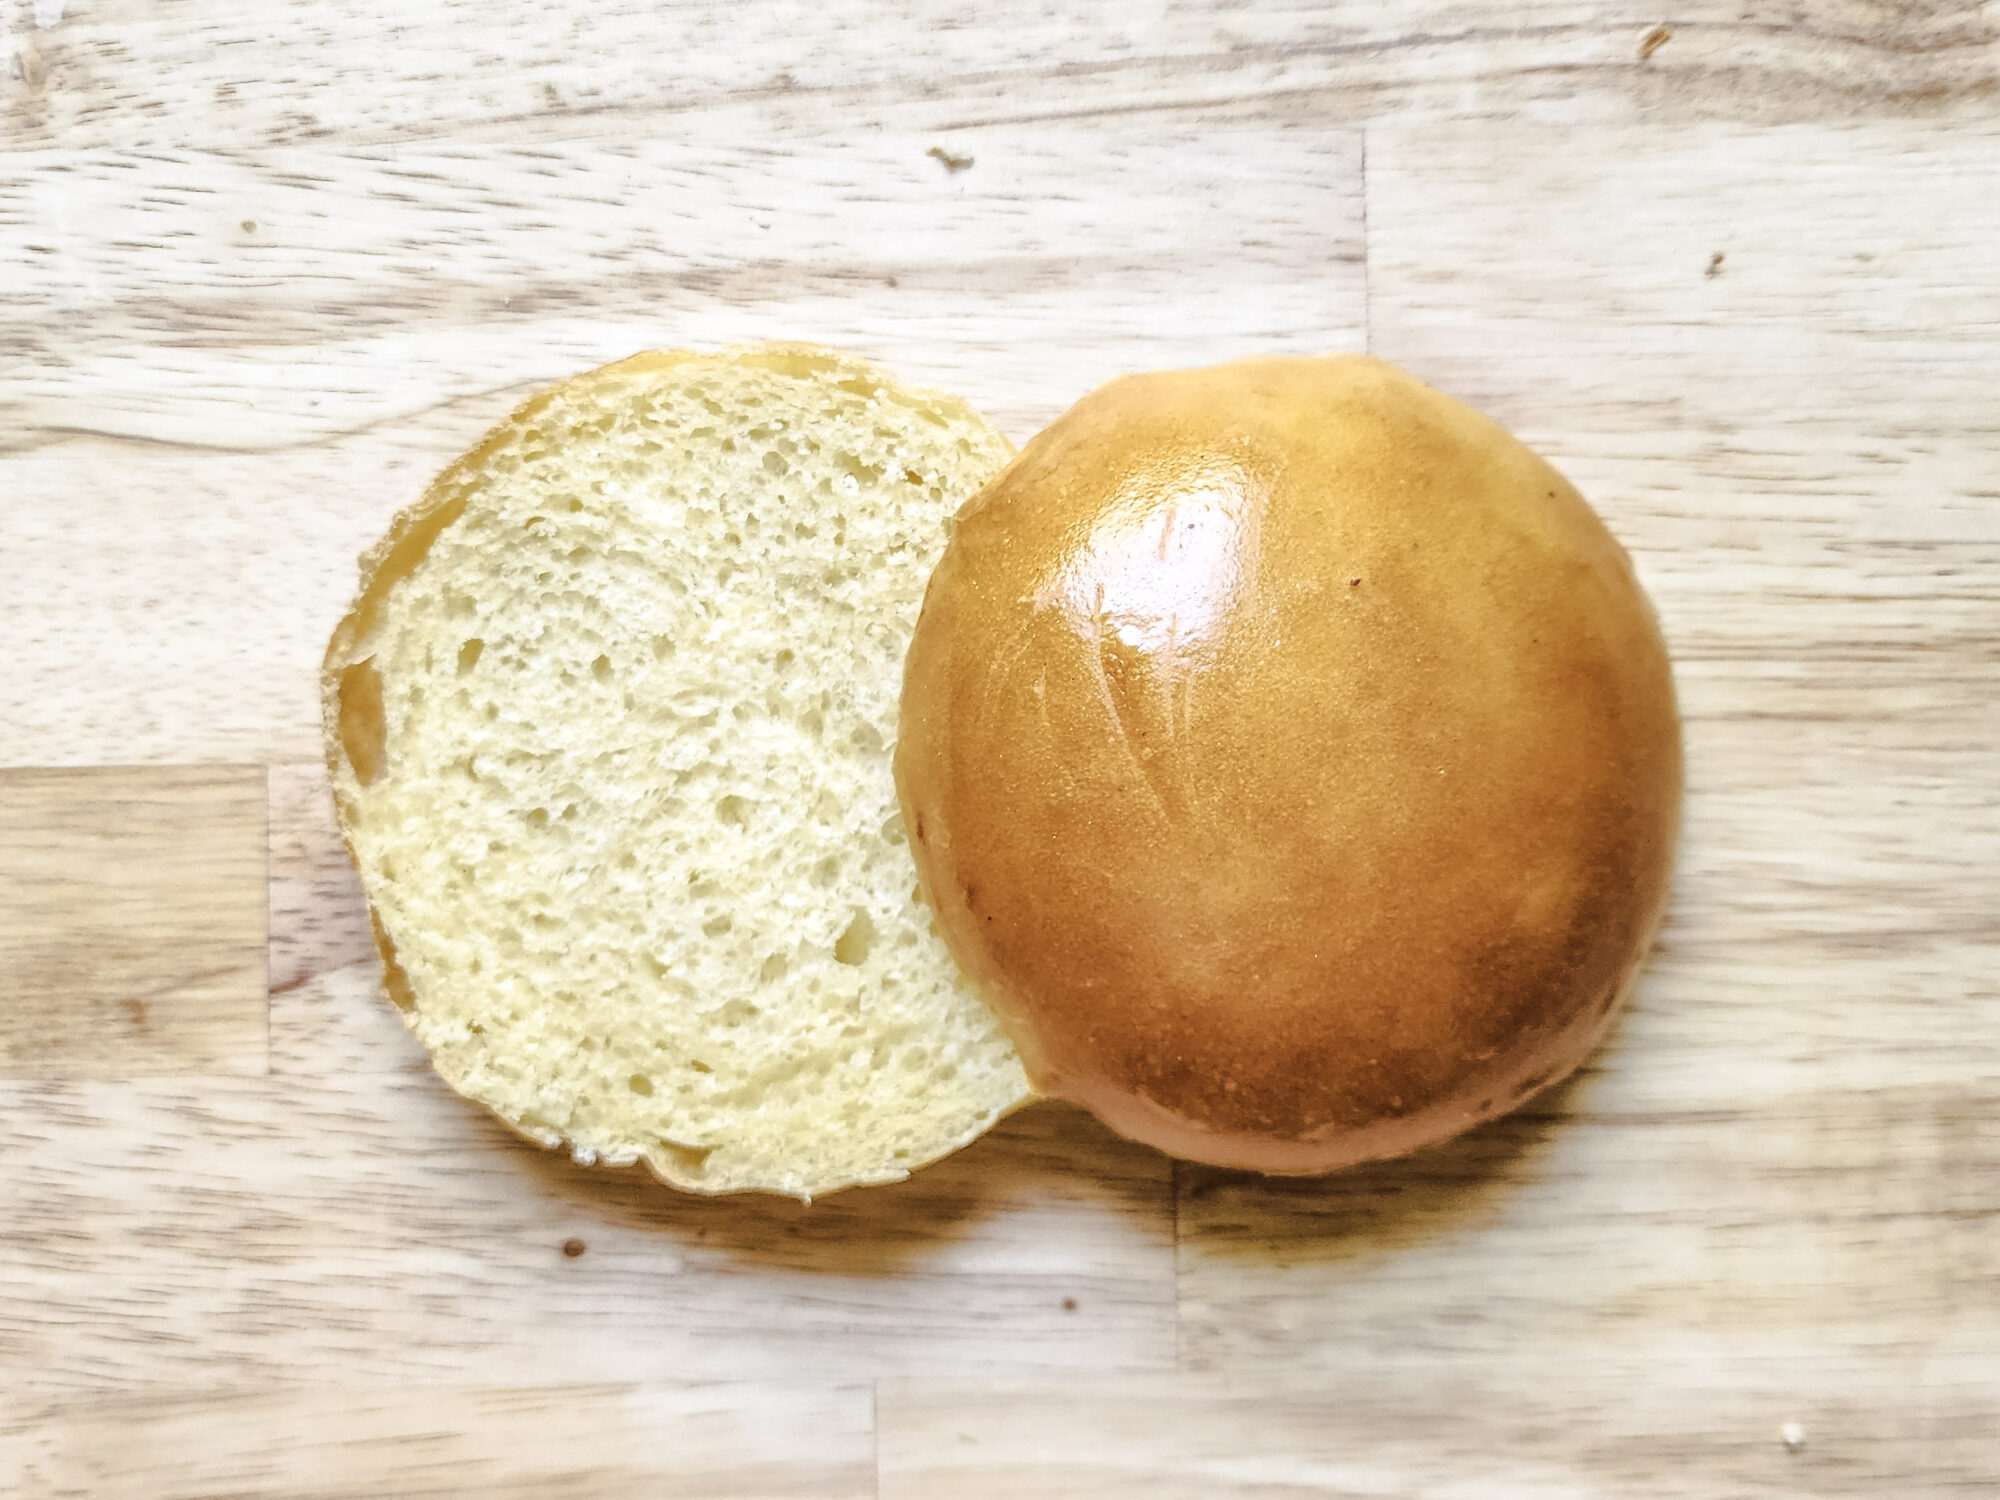
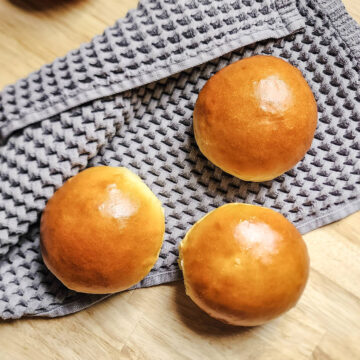
These Fluffy Brioche Buns might just be the perfect buns for any kind of burger or sandwich. There...I said it, and I meant it. They're soft, fluffy, and buttery, yet sturdy enough to handle a hefty amount of toppings. That being said, this recipe was specifically developed for my Buttermilk Fried Chicken Sandwich - go check it out and let me know what you think!

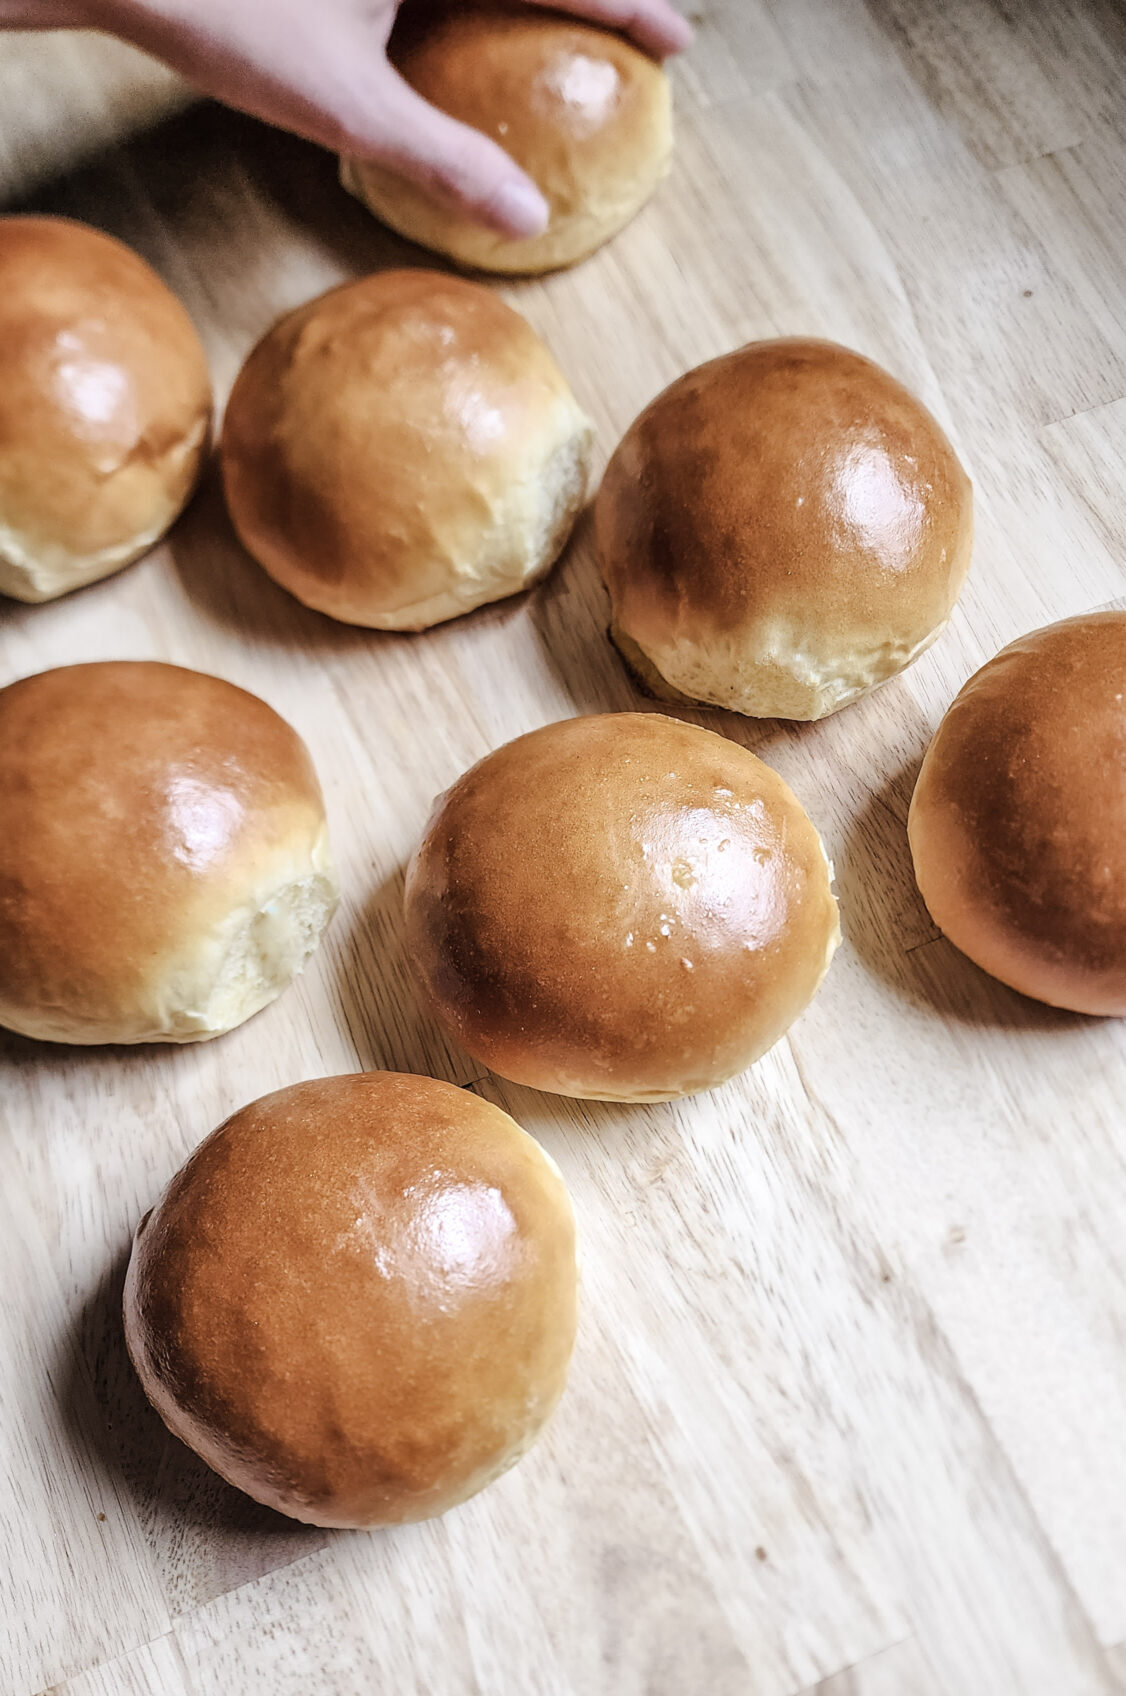
Back to the buns: these are just like the ones that come on the "fancy", $22 cheeseburgers with the bamboo toothpicks through them-don't lie, you know exactly what I'm talking about. The only thing that's different is that these are handmade and won't cost you a ton of money. You can use this as a base recipe for a multitude of breads, including burgers, fried chicken sandwiches, hot-dog buns, and even dinner rolls.
Brioche Bun Ingredients and Proofing (Rising)
These brioche buns only take a handful of ingredients, and a little bit of time - most of which is "hands-off" for rising time. This version took several tries to get everything "perfect", so deviating too much from the recipe quantities or the proofing times may result in drastically different results. This dough is easy to work with, but developing it has taken some troubleshooting.
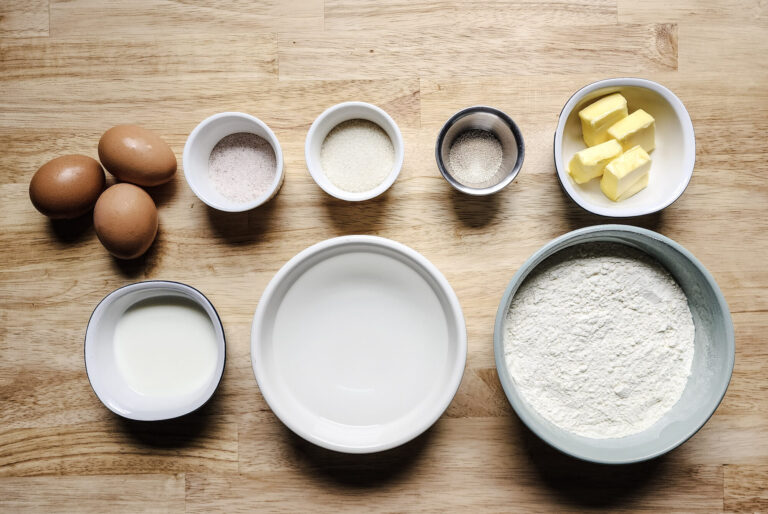
Brioche bun Ingredients
The ingredients are basic pantry staples: bread flour, whole milk, water, fine sea salt, granulated sugar, eggs, and unsalted butter. What really makes this recipe good lies in the technique, not so much in the ingredients themselves.
Proofing and Shaping Methods
Like most yeasted doughs, this bread has two proofing (or rising) stages. The initial, 1-hour bulk proof followed by dividing and shaping, then a second longer proof that is an hour and half. The second proof is longer than the first and it provides the irresistibly soft and fluffy texture that makes this recipe great.

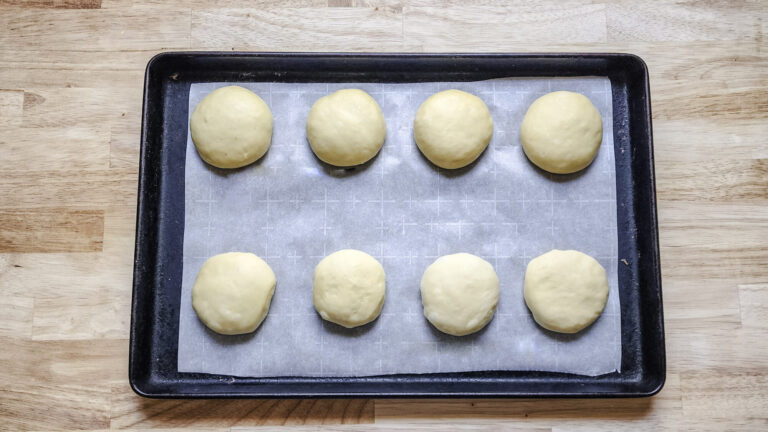
To shape these, divide the dough into eight equal pieces (weighing about 75-80 grams each), fold the outside edges in on themselves, and then form them into balls on an un-floured work surface. The outer layer should be slightly taught and spring back when pressed with your finger tip. Let these rest for a few minutes, then flatten into small discs that are about ¾ of an inch thick. If you leave these in round balls, they tend to be too tall and dense once they are baked. Flattening them into disc shapes helps alleviate this problem and makes a more manageable finished product. There is no need to completely unhinge your jaw to take a bite!
These are super delicious and the base dough can be shaped into almost any bread type. Use them for burger buns, hot dog buns, flatten then roll into loaf for traditional brioche - the possibilities are endless!

Did you make this recipe for Fluffy Brioche Buns?
Let me know in the comments below how yours turned out, and don't forget to leave a rating!
Recipe
Fluffy Brioche Buns
Equipment
- Stand Mixer Optional
- Small Sauce Pan
- Large Mixing Bowl
- Parchment Paper
Ingredients
Dough
- ½ Cup Warm Water - 90°F to 100°F 135 ml
- 2 Tablespoons + 1 Teaspoon Warm Milk - 90°F to 100°F 34 ml
- 1 ¼ Teaspoon Active Dry Yeast 4 g
- 1 ½ Tablespoons Granulated Sugar 24 g
- 1 Large Egg Beaten
- 1 Egg Yolk Beaten
- 2 ¾ Cups Bread Flour (Approx. 2 ¾ Cups) 354 g
- 1 ¾ Teaspoons Fine Sea Salt 8 g
- 2 ½ Tablespoon Unsalted Butter Softened, 34g
Egg Wash
- 1 Egg Beaten
- 1 Tablespoon Water
- Pinch Fine Sea Salt
Instructions
- Combine water and milk in a small sauce pan. Heat over medium high heat until an instant read thermometer reads 90°F to 100°F.
- Add active dry yeast and sugar, stirring to combine. Allow to bloom 5 to 10-minutes until active and frothy.
- While yeast mixture rests, add salt and bread flour in the bowl of a stand mixer, whisking to combine.
- In a small bowl, beat egg and egg yolk together.
- Add the yeast mixture and beaten eggs to the dry ingredients. Turn mixer on low speed until combined, scraping down the sides of the bowl as needed.
- Once you have a rough dough, add the unsalted butter and increase the speed to medium-low. Knead for 10-minutes until butter is combined and dough begins to pull away from the sides of the bowl and becomes smooth. (The dough will be slightly sticky at this stage).
- Turn the dough onto an un-floured work surface, and shape into a ball.
- Place dough into a large mixing bowl and cover in an airtight container, or a damp kitchen cloth. Let rest for 1-hour for the first proof.
- After the first proof, punch the dough down and turn it onto an un-floured work surface.
- Divide into 8 equal sized pieces (approximately 80 grams each). Shape into individual balls by folding the edges of the dough onto themselves, and then scooping and dragging across the work surface.
- Place the balls on a parchment paper lined baking sheet, and flatten into discs that are approximately 3 to 4-inches wide. Cover with a damp kitchen towel and let proof for 2 additional hours.
- Towards the end of the second proof, preheat oven to 375°F and combine the egg wash ingredients in a small bowl.
- Uncover the dough, and brush evenly with the egg wash.
- Bake for 15 to 20-minutes until golden brown.
- Remove from the oven and allow to cool on the tray for 5 to 10-minutes. Transfer to a wire cooling rack and allow to completely cool for approximately 1-hour.
- Split with a bread knife and optionally toast with butter until golden brown.


Michelle says
I can never just grab a chicken sandwich from take out ever again! This is a must make for everyone!