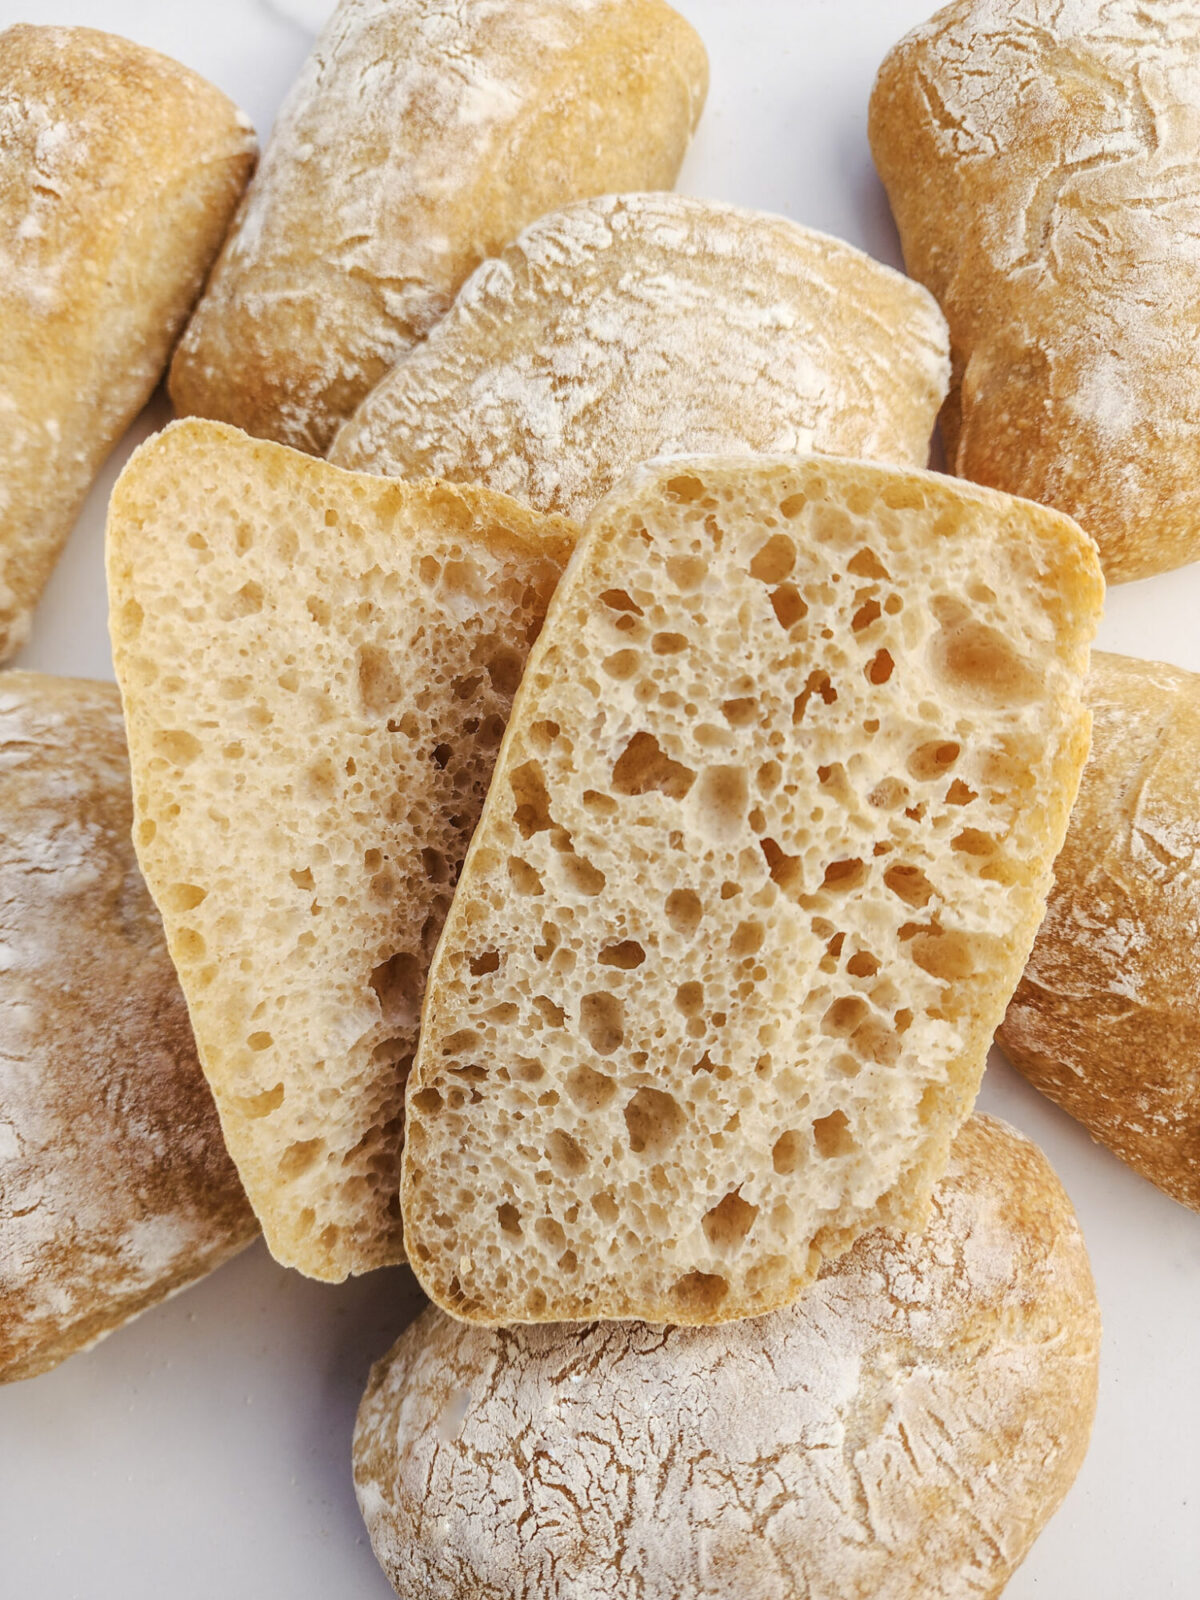
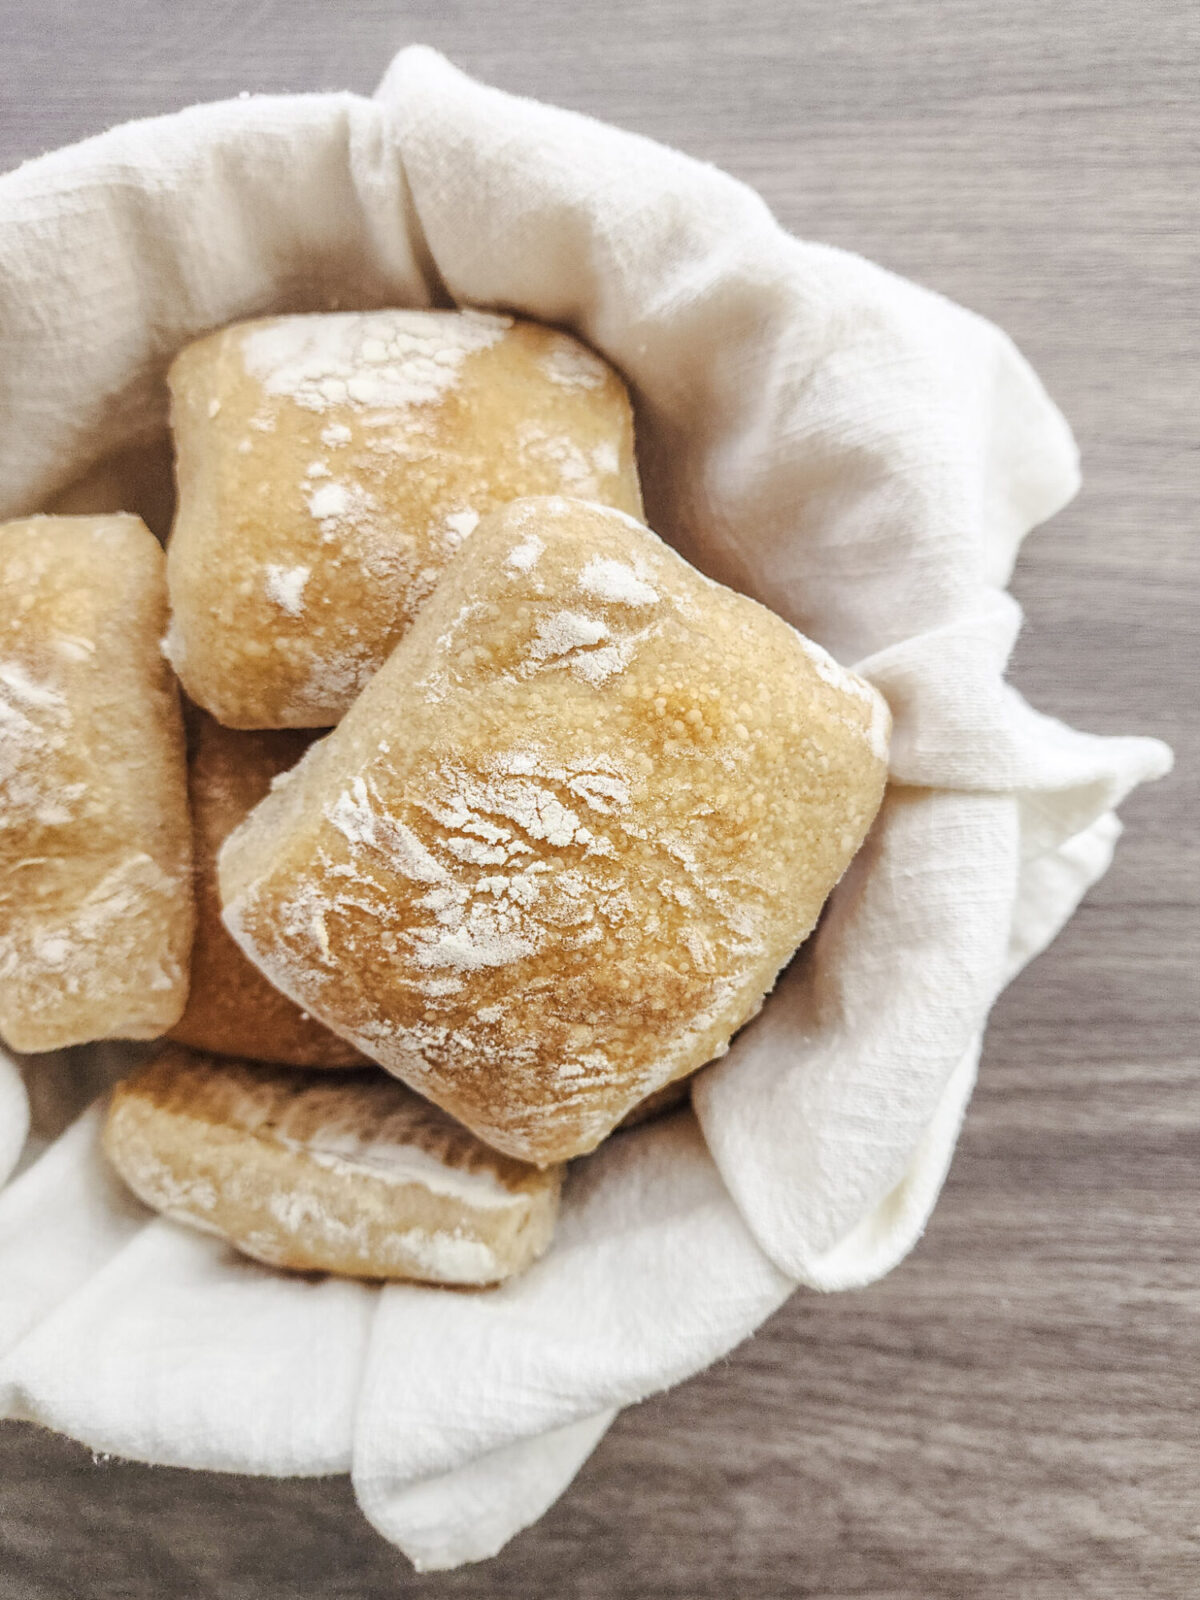
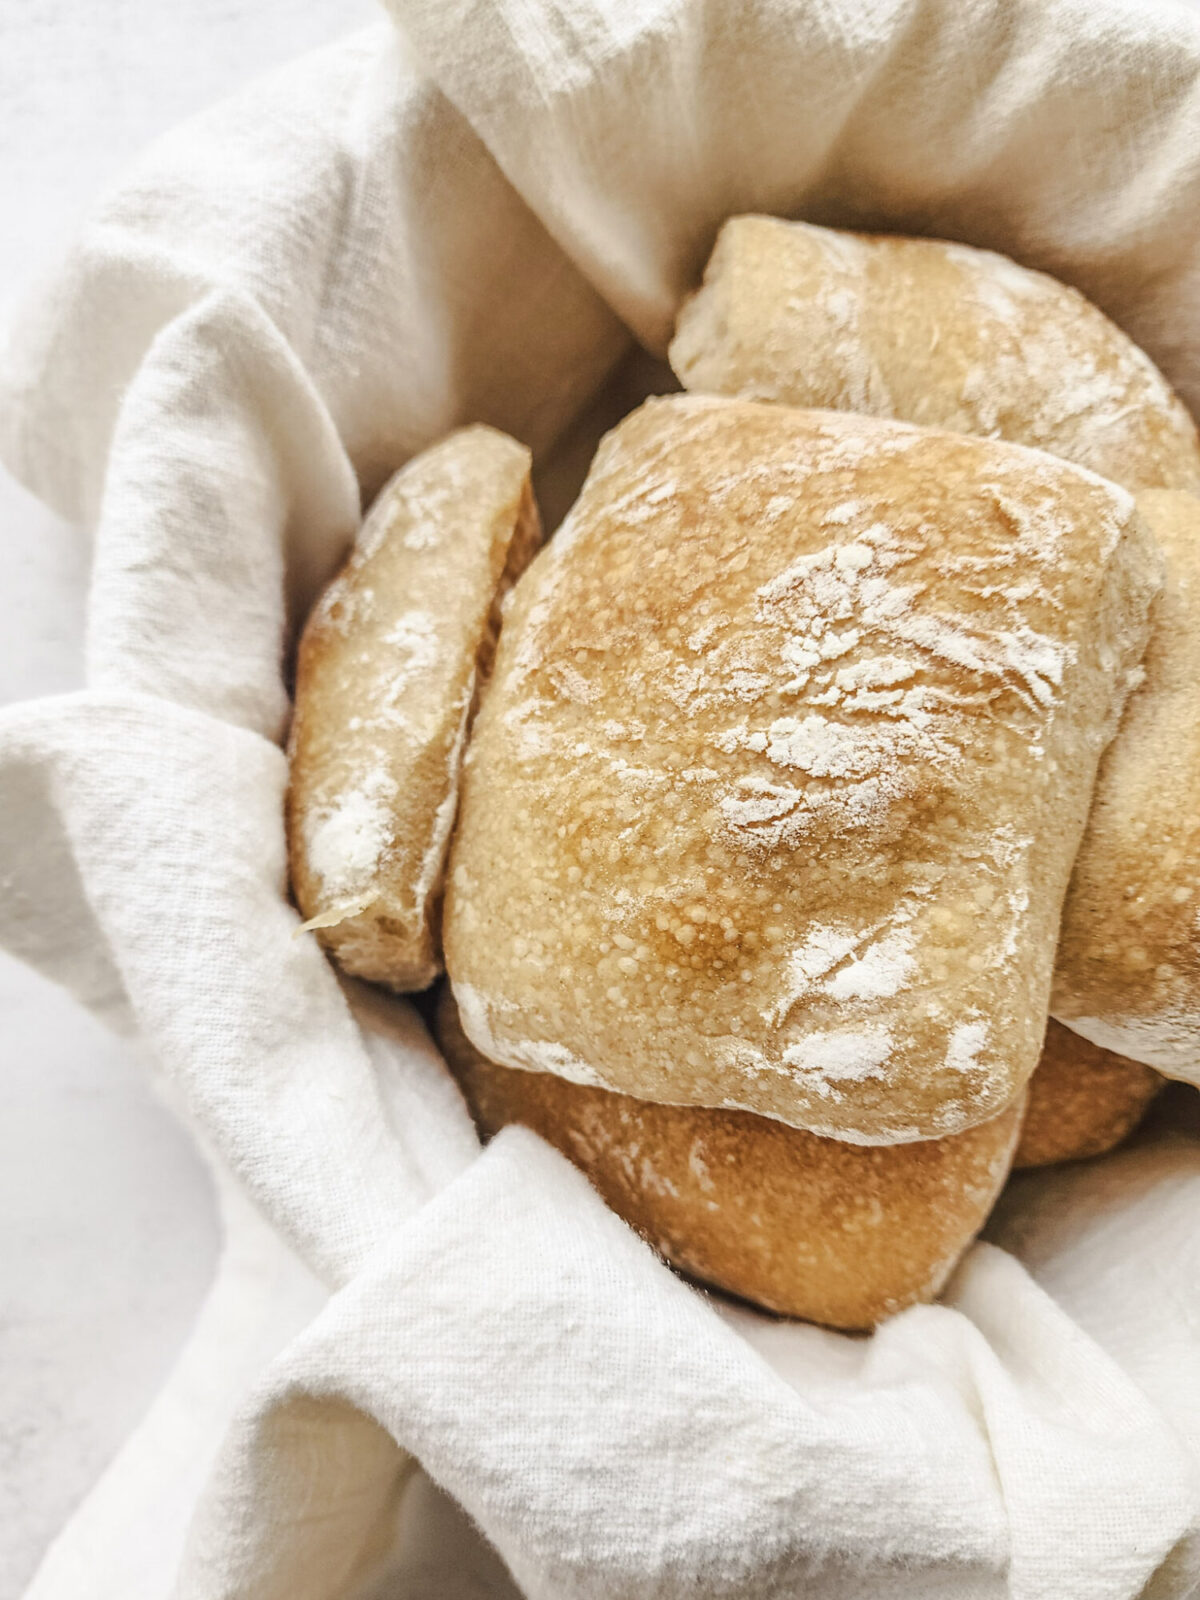
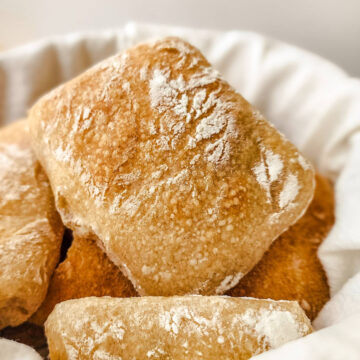
Homemade Ciabatta Rolls are tough to beat, in my opinion. They have really nice, open air pockets on the inside that make them super soft and fluffy. They also have a really thin and delicate crust on the outside that gives these rolls amazing texture!

These are perfect for sandwiches, paninis, or serving next to your favorite soup, and I'm so excited to be sharing this recipe with you! This is perfect to pair with my recipes for Rustic Zuppa Toscana and Potato Leek Soup (with Bacon). Give one of those a try next!
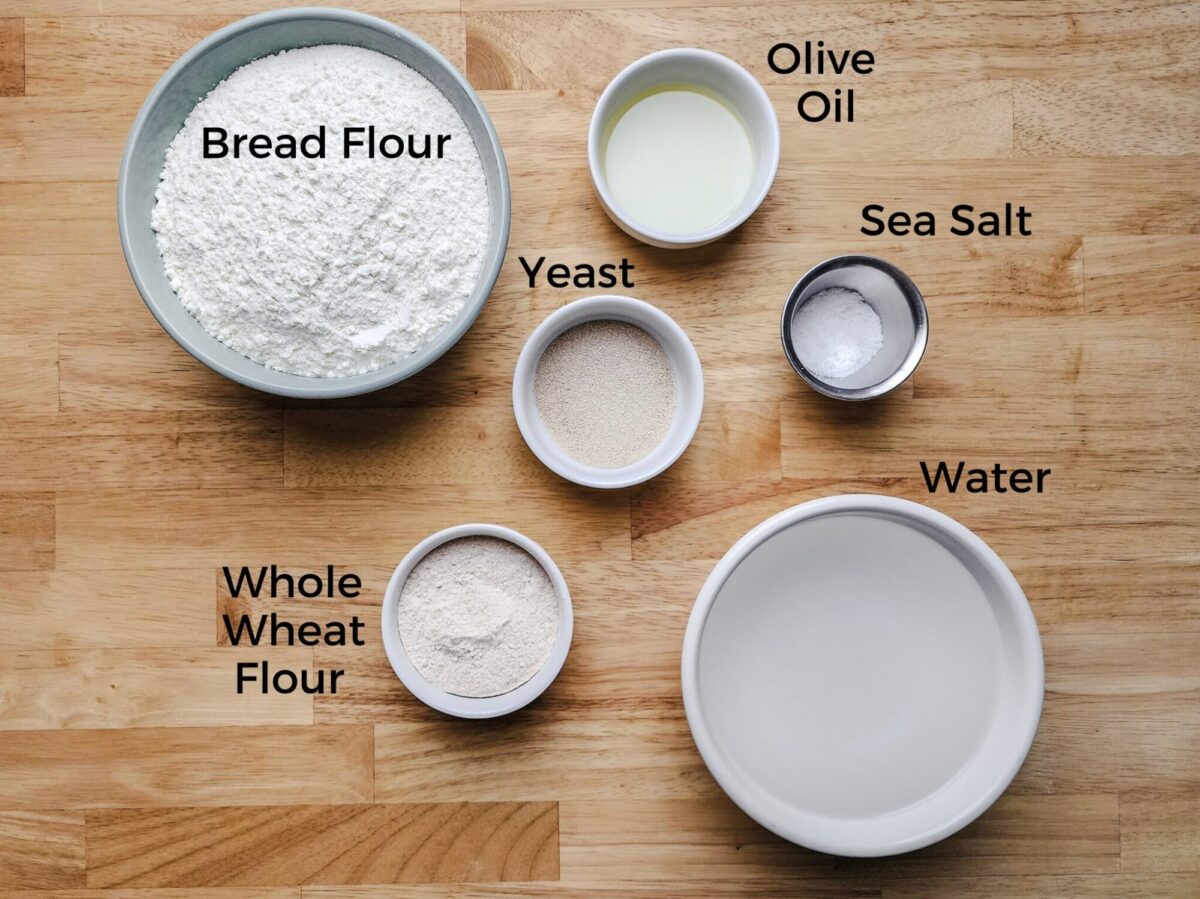
Homemade Ciabatta Roll Ingredients
Simplicity is key when it comes to the ingredients of these Homemade Ciabatta Rolls. I chose to use 90% bread flour and 10% whole wheat flour as the base, but feel free to use all bread flour or even substitute it for all-purpose flour. You will end up with rolls that are just as tasty - I promise. The reason I chose bread flour is that it has more protein content than all-purpose flour, so it develops more gluten, which is important to give it the texture we're looking for. The whole wheat lends a subtle, nutty, whole-grain flavor that I really like.
Ciabatta Roll Baker's Percentages
While you can certainly use volume measurements (cups and tablespoons, etc.), using a kitchen scale and weight measurements (grams and milliliters, etc.) will get you significantly more consistent and repeatable results. Using baker's percentages and weight measurements is also a really easy way to calculate how much hydration you need in a dough. It's equally as helpful to scale bread recipes up or down while retaining all of the right proportions. As a quick example, if you have 1,000 grams of flour, an 85%-hydration dough would require 850 grams of water.
This is a high-hydration dough with an 85% water-to-flour ratio. The high hydration amount is what provides the open crumb and texture of this recipe and is really important in this recipe. One thing to keep in mind when using baker's percentages is that each ingredient's (except the flour) percentage is calculated against the total flour weight, and their percentages listed likely will never total 100%. It's a way to show the ratios of the ingredients compared to the total flour weight.
| Ingredients | Metric | Imperial | Baker's Percentage |
|---|---|---|---|
| Bread Flour | 383 grams | 2 ¾ Cups + 2 Tbsp | 90.0% |
| Whole Wheat Flour | 42 grams | ¼ Cup + 2 tsp | 10.0% |
| Water | 360 milliliters | 1 ⅔ Cup | 85.0% |
| Fine Sea Salt | 10 grams | 2 ½ tsp | 2.5% |
| Olive Oil | 15 grams | 1 Tbsp | 3.5% |
| Active Dry Yeast | 9 grams | 2 ½ tsp | 2.0% |
| Sugar* | 1 Pinch | 1 Pinch | Negligible |
Instructions
As mentioned in the section above, this is an unavoidably wet dough at 85% hydration. This gives us the open crumb and texture we're looking for, but it does make the dough slightly tricky to work with since it's so wet. If you follow the process below, these tips will help you successfully handle this without ending up with dough stuck to everything. An overnight, cold ferment in the refrigerator adds flavor and texture to the finished product as well!
Mixing
- To help combat how wet and sticky this dough is, we need to develop some structure in the dough first. To do this, begin by combining 75% of the water (270g) with both flours, salt, and oil. Knead the dough on medium-low speed for 2 to 3 minutes until a dough ball forms and pulls away from the sides of the bowl.
- Cover and let rest for 30 minutes to 1 hour. (This rest is called an autolyse (pronounced "auto-lease"), and it allows the proteins that form gluten to hydrate and unwind, which makes it easier to develop gluten much more readily-a much-needed component to this recipe.)
- In the last 5 to 10 minutes of the autolyse, heat the remaining 25% of water (90g) to 100 °F. Remove from the heat and add the yeast and a small pinch of sugar. Start by heating the water in a small sauce pan over medium heat until it reads 100°F on an instant read thermometer. Add the yeast with a pinch of sugar and allow the mixture to bloom for 5 to 10 minutes.
- Slowly add in the yeast mixture to the dough, a little bit at a time, while mixing on medium-low until evenly combined, about 7 minutes.
Stretch and Folds & Bulk Proofing
- Transfer the dough to an ungreased bowl and cover. Rest for 30 minutes.
- Perform three sets of "stretch and folds." To do this, wet your fingers, grab one edge of the dough, and fold it over itself. Repeat with the three remaining sides of the dough. (The video below shows how to do this.)
- Repeat the 30-minute rest, and stretch and fold two more times. (In lieu of kneading, these stretch and folds add structure and air to the dough.)
- After the last stretch and fold, cover and allow to bulk proof on the counter for one to one and a half hours. Then transfer to the refrigerator and cold ferment overnight.
Shaping, Second Proofing and Baking
- Heavily dust a work surface with flour to ensure the dough doesn't stick.
- Remove the dough from the refrigerator, and gently turn the dough out onto the floured work surface.
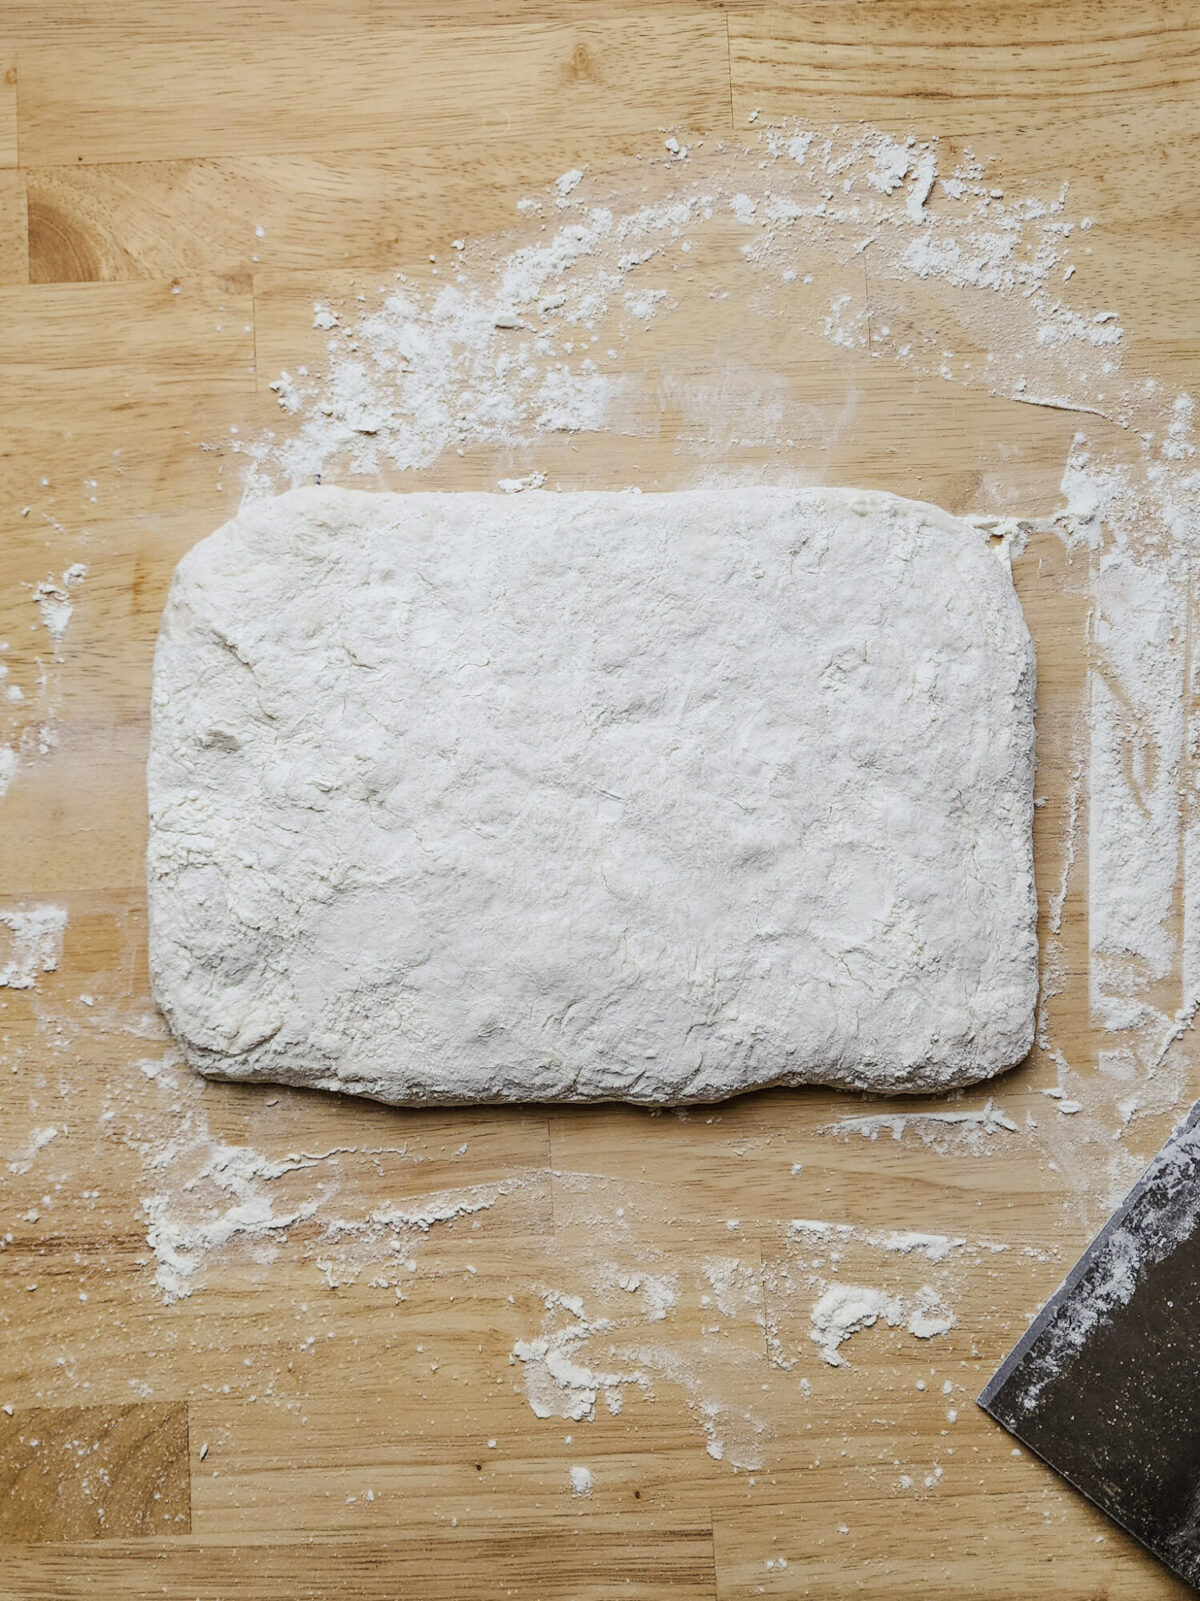
- Gently stretch the dough into a rough 8 by 11-inch rectangle, and dust the top of the dough with flour.
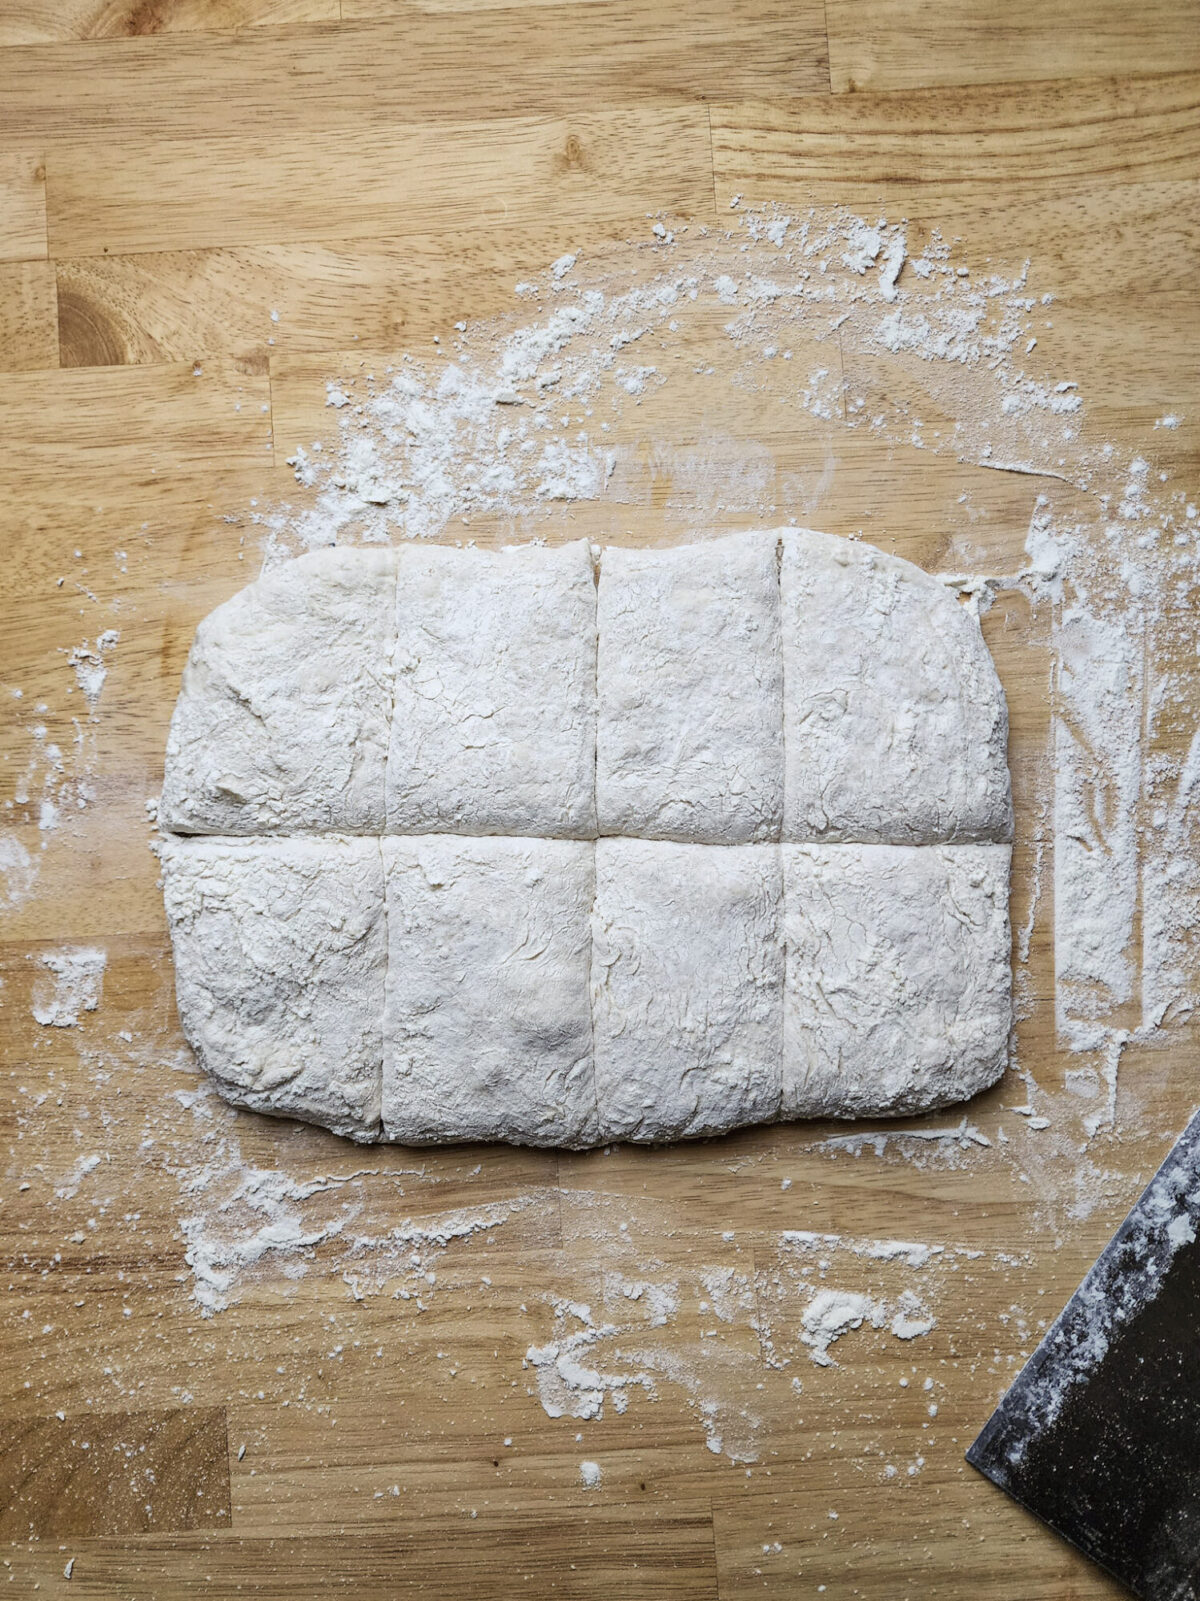
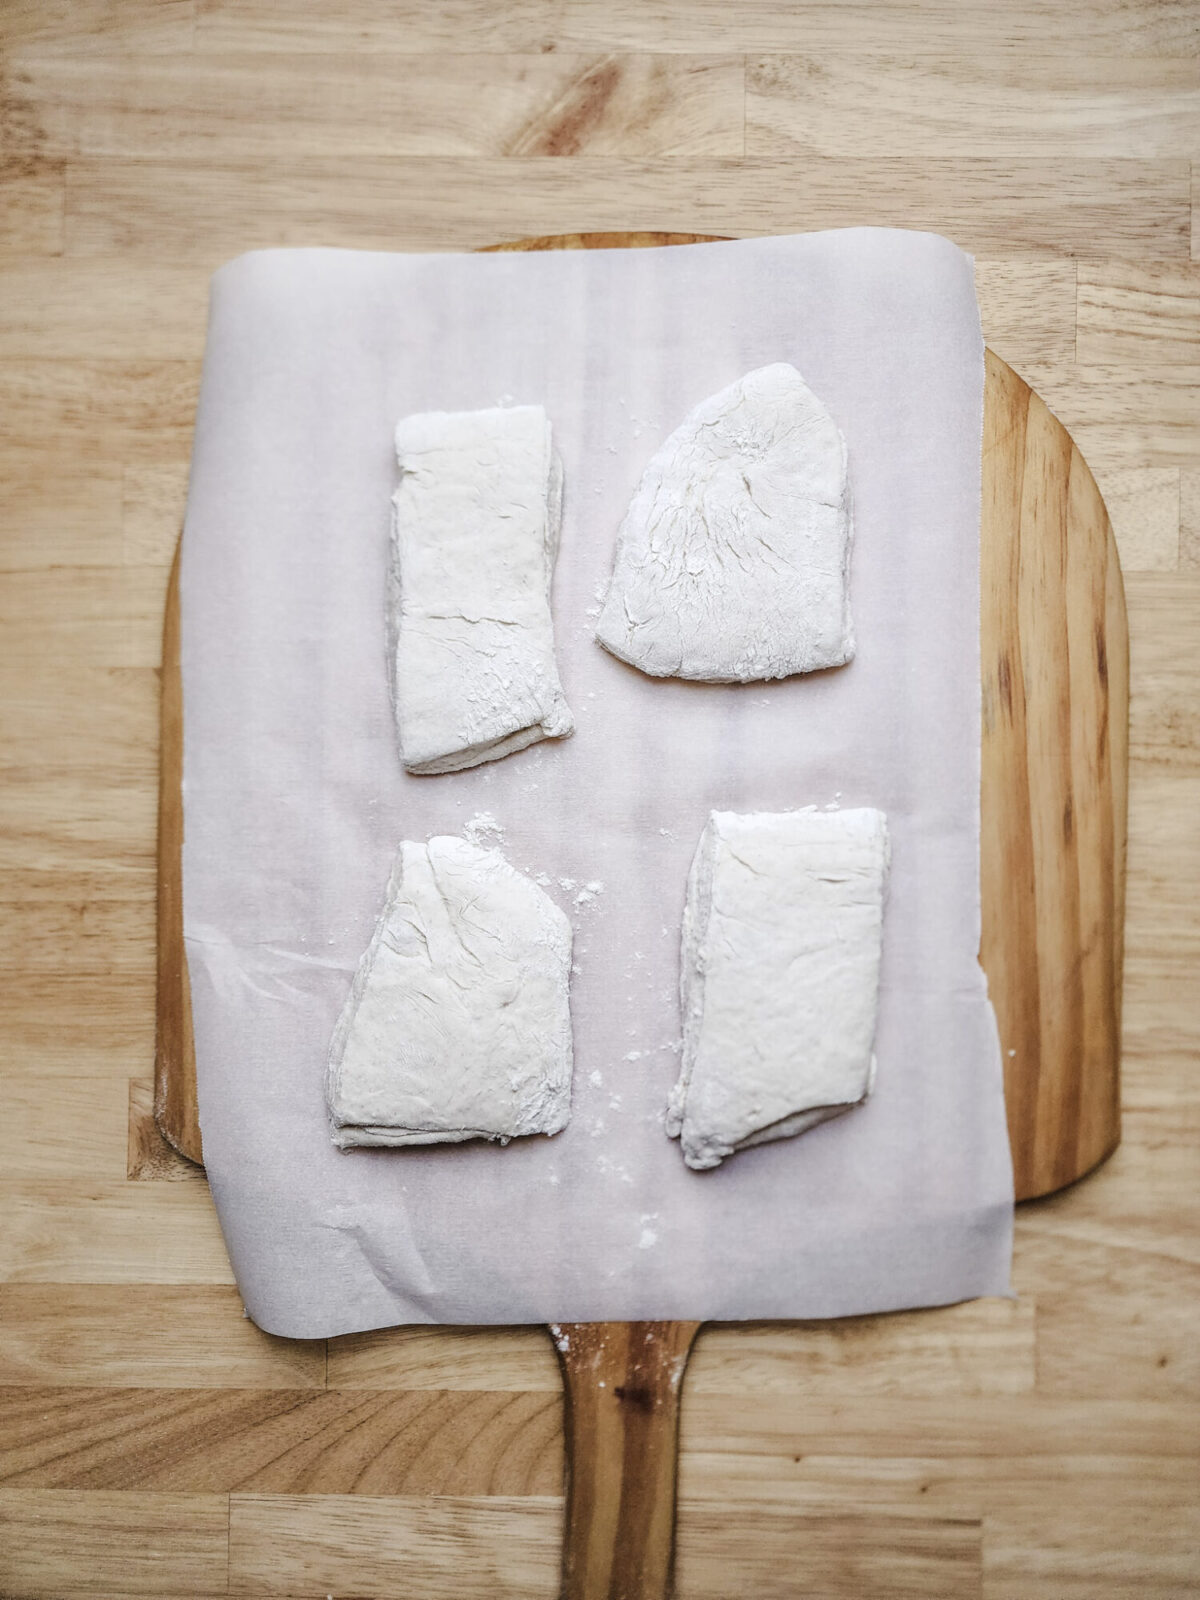
- Using a sharp knife or a bench scraper, divide the dough into 8 to 10 even pieces. (Now is the time to decide how big you want to make the rolls.)
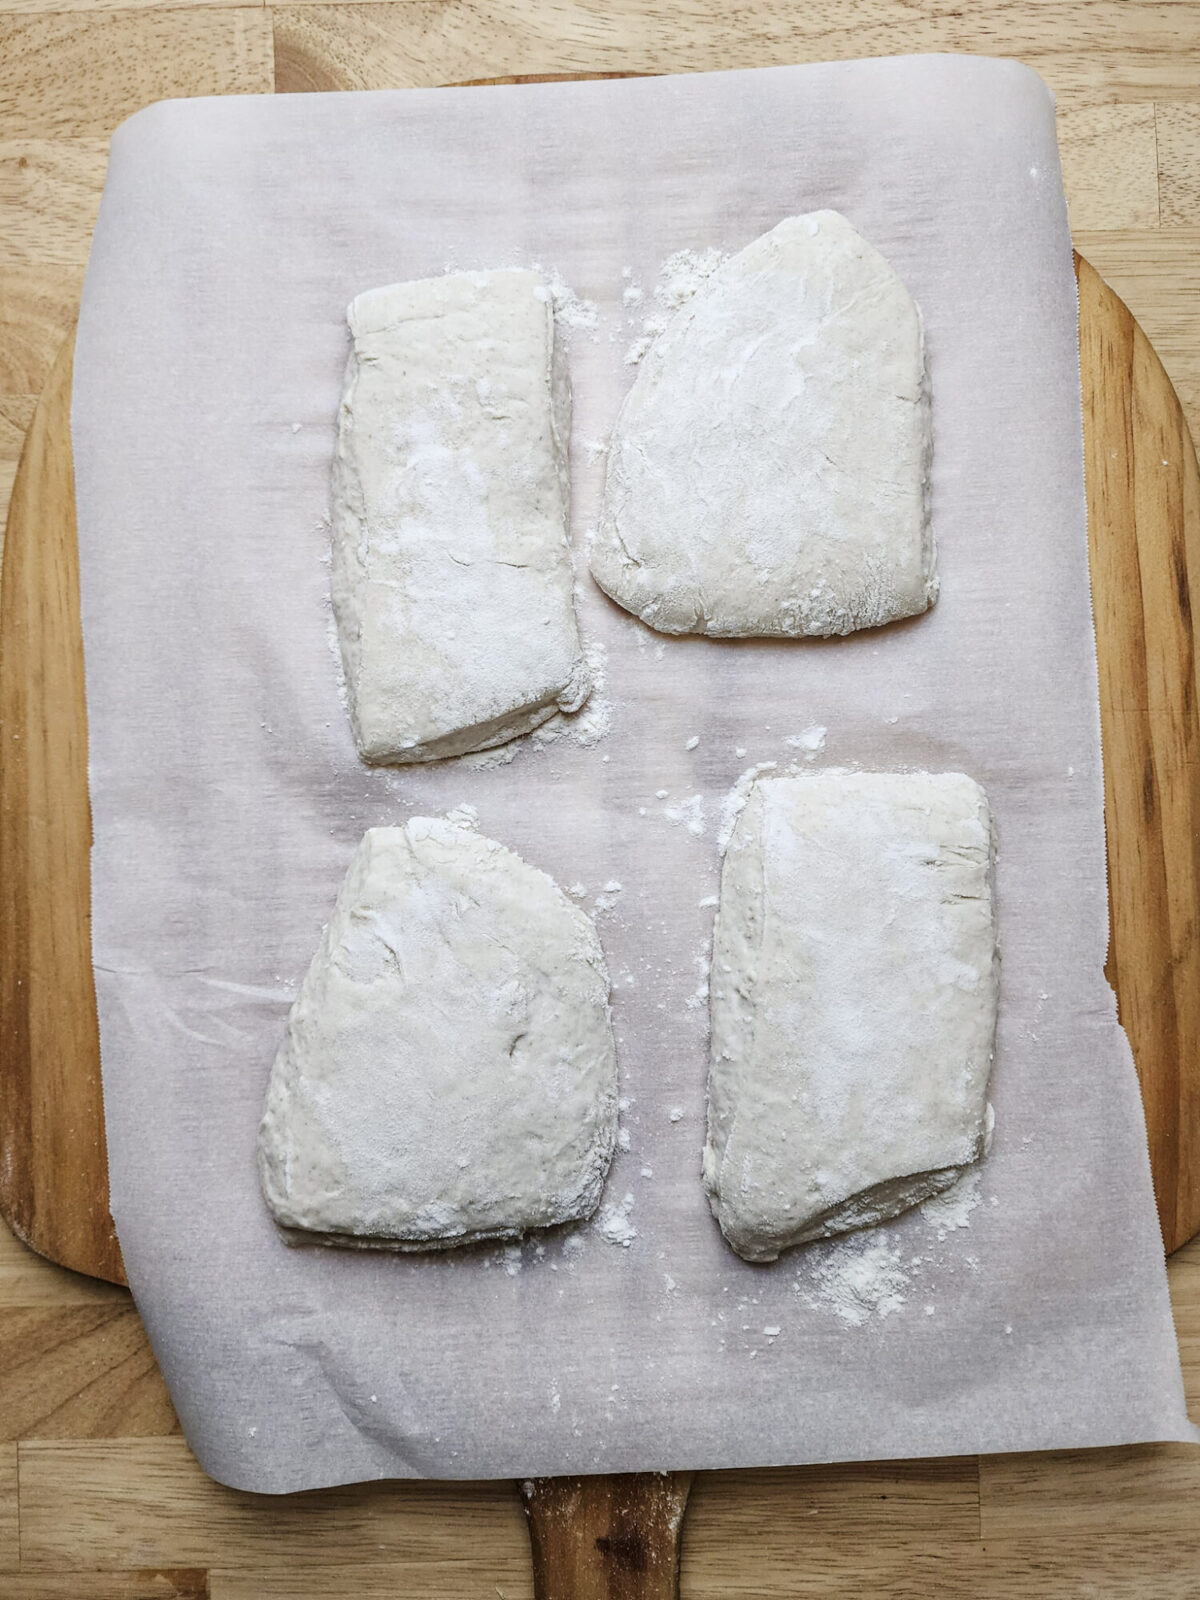
- Pick up the rolls, flip them over, and transfer them to a parchment paper-lined baking sheet or pizza peel (if using baking steel or stone).
- Cover lightly and allow to proof for 1 to 2 hours (two hours is preferred as it will give you larger air pockets).
- Preheat the oven to 450°F (including the baking steel if using).
- Towards the end of the second proof, fill a 9 by 13-inch casserole dish ⅔rds with boiling water and place it on the bottom rack of the oven. (This creates steam in the oven, which helps develop a crispier crust on the bread.)
- Transfer the rolls (including the parchment paper) to the baking steel with the pizza peel, or place the baking sheet in the oven and bake for 20 minutes.
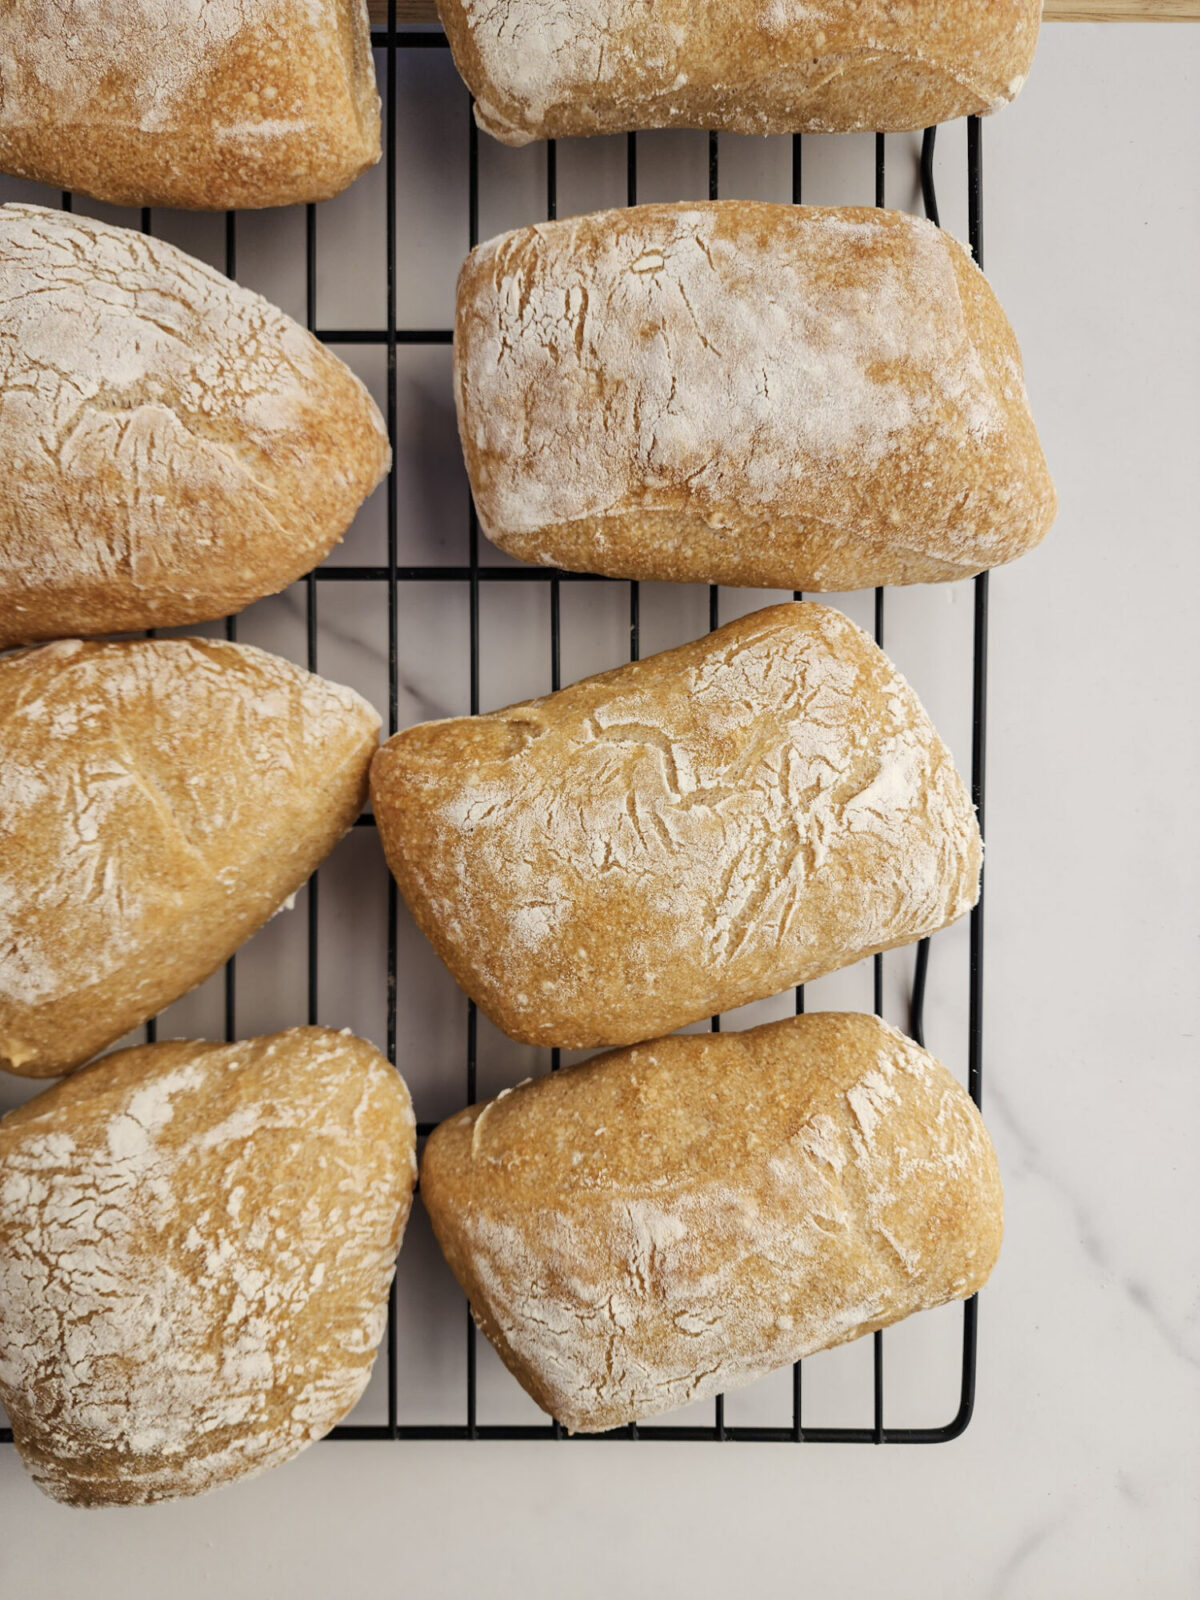
- Remove the rolls from the oven and allow them to cool completely before serving.

1. After an overnight cold ferment, stretch the dough into an 8 by 11-inch rectangle. -
2. Generously dust the top of the dough with flour, and divide into 8 or 10 even pieces 
3. Flip the ciabatta rolls over while transferring to a pizza peel or baking sheet lined with parchment paper. -
4. Cover and let proof at room temperature for 1 to 2 hours. Transfer the rolls to a preheated oven and bake for 20 minutes. -
5. Remove from the oven and allow to cool completely.
Serving Suggestions
These Homemade Ciabatta Rolls are the perfect pairing to serve alongside your favorite soup or to use for sandwiches. These are perfect to be served with my recipe for Rustic Zuppa Toscana. Go give it a try the next time you're in for some chilly or rainy weather, I can guarantee that soup paired with these rolls will be the perfect antidote!
Storing and Reheating Tips
Storing Tips
These Homemade Ciabatta Rolls are best eaten fresh, as is the case with most homemade breads. If you have any leftovers, store them in an airtight container at room temperature for 2 to 3 days. Any time beyond that, transfer them to the fridge for about a week.
These also freeze very well. Wrap each roll tightly in aluminum foil or plastic wrap, then freeze in a gallon-sized zip-lock bag. To thaw, set them on the counter for a few hours, until soft.
Reheating Tips
To reheat the ciabatta rolls, the best method is to sprinkle them with a little bit of water, wrap them tightly in aluminum foil, and heat them in a 350°F oven for about 4 to 7 minutes. Optionally, you can wrap them in a damp paper towel and microwave them for 30 seconds at a time until they reach your desired temperature. I recommend using the oven method if possible, since it provides better results.
Did you make this recipe for Homemade Ciabatta?
Let me know in the comments below how yours turned out, and don't forget to leave a rating!
Recipe
Homemade Ciabatta Rolls
Equipment
- Instant Read Digital Thermometer Optional
- Parchment Paper
- Pizza or Baking Steel Optional
- Pizza Peel Only needed if using a pizza or baking steel
Ingredients
- 383 g Bread Flour
- 42 g Whole Wheat Flour
- 360 ml Water Warmed to 90 - 100°F, Divided
- 10 g Fine Sea Salt
- 15 g Olive Oil
- 9 teaspoon Active Dry Yeast Substitute Instant Yeast
- 1 Small Pinch Sugar Omit if using Instant Yeast
Instructions
Mixing
- Add 75% of the warm water (270g - about 1 ¼ cup) with both flours, salt, and oil. Knead the dough on medium-low speed for 2 to 3 minutes until a dough ball forms and pulls away from the sides of the bowl.
- Cover and let rest for 30 minutes to 1 hour. (This rest is called an autolyse, and it allows the proteins that form gluten to hydrate and unwind, which makes it easier to develop gluten much more readily-a much-needed component to this recipe!)
- In the last 5 to 10 minutes of the autolyse, ensure that the remaining 25% of water (90g or ⅜ cup) is still heated to 100 °F. Remove from the heat, add the yeast and a small pinch of sugar and allow the mixture to bloom for 5 to 10 minutes. (The sugar is not needed if using Instant Yeast instead of Active Dry Yeast).
- Add in the yeast mixture to the dough a little bit at a time while mixing on medium-low until evenly combined and a smooth dough forms, about 7 minutes.
Stretch and Folds & Bulk Proofing
- Transfer the dough to an ungreased bowl and cover. Rest for 30 minutes.
- Perform three sets of "stretch and folds." To do this, wet your fingers, grab one edge of the dough, and fold it over itself. Repeat with the three remaining sides of the dough. (There is a brief video in the blog post above for reference.)
- Repeat the 30-minute rest, and stretch and fold two more times.
- After the last stretch and fold, cover and allow to bulk proof on the counter for 1 to 1 ½ hours until doubled in size. Cover and transfer to the refrigerator, and cold ferment overnight.
Shaping, 2nd Proofing & Baking
- Heavily dust a work surface with flour to ensure the dough doesn't stick. Remove the dough from the refrigerator, and gently turn the dough out onto the floured work surface.
- Gently stretch the dough into a rough 8 by 11-inch rectangle, and generously dust the top of the dough with flour.
- Using a sharp knife or a bench scraper, divide the dough into 8 to 10 even pieces. (Now is the time to decide how big you want to make the rolls.)
- Pick up the rolls, flip them over, and transfer them to a parchment paper-lined baking sheet or pizza peel (if using baking steel or stone).
- Cover lightly and allow to proof for a second time for 1 to 2 hours (2 hours is preferred as it will give you larger air pockets).
- During the last hour of the second proof, preheat the oven to 450°F (including the baking steel if using.)
- Immediately before baking, fill a 9 x 13-inch casserole dish ⅔ with boiling water and place it on the bottom rack of the oven. (This creates steam in the oven, which helps develop a crispier crust on the bread. This step is optional.)
- Transfer the rolls and parchment paper to the baking steel with the pizza peel, or place the baking sheet in the oven and bake for 20 minutes.
- Remove the rolls from the oven and cool on a wire cooling rack completely before serving.


Ericka says
Love this recipe! Perfect for sandwiches in the Summer and I'm going to make them to have with soup this fall.