These Handmade Sub Rolls are ideal for any type of sub sandwich, grinder, or hoagie - whatever you want to call them! This recipe was developed specifically for my Homemade Meatball Sub Sandwiches but realistically, they can be used for just about any type of sandwich!

I never hear complaints about having fresh baked bread in the house. I doubt you will either, so I recommend giving these a try. They are sturdy enough to handle hefty meatballs and sauce without having to toast them, yet they are super soft, fluffy, and jam packed with flavor. These are honestly so much better than store-bought rolls. I can guarantee that it will be hard to go back to anything else!

Handmade Sub Roll Ingredients
I had a few goals I wanted to achieve with this bread. I wanted the loaves to have a good amount of structure to them, yet still remain soft and pliable. Bread flour was the logical starting point in my mind. It has a higher protein content than all-purpose flour, which helps form a strong gluten network. In turn, this helps create more structure and body to the bread. I also opted for whole milk for my liquid component instead of water for the added fat content and slight sweetness that it lends.

I also opted for cold, cubed, unsalted butter. Using cold butter versus softened butter extends the kneading time by several minutes, which is by design. Using softened butter takes about 3-5 minutes to completely incorporate into the dough, while using cold butter takes closer to 8-10 minutes. The longer knead time helps bring everything together to make a really smooth dough and adds more body to the finished product. The longer you knead dough, the stiffer/chewier your bread will be. Having a moderate amount of kneading was key to properly developing the structure of the finished product.

I also strongly encourage you to invest in a digital kitchen scale if you do any baking. Most (if not all) of my baking recipes will be listed out by weight. I will have volume measurements provided as well. The general consensus is that you will have more accurate, repeatable results when measuring by weight vs. volume. I have found this to be true in my own experience.

Dough Proofing and Shaping Process
This dough will go through two proofing (or rising) stages: a one-hour bulk proof, and then a secondary proof after the dough has been shaped into loaves. I have the complete shaping and proofing process outlined in the gallery below.
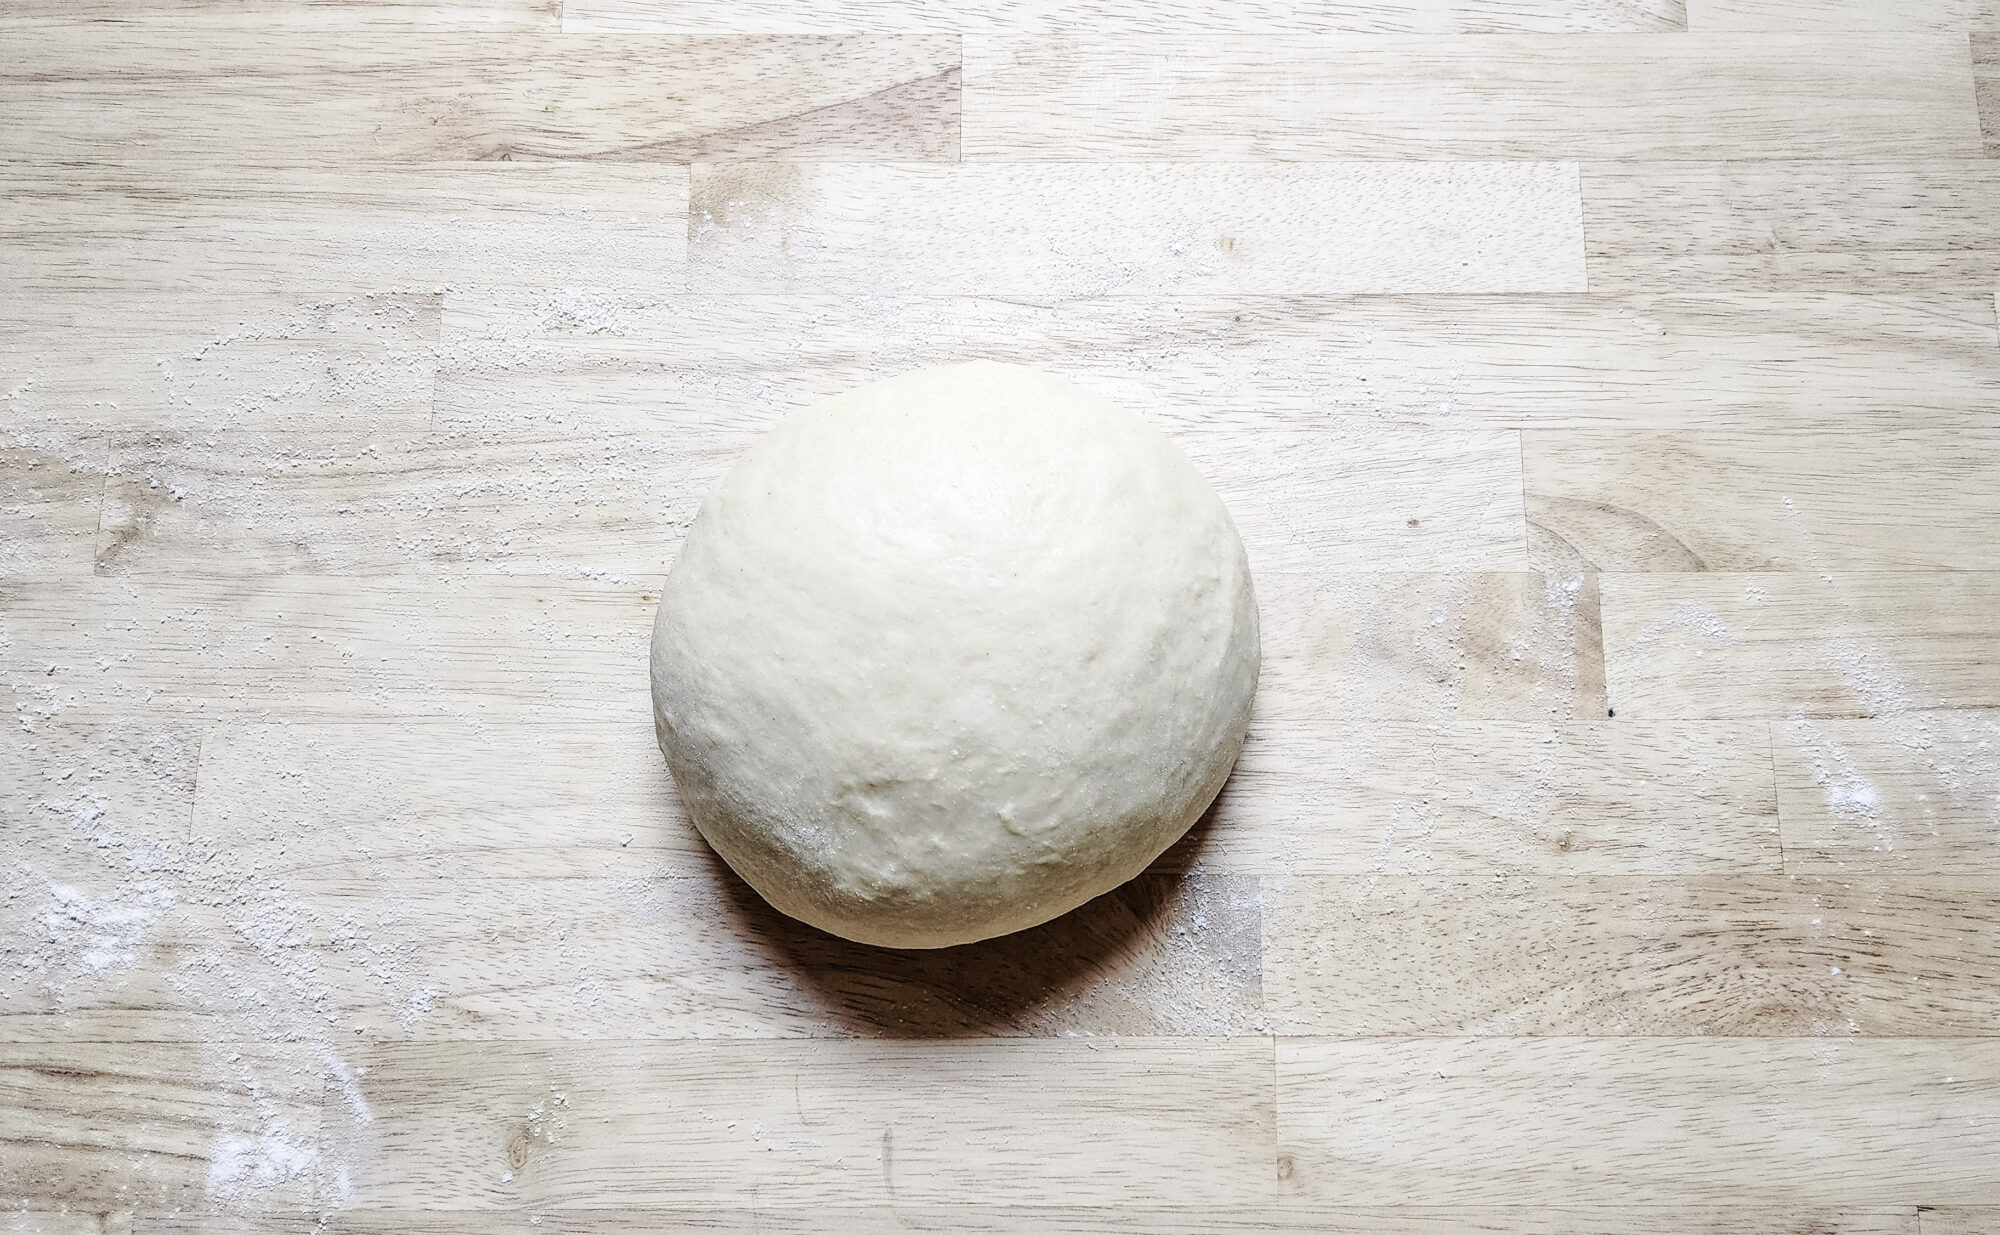
1. Sub roll dough ready for proofing. Lightly coat a bowl with oil and toss the dough ball to coat it evenly. Cover and allow to proof for 1 hour. 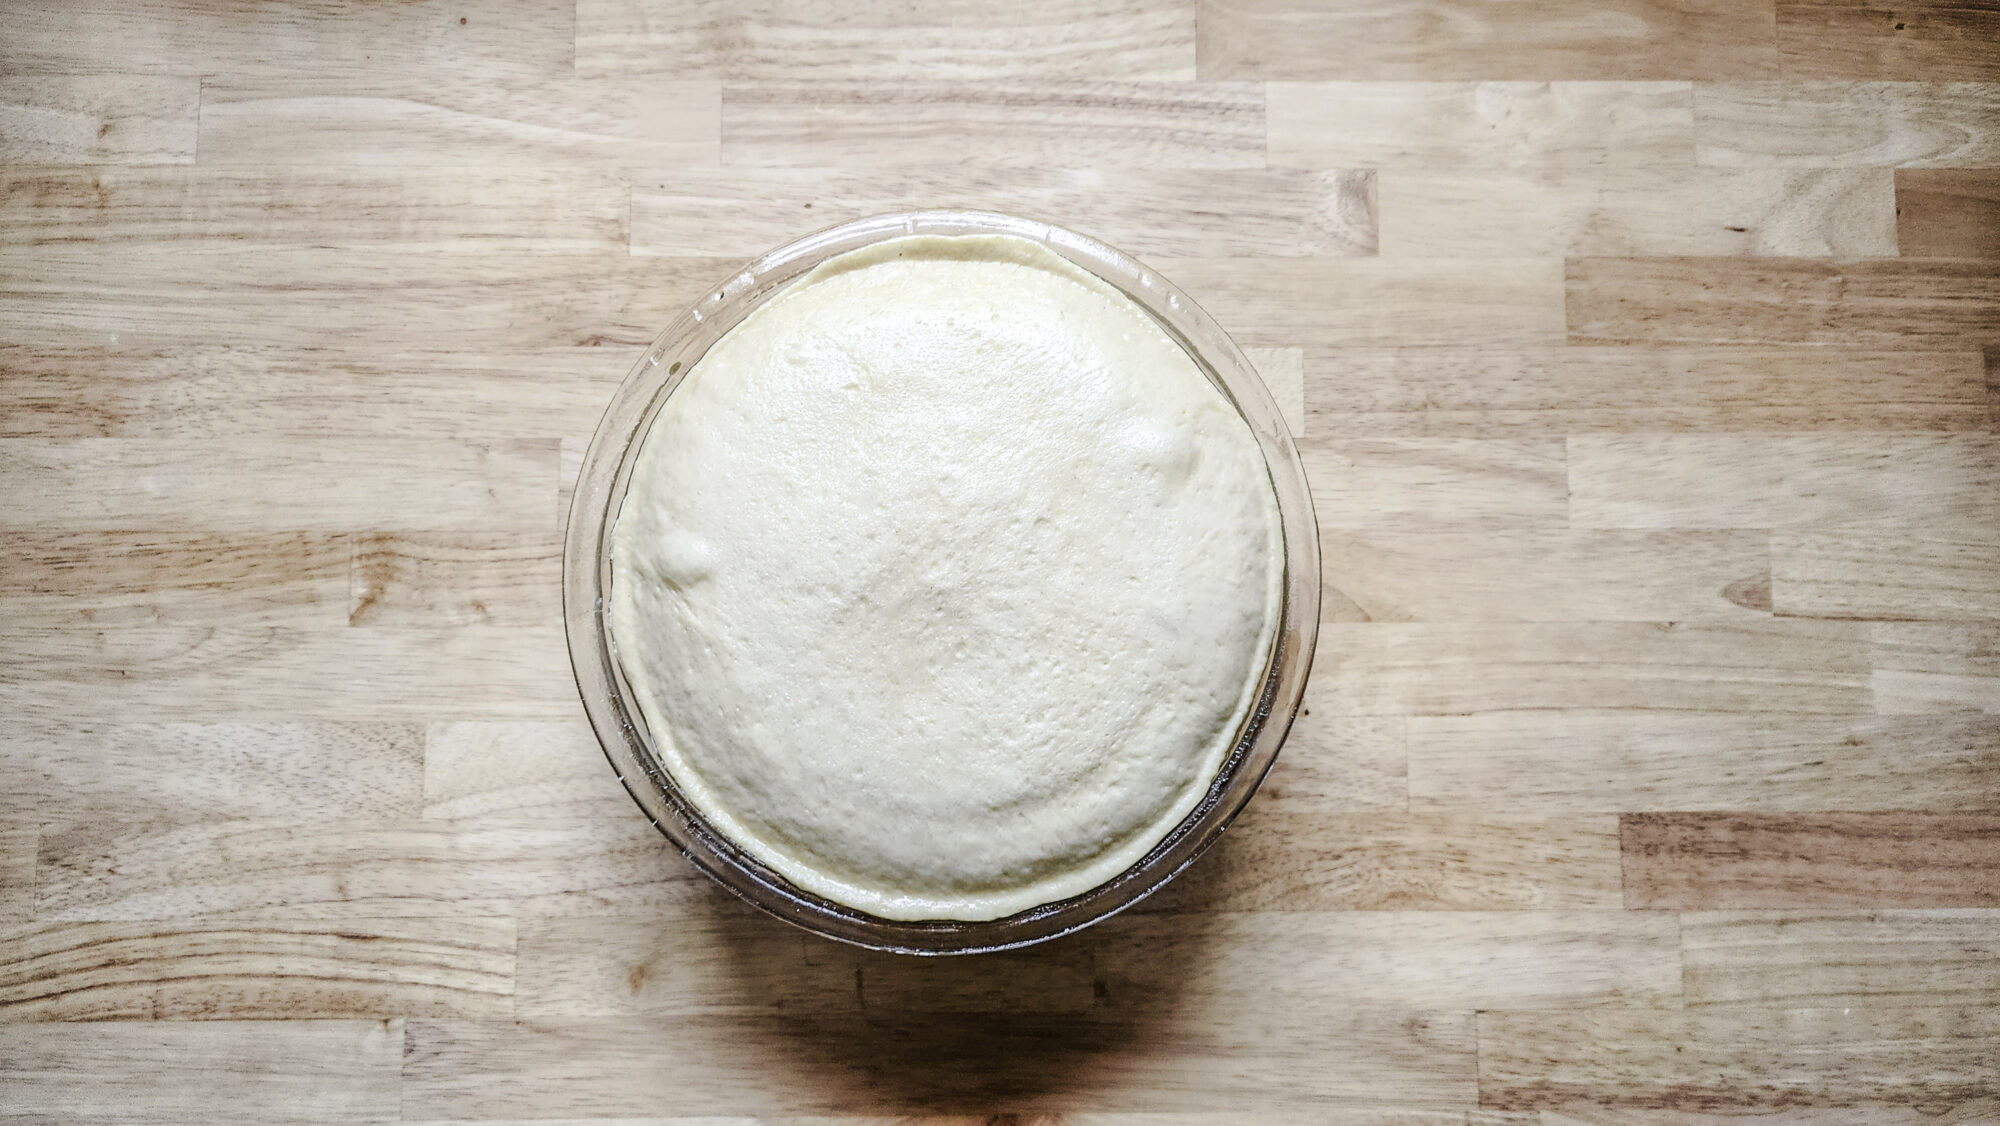
2. Dough after the initial bulk proofing. 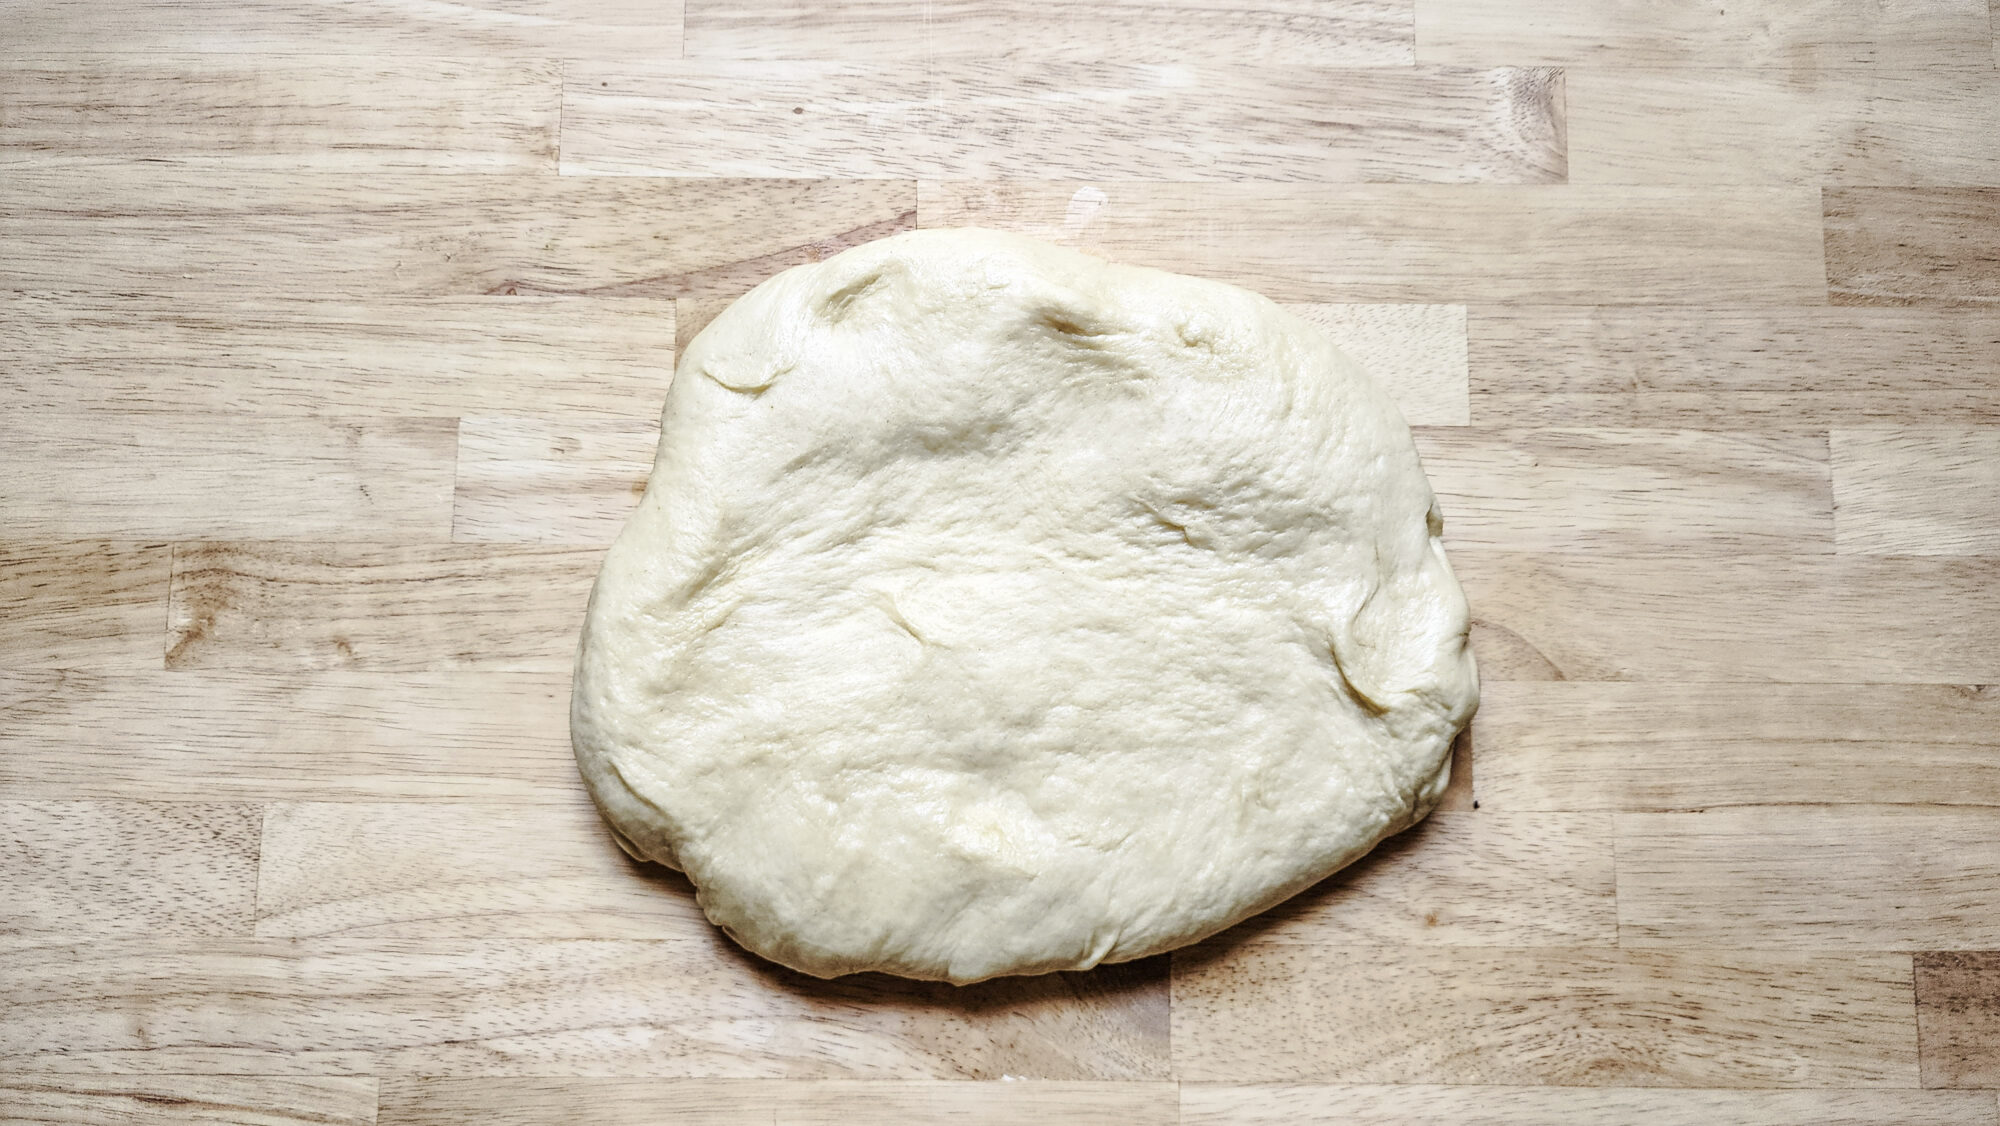
3. Turn the dough onto a lightly floured work surface and flatten into a 1-inch flat disc. 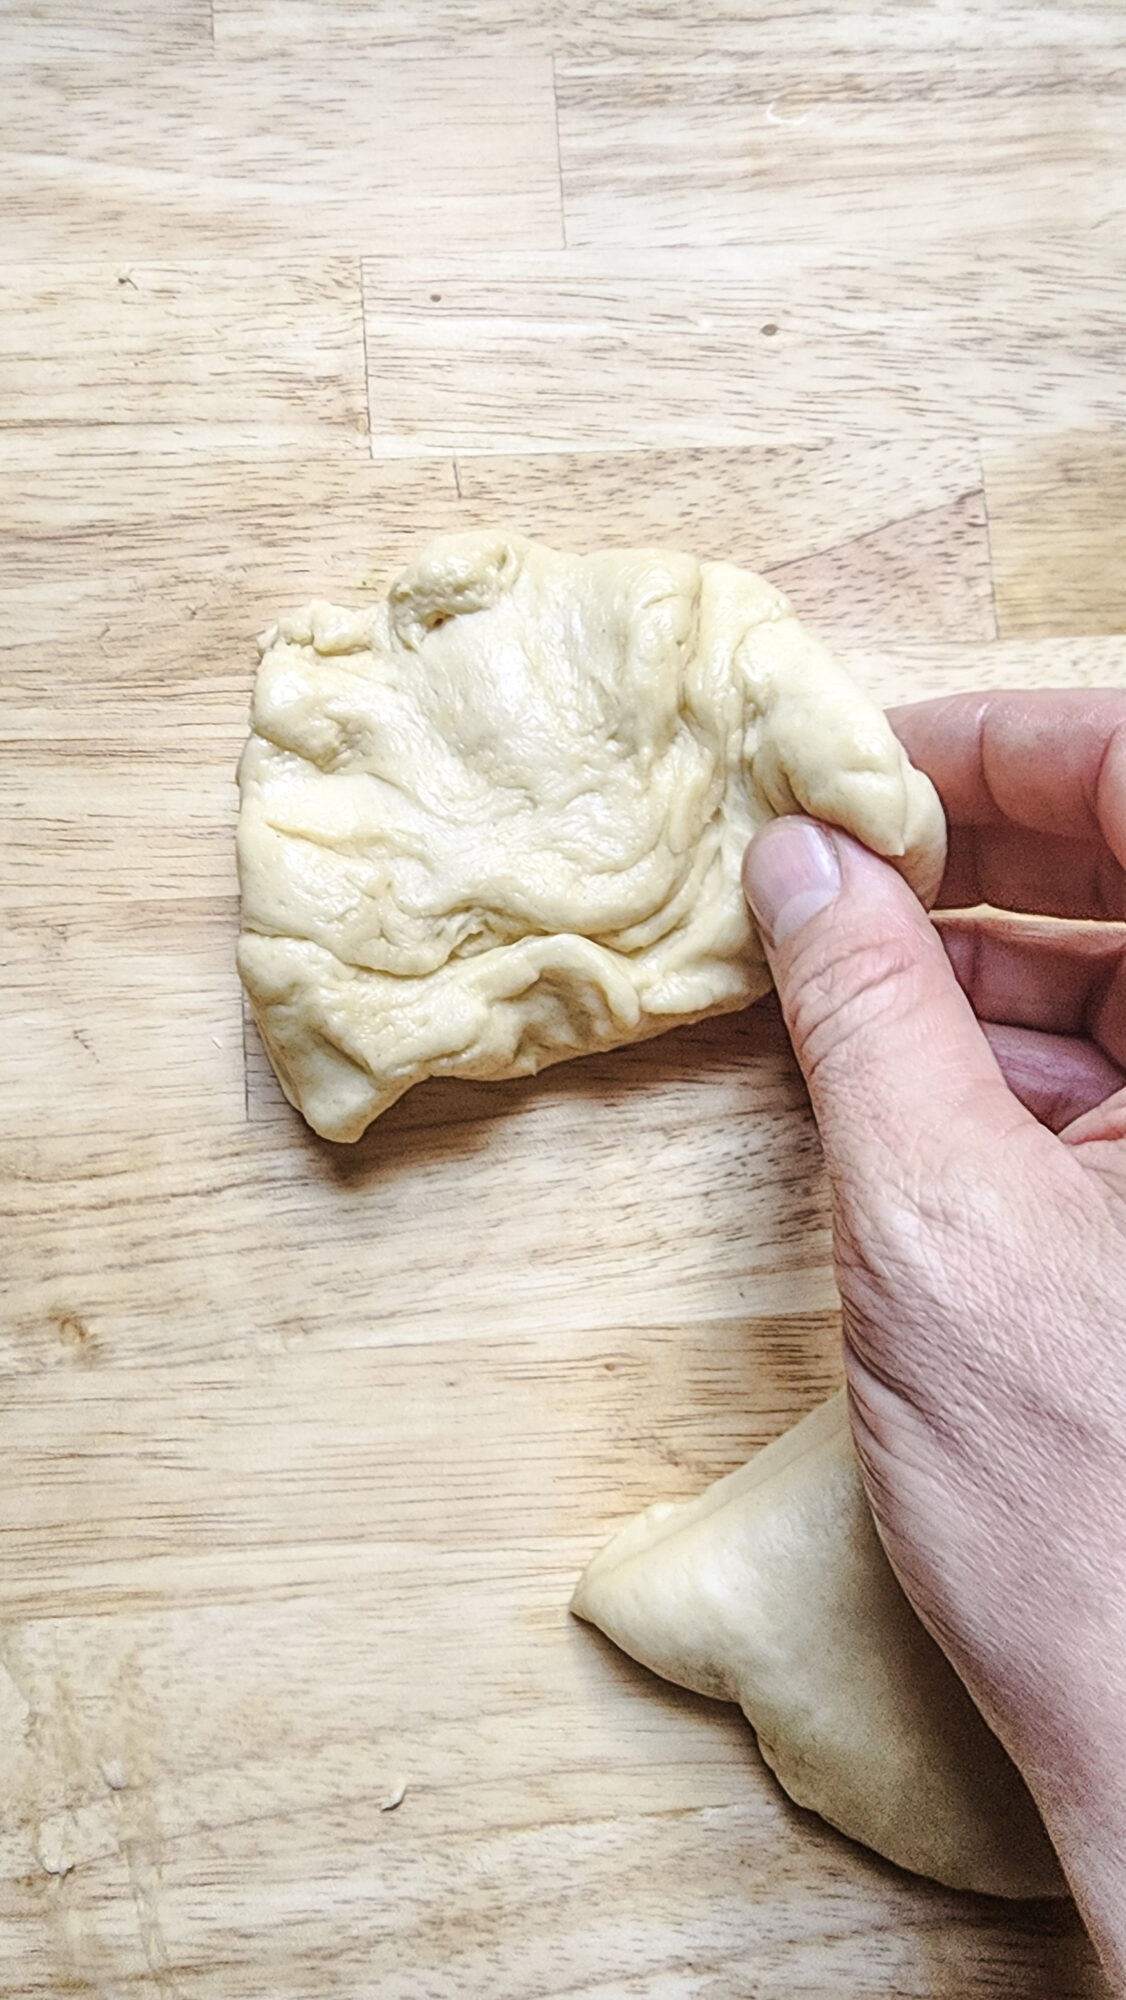
4. Cut the dough into 6 equal pieces, then begin to shape into mini dough balls. 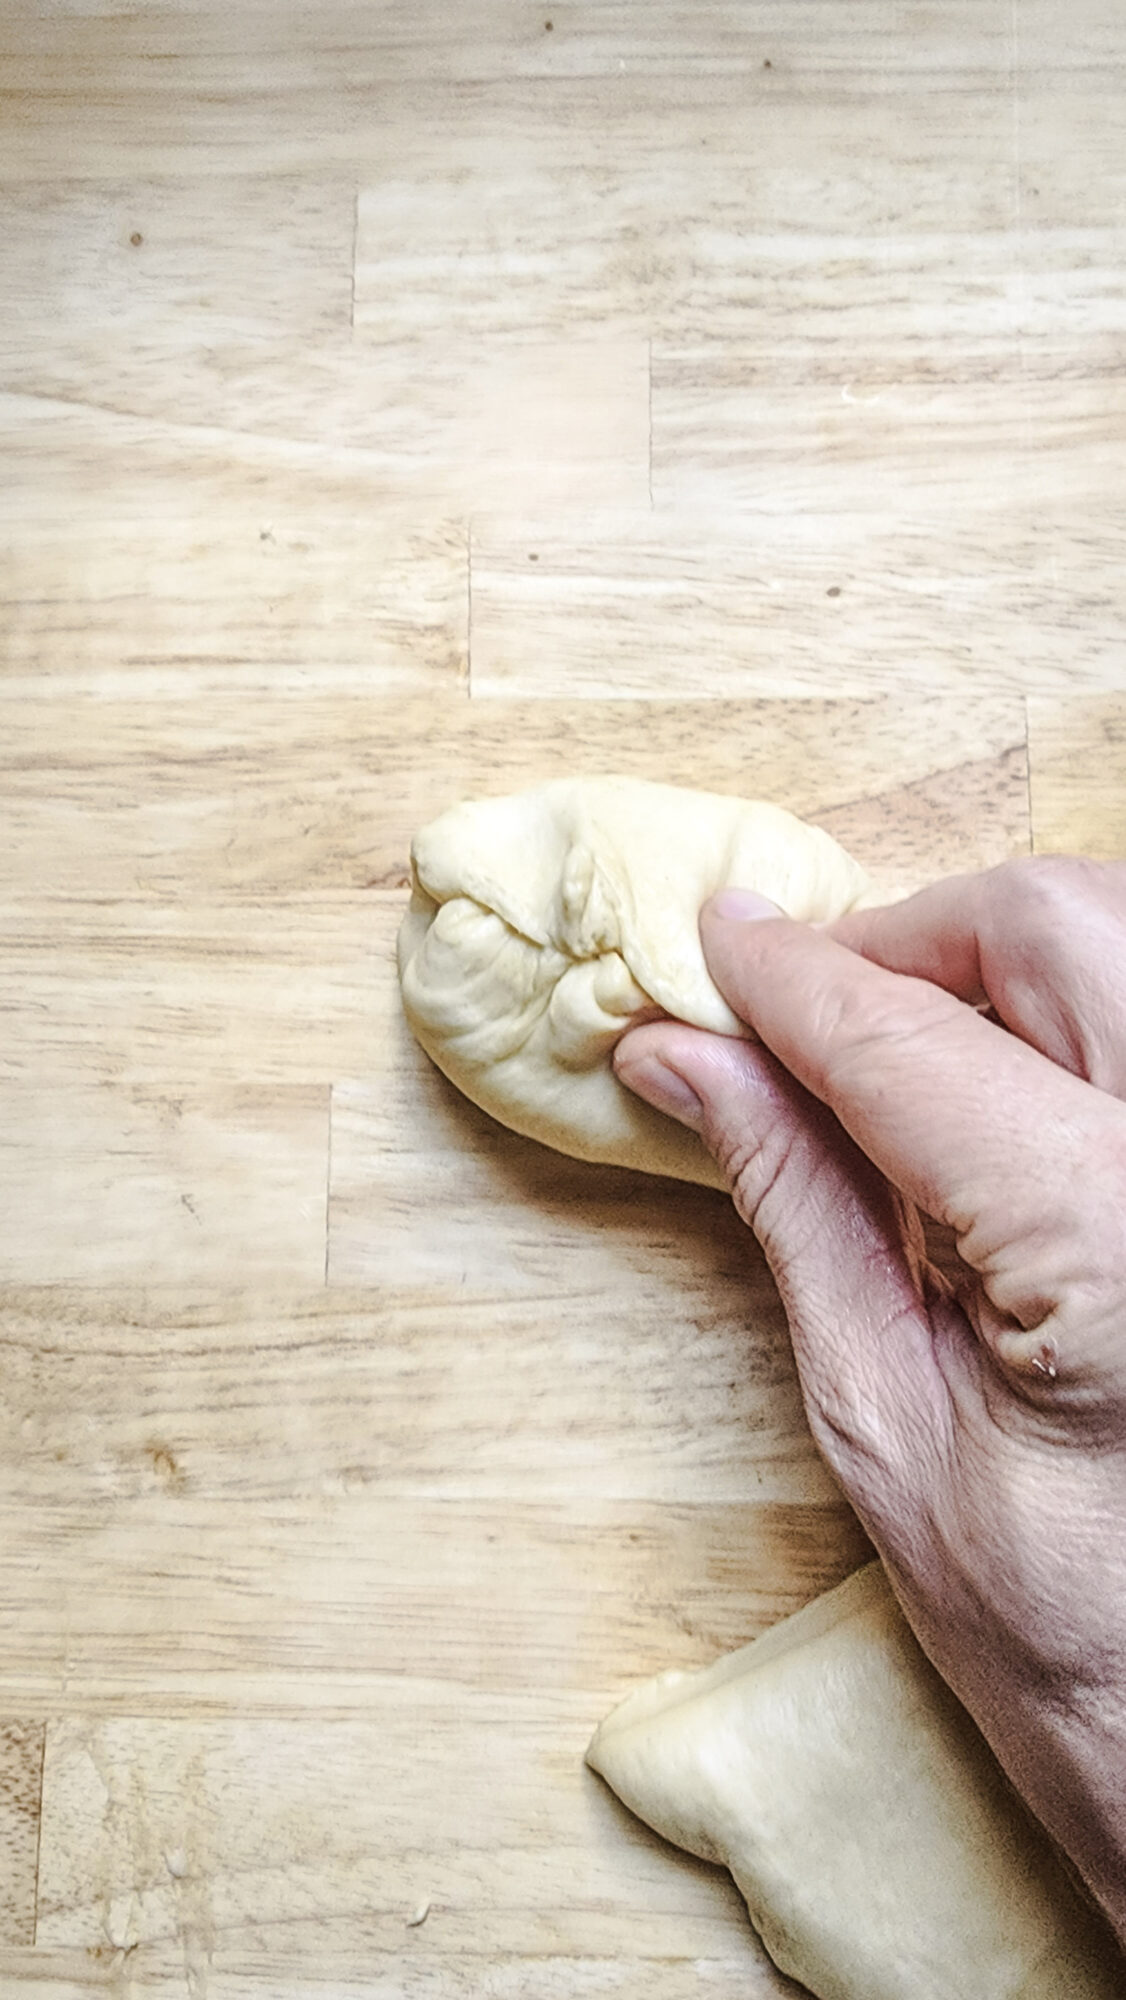
5. Pinch the seams of the mini dough balls. 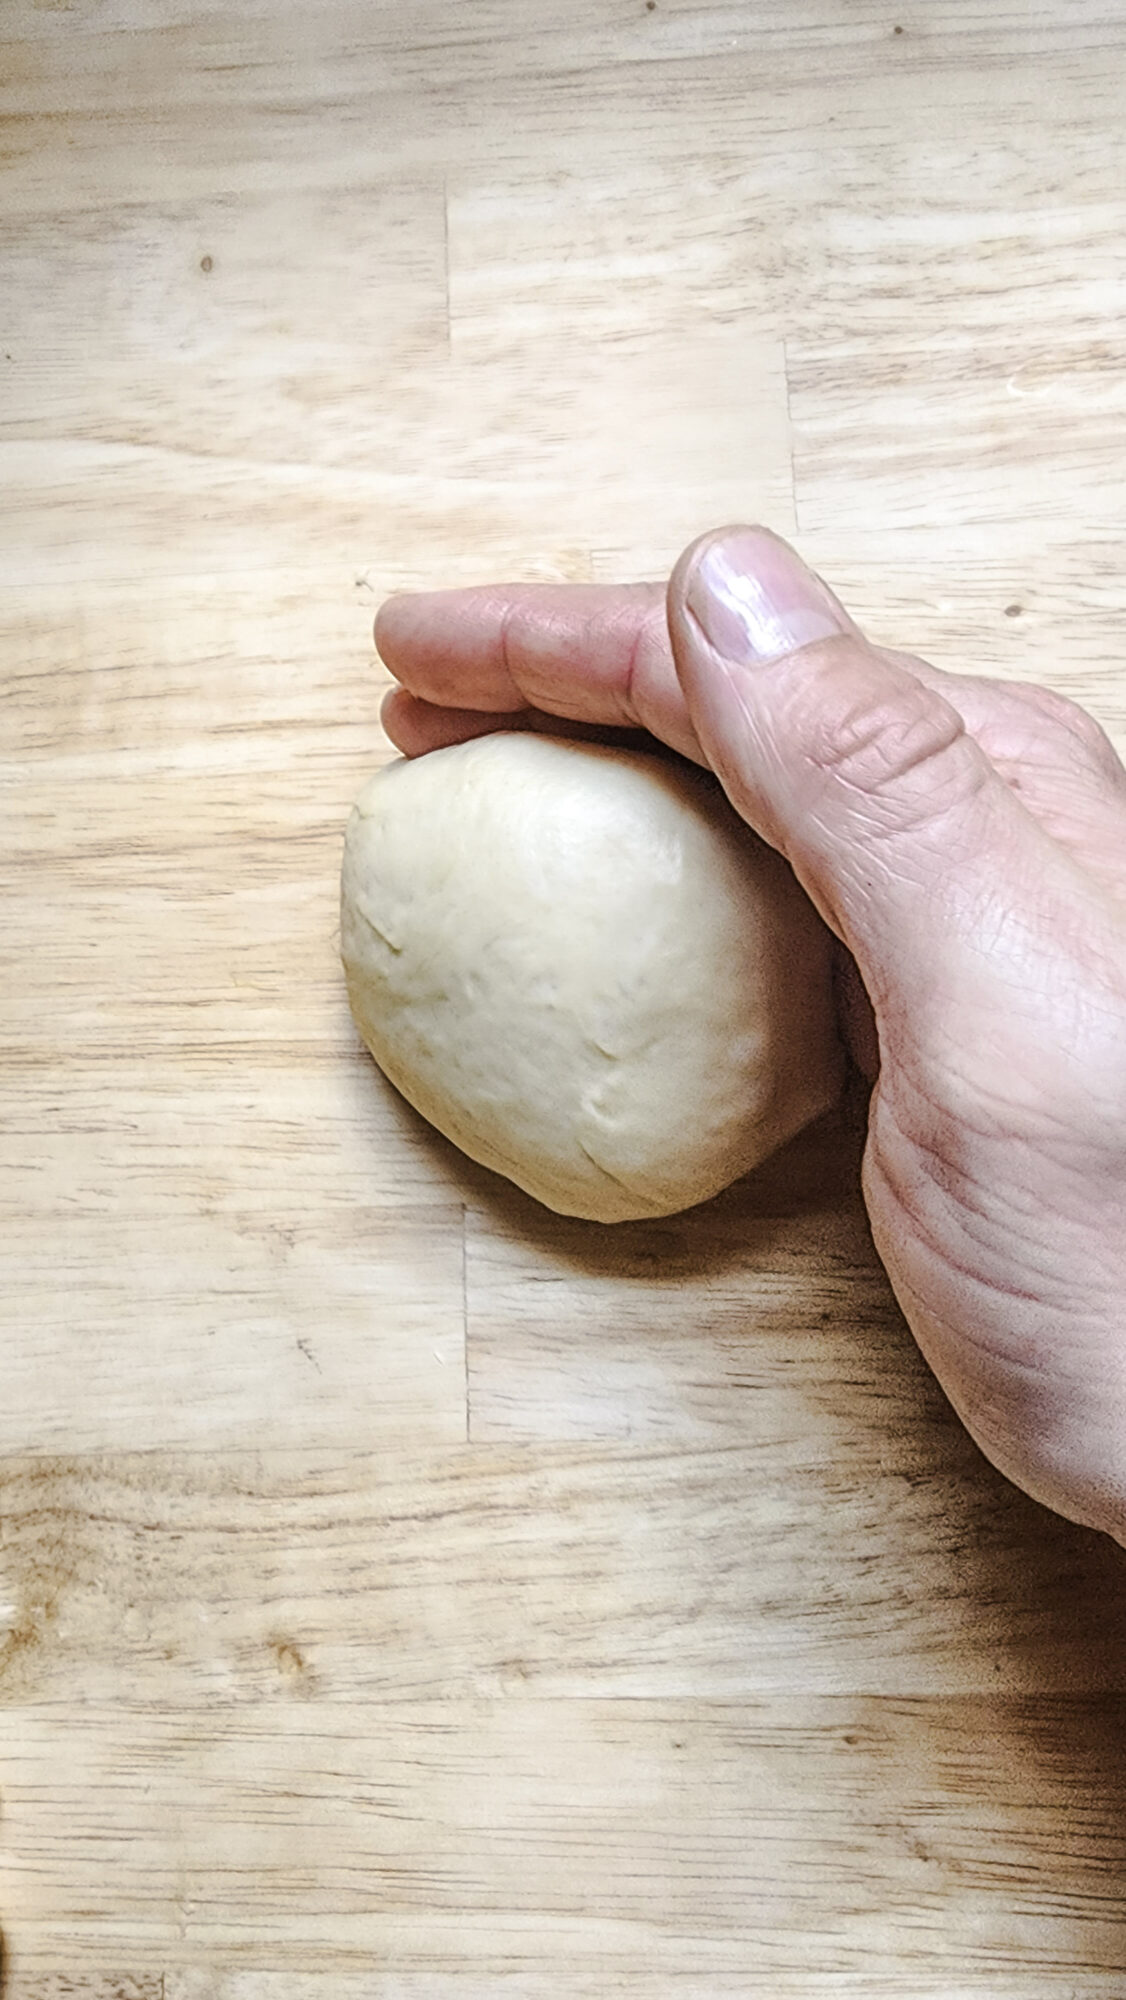
6. Place the dough balls seam side down, use a cupping motion to drag the dough ball across your work surface. This is so you end up with a smooth dough ball, with no visible seams. 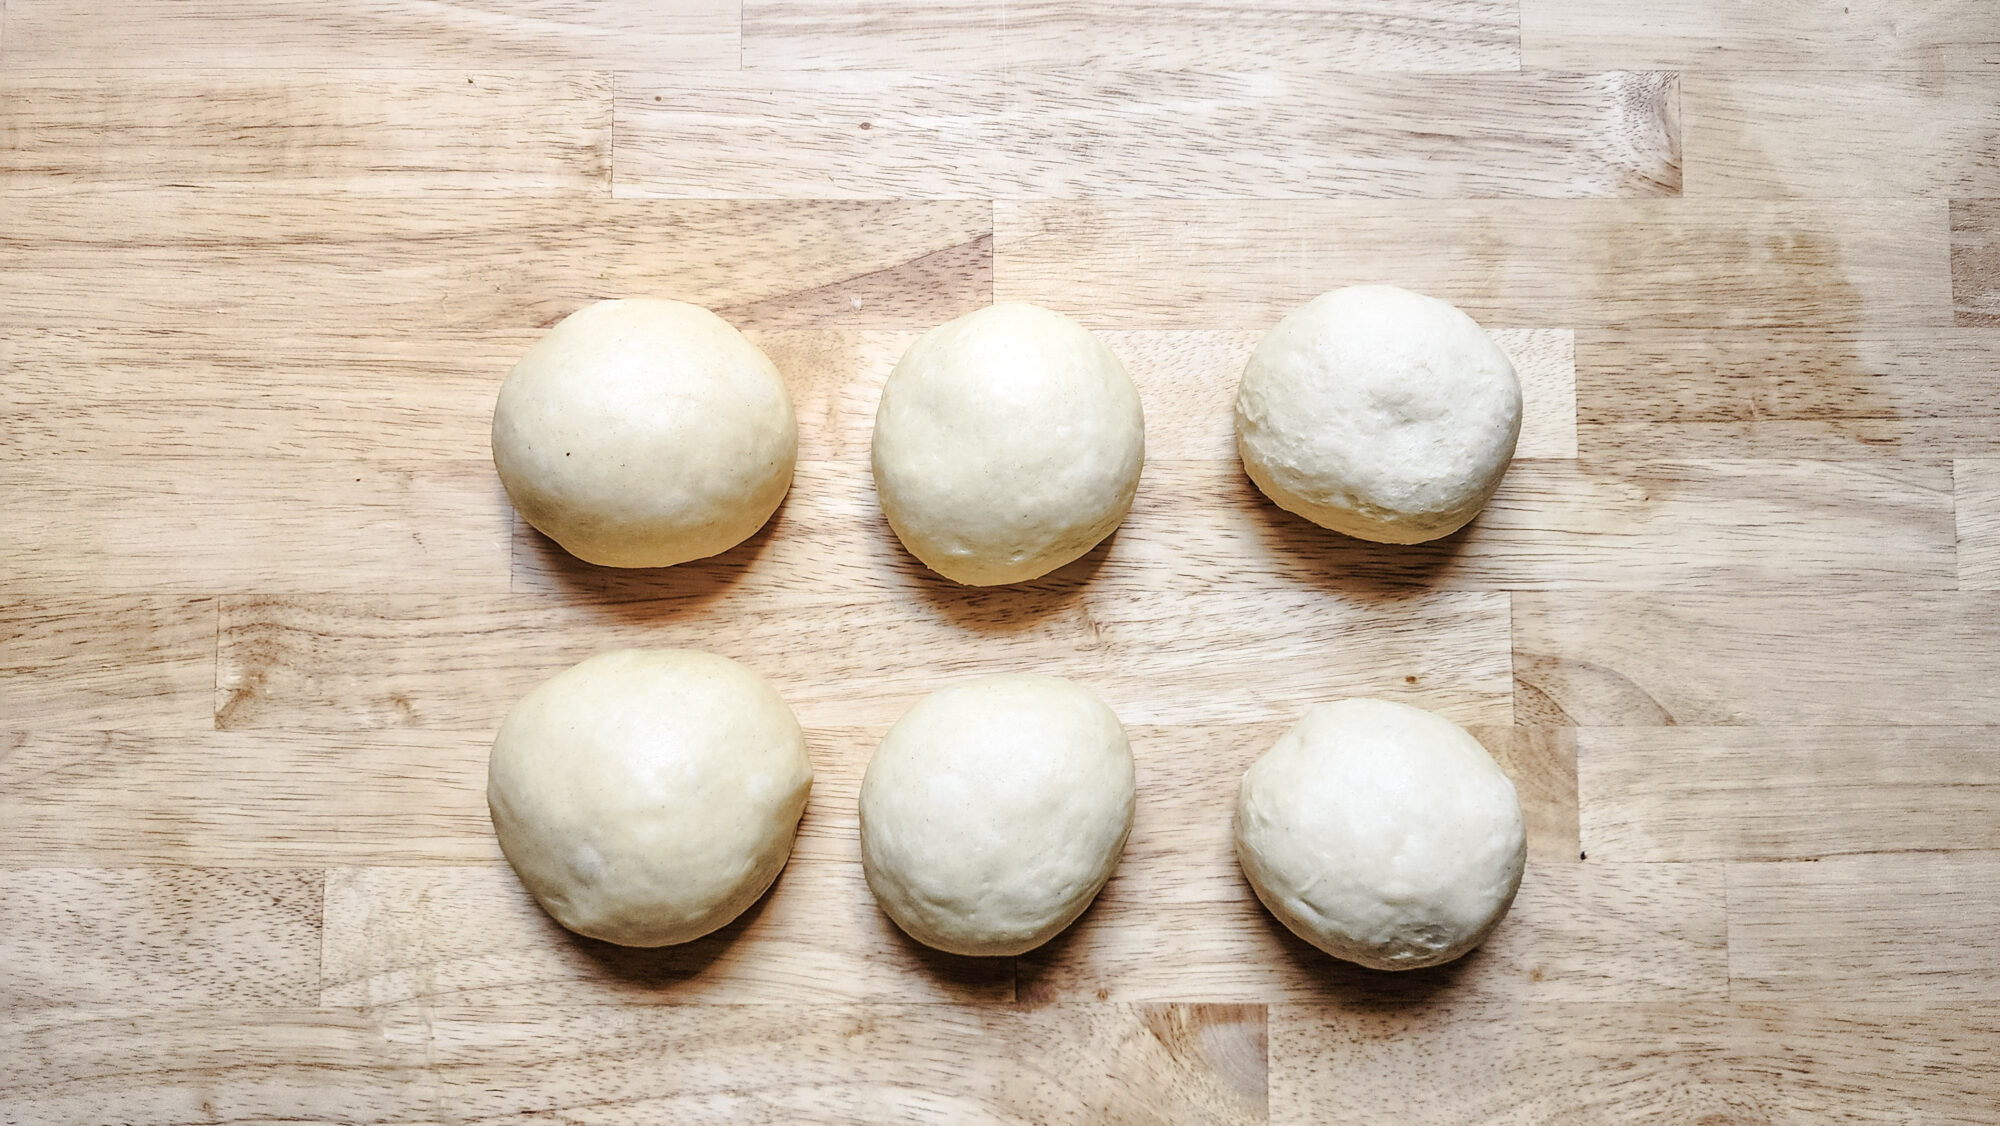
7. Mini dough balls portioned for sub rolls 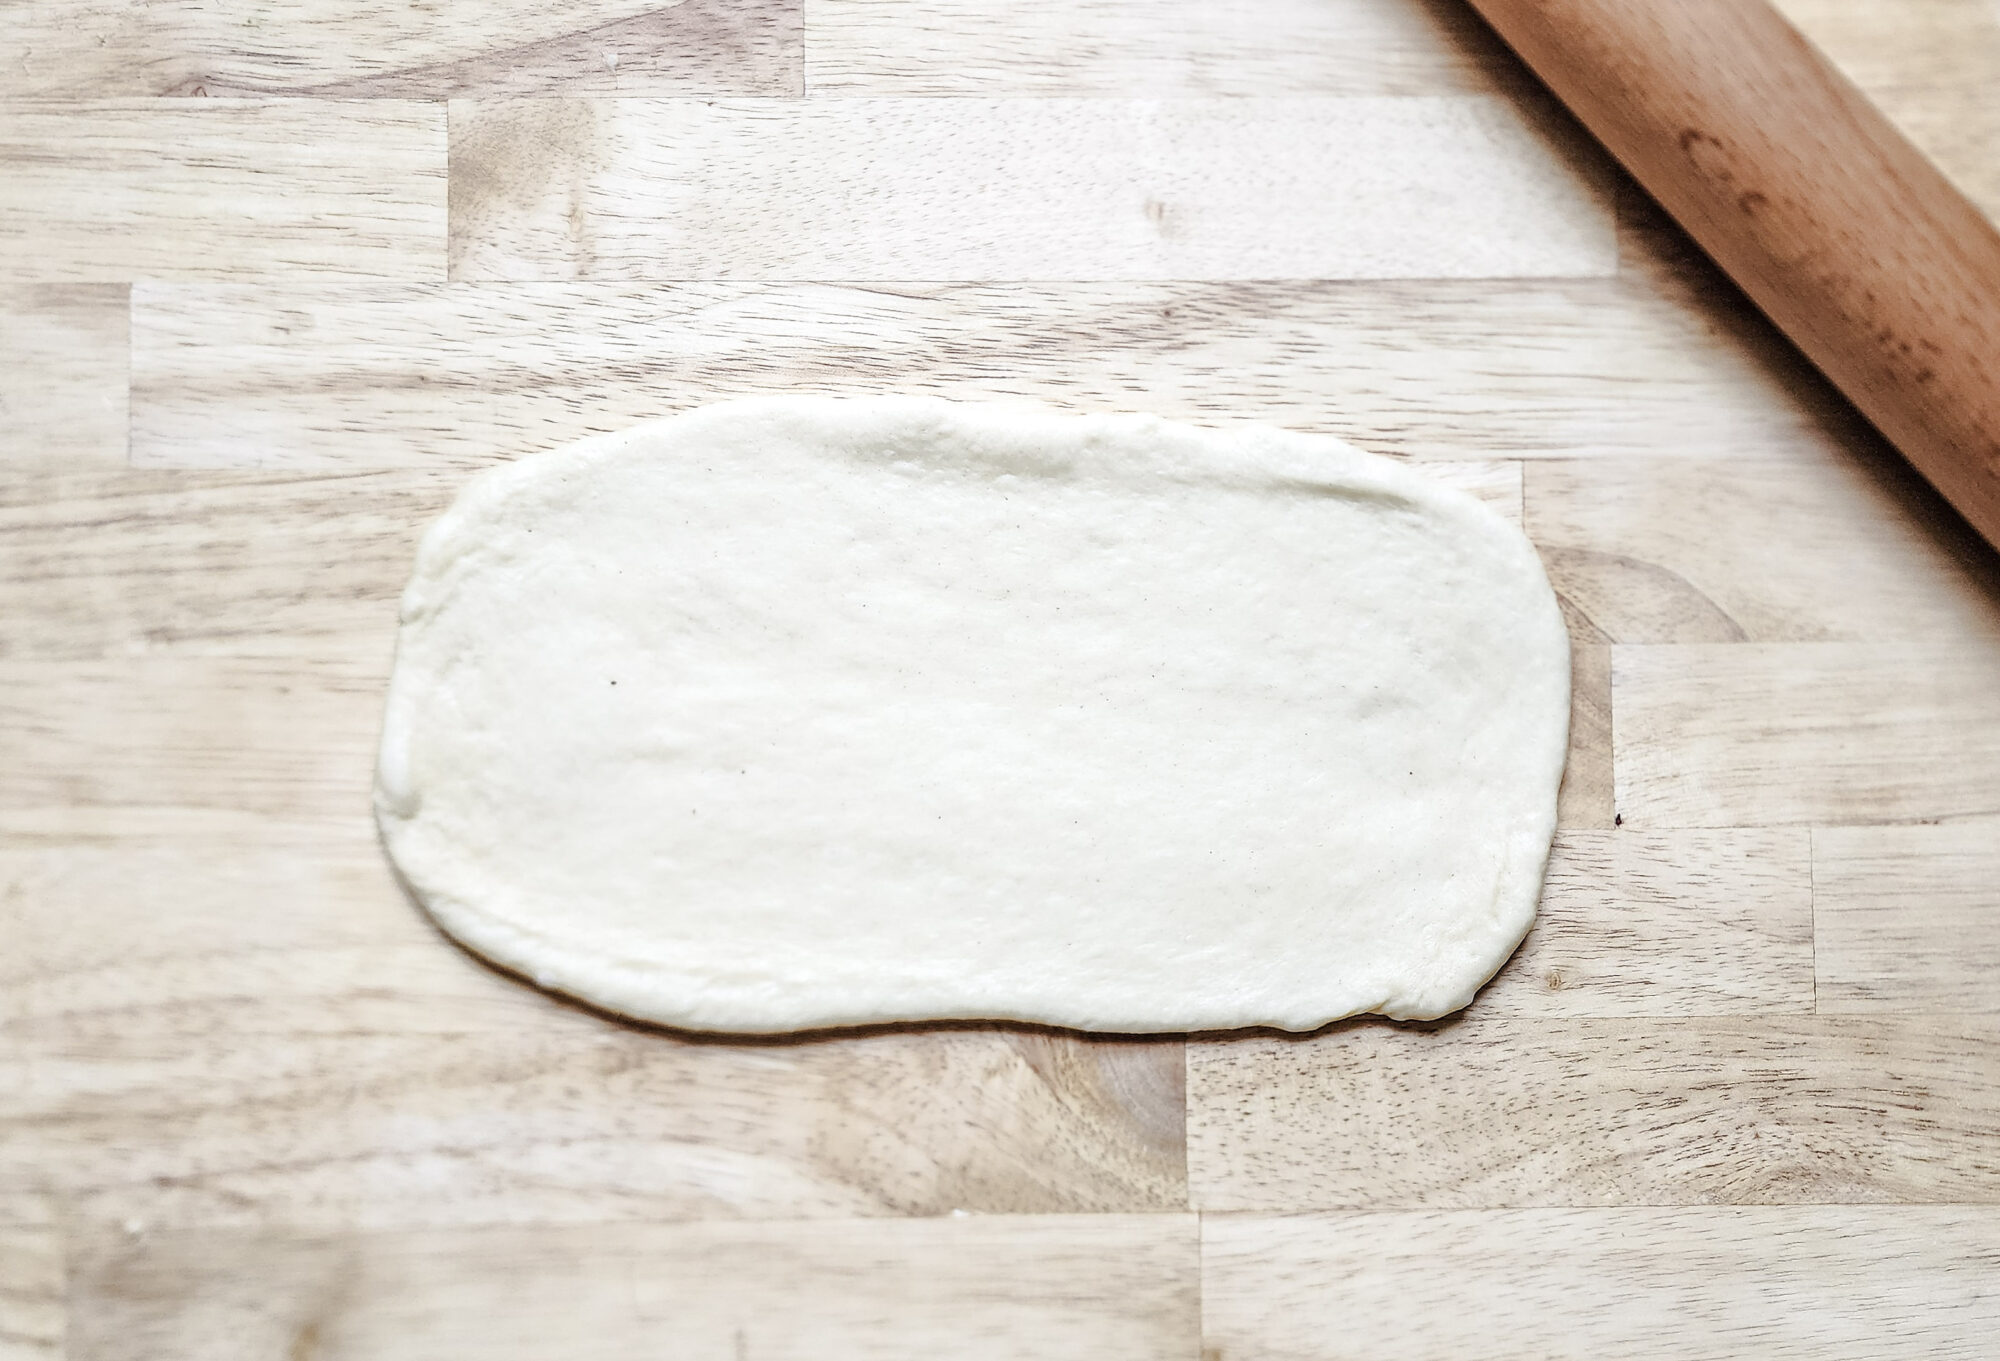
8 - Roll the dough balls into a 5-inch tall by 9-inch wide rectangle. 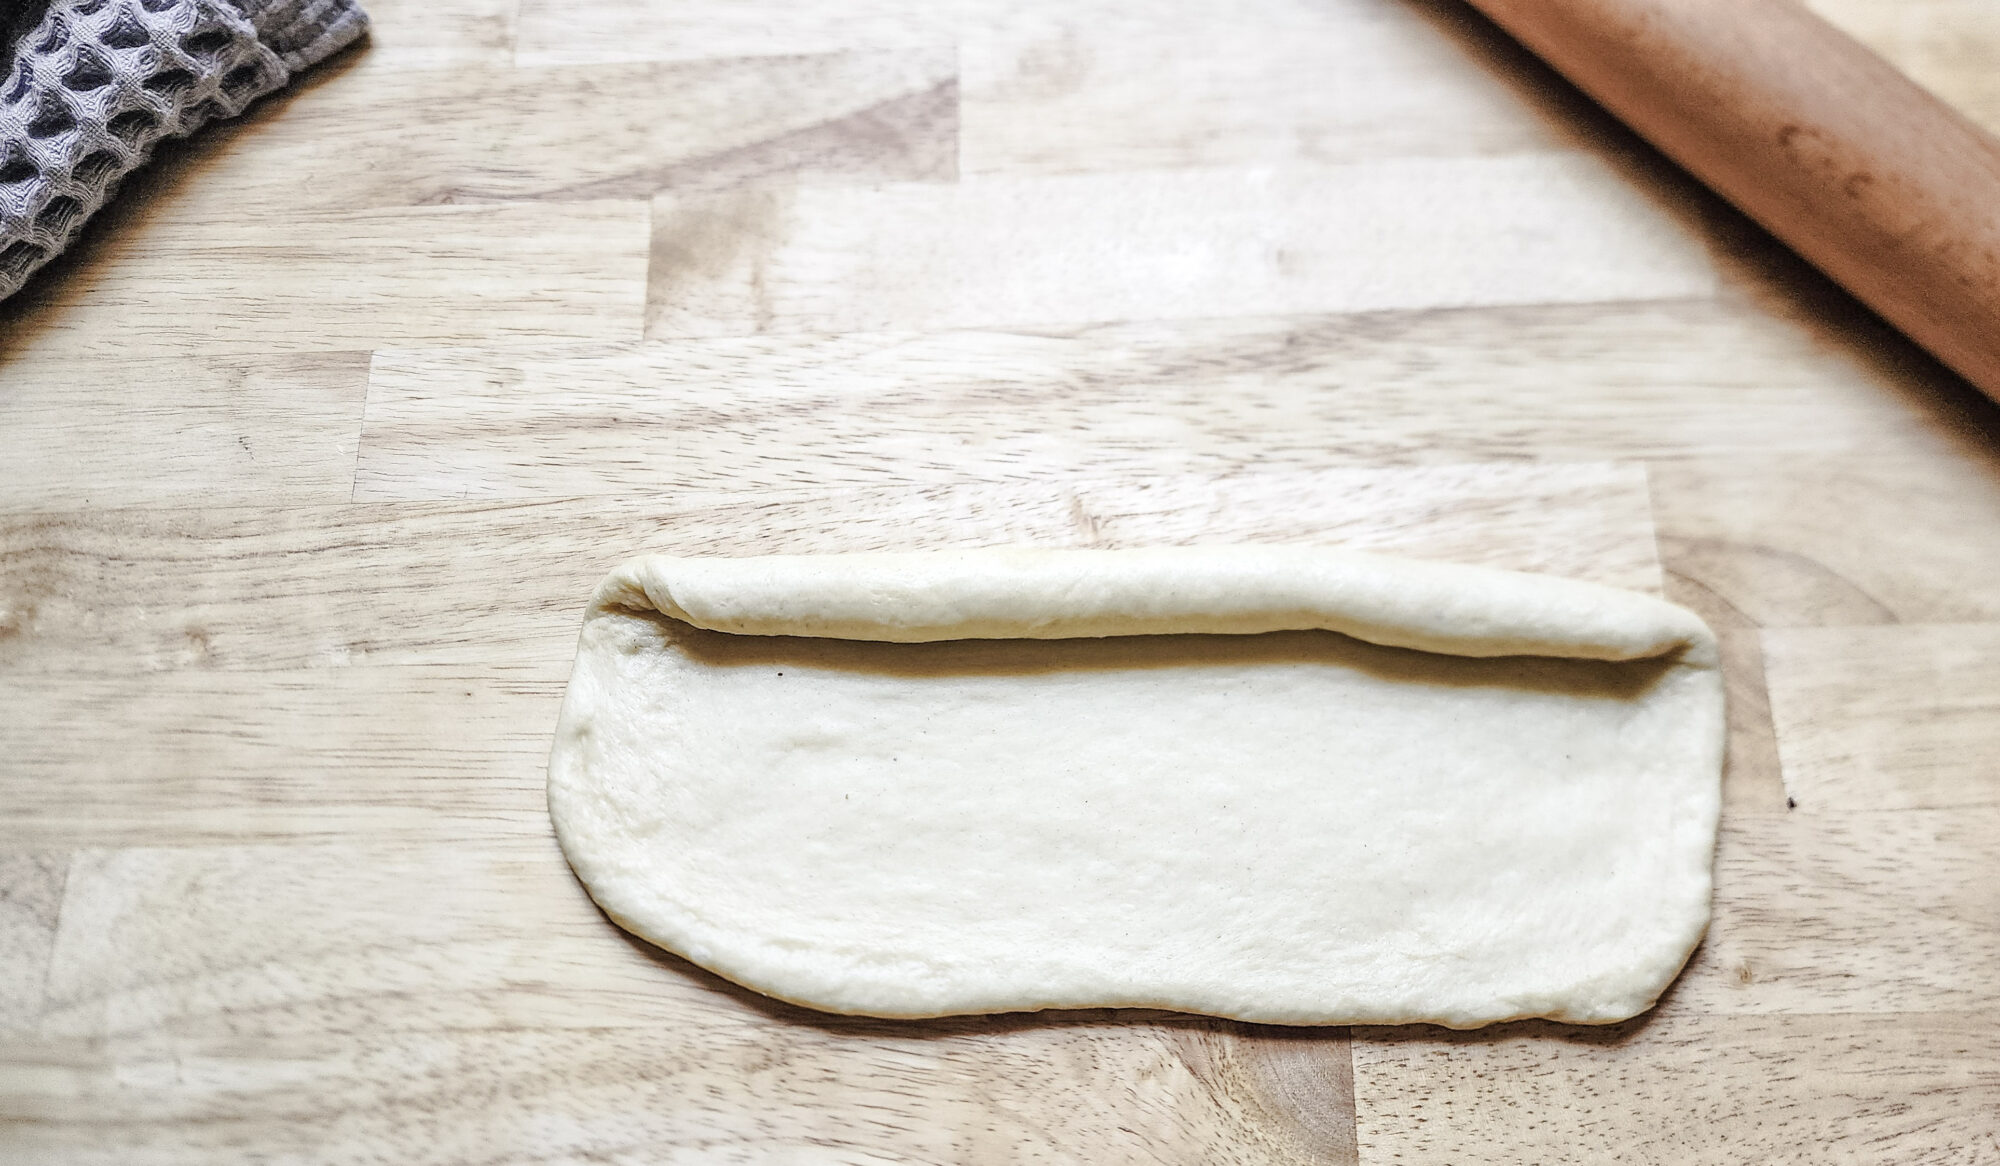
9. Tightly roll the dough into individual loaves. 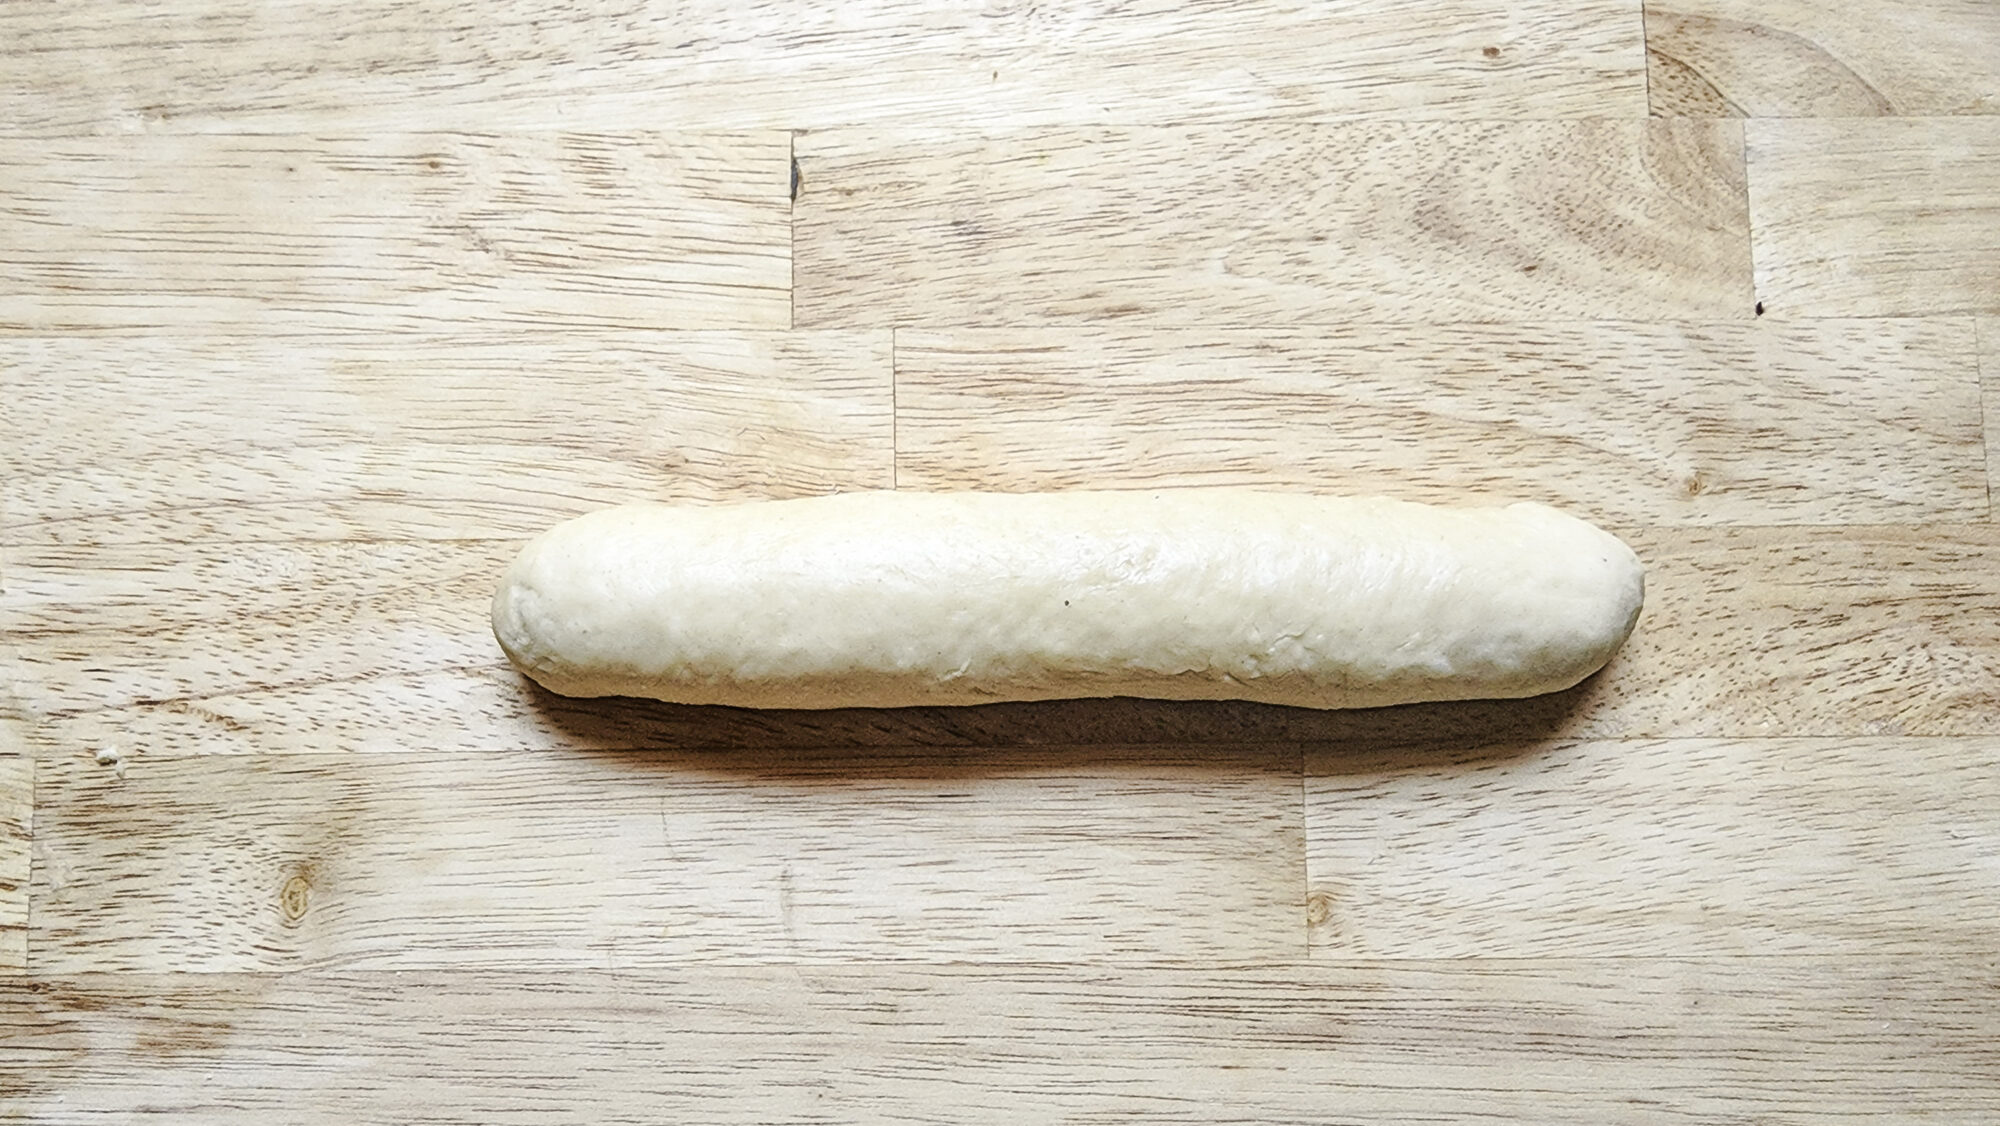
10. Pinch the ends of the loaves together to seal the end seams. 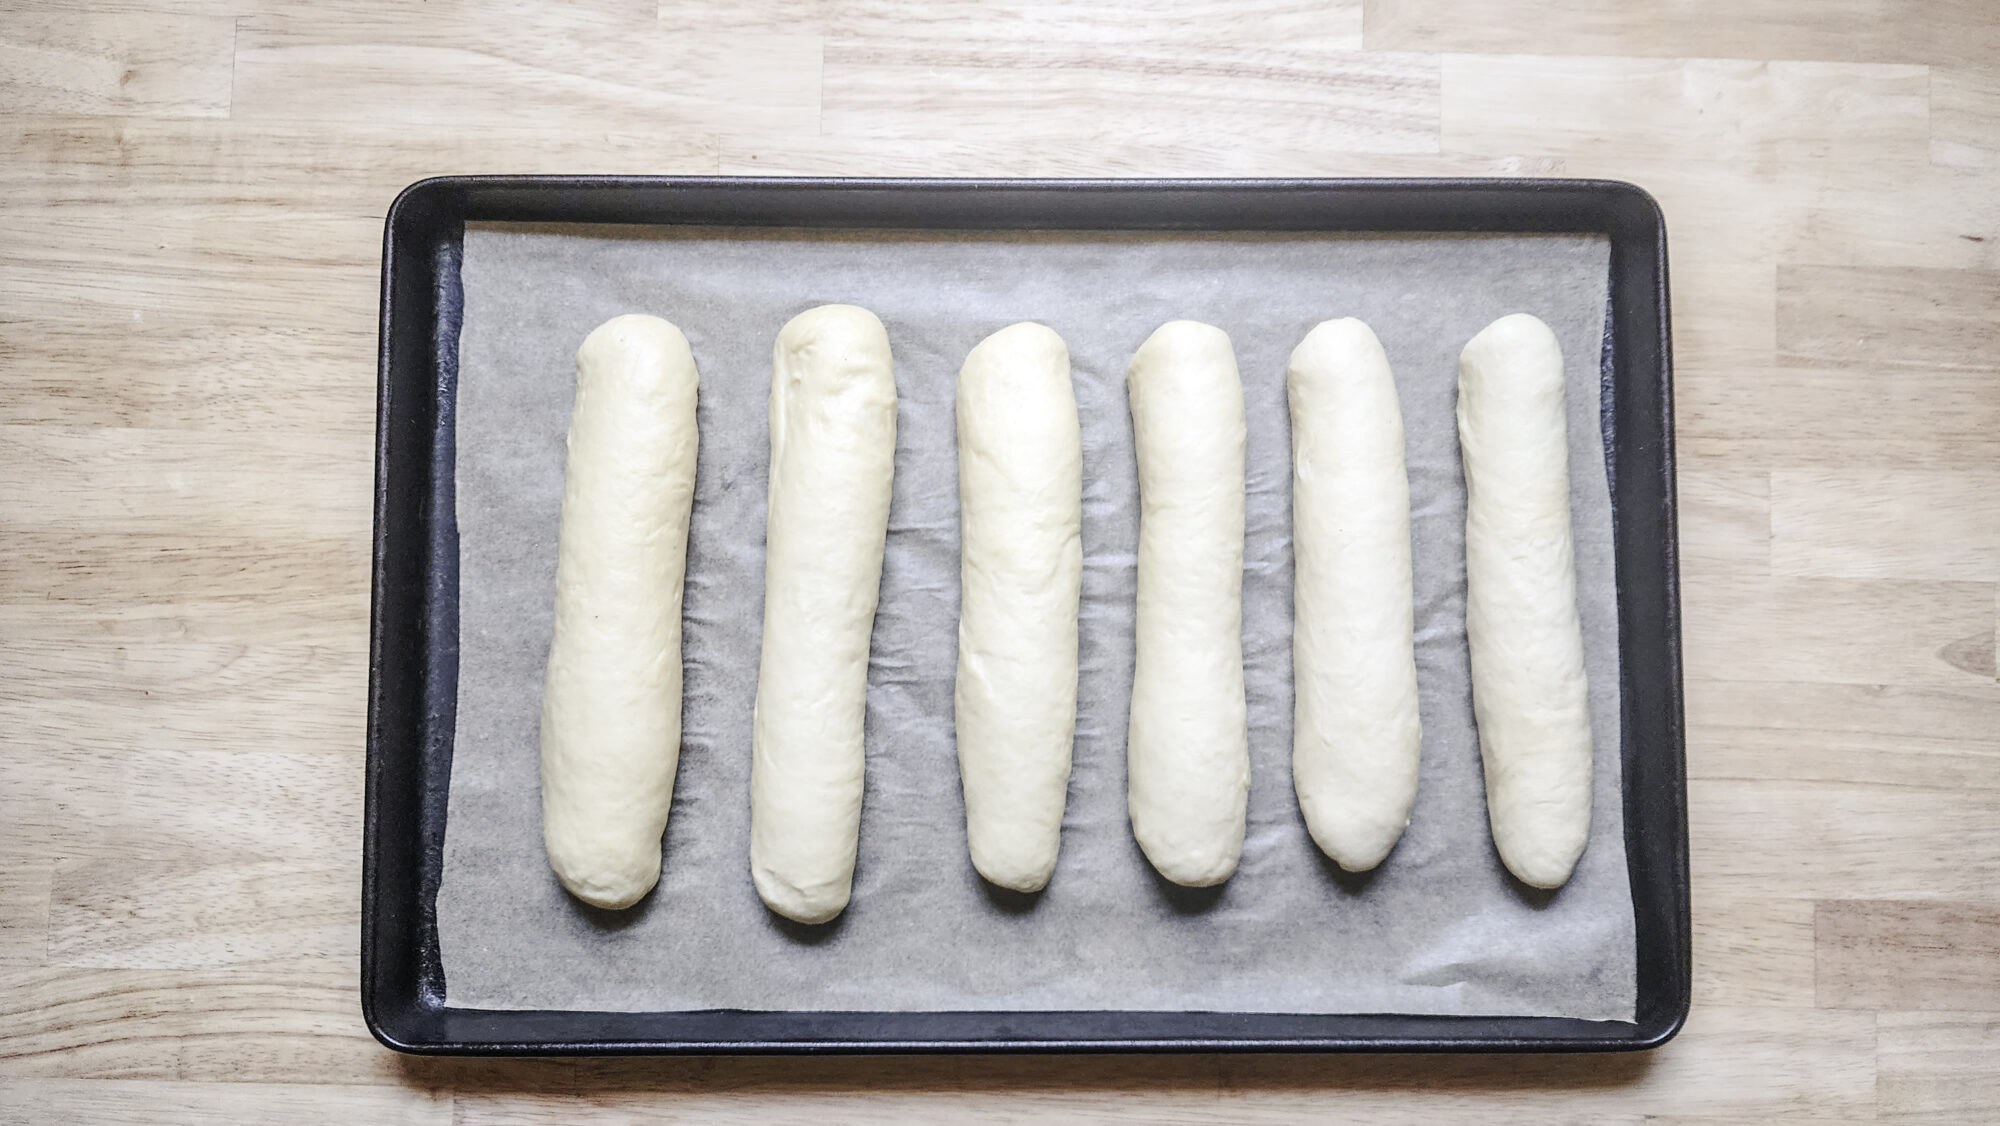
12. Cover your sub roll loaves with a damp kitchen cloth and proof for an additional 30-minutes. 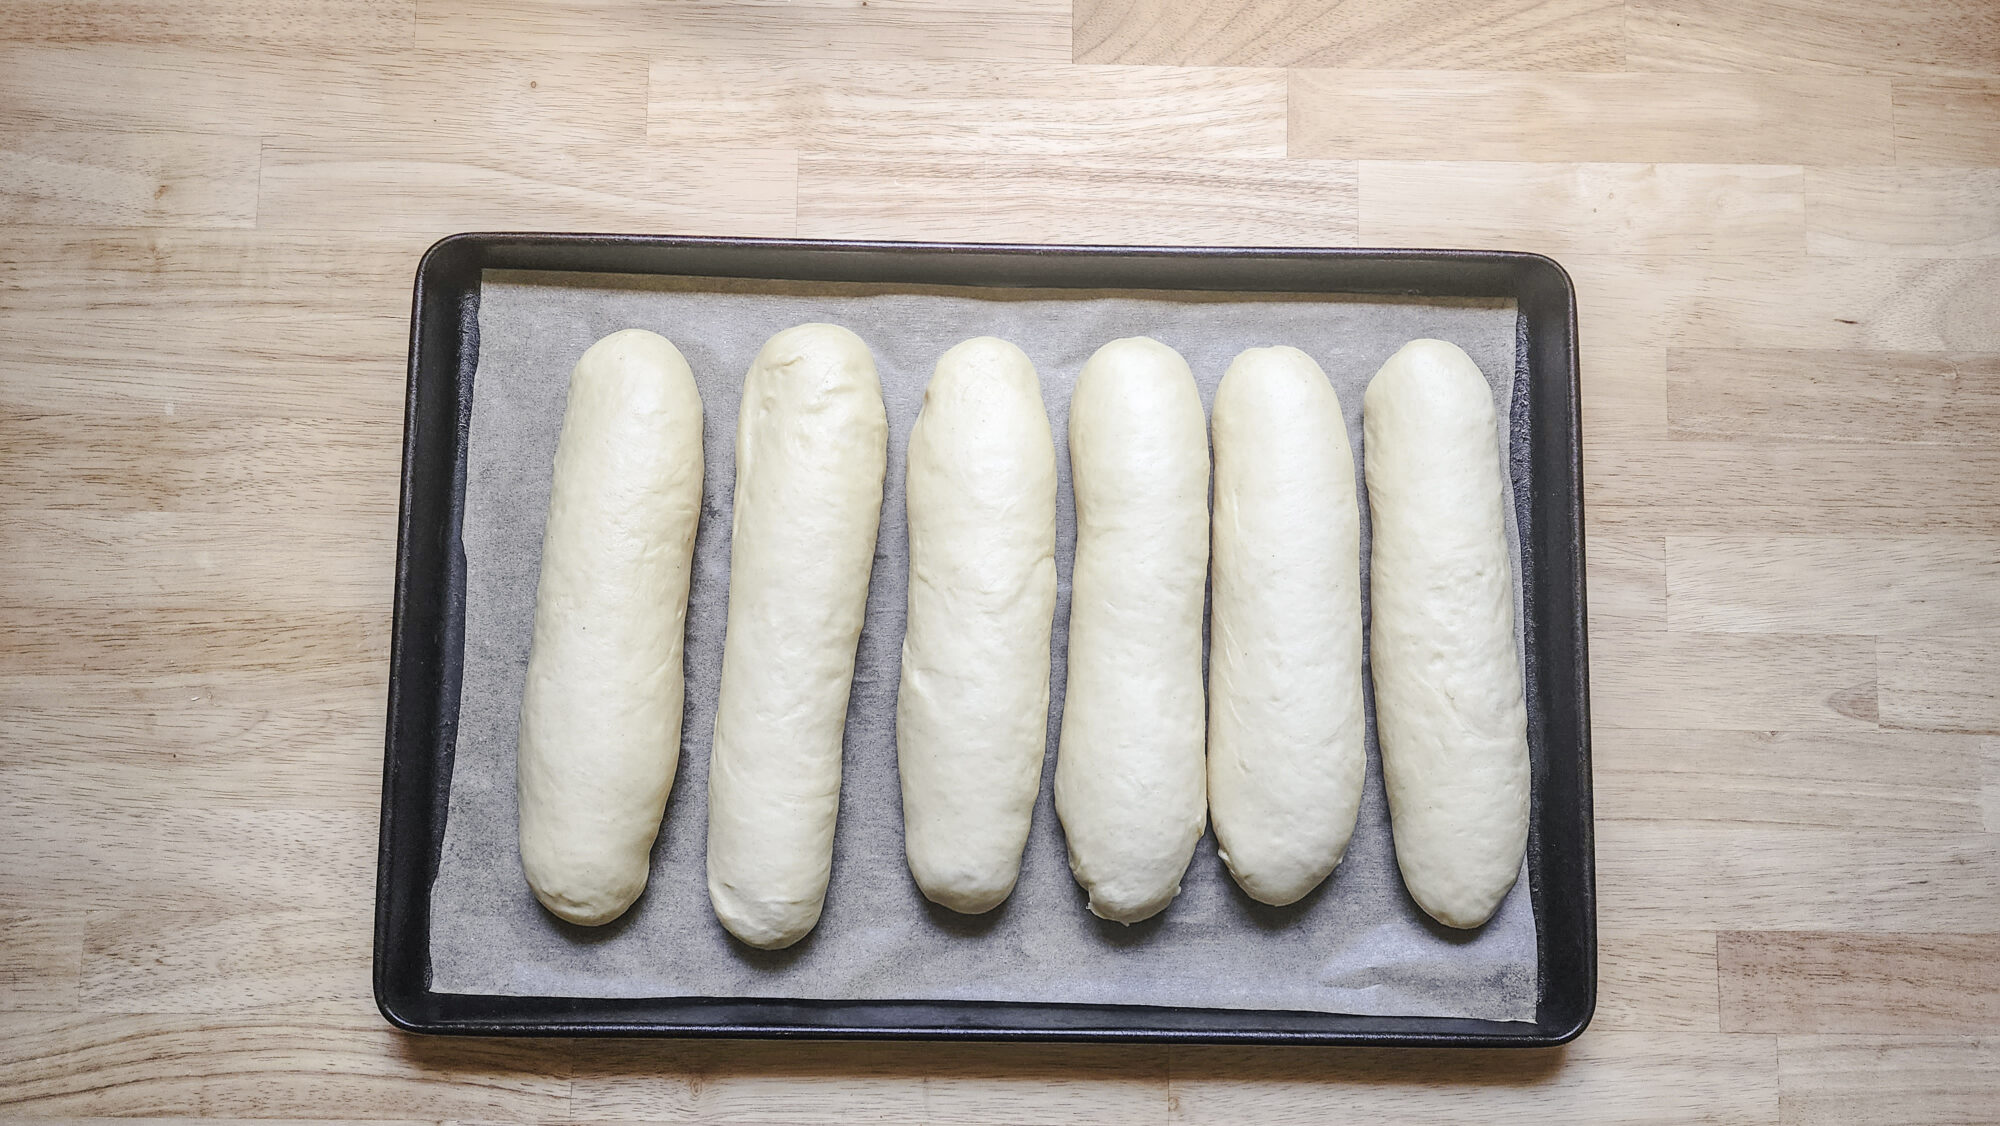
13. Sub roll loaves after the second proof. 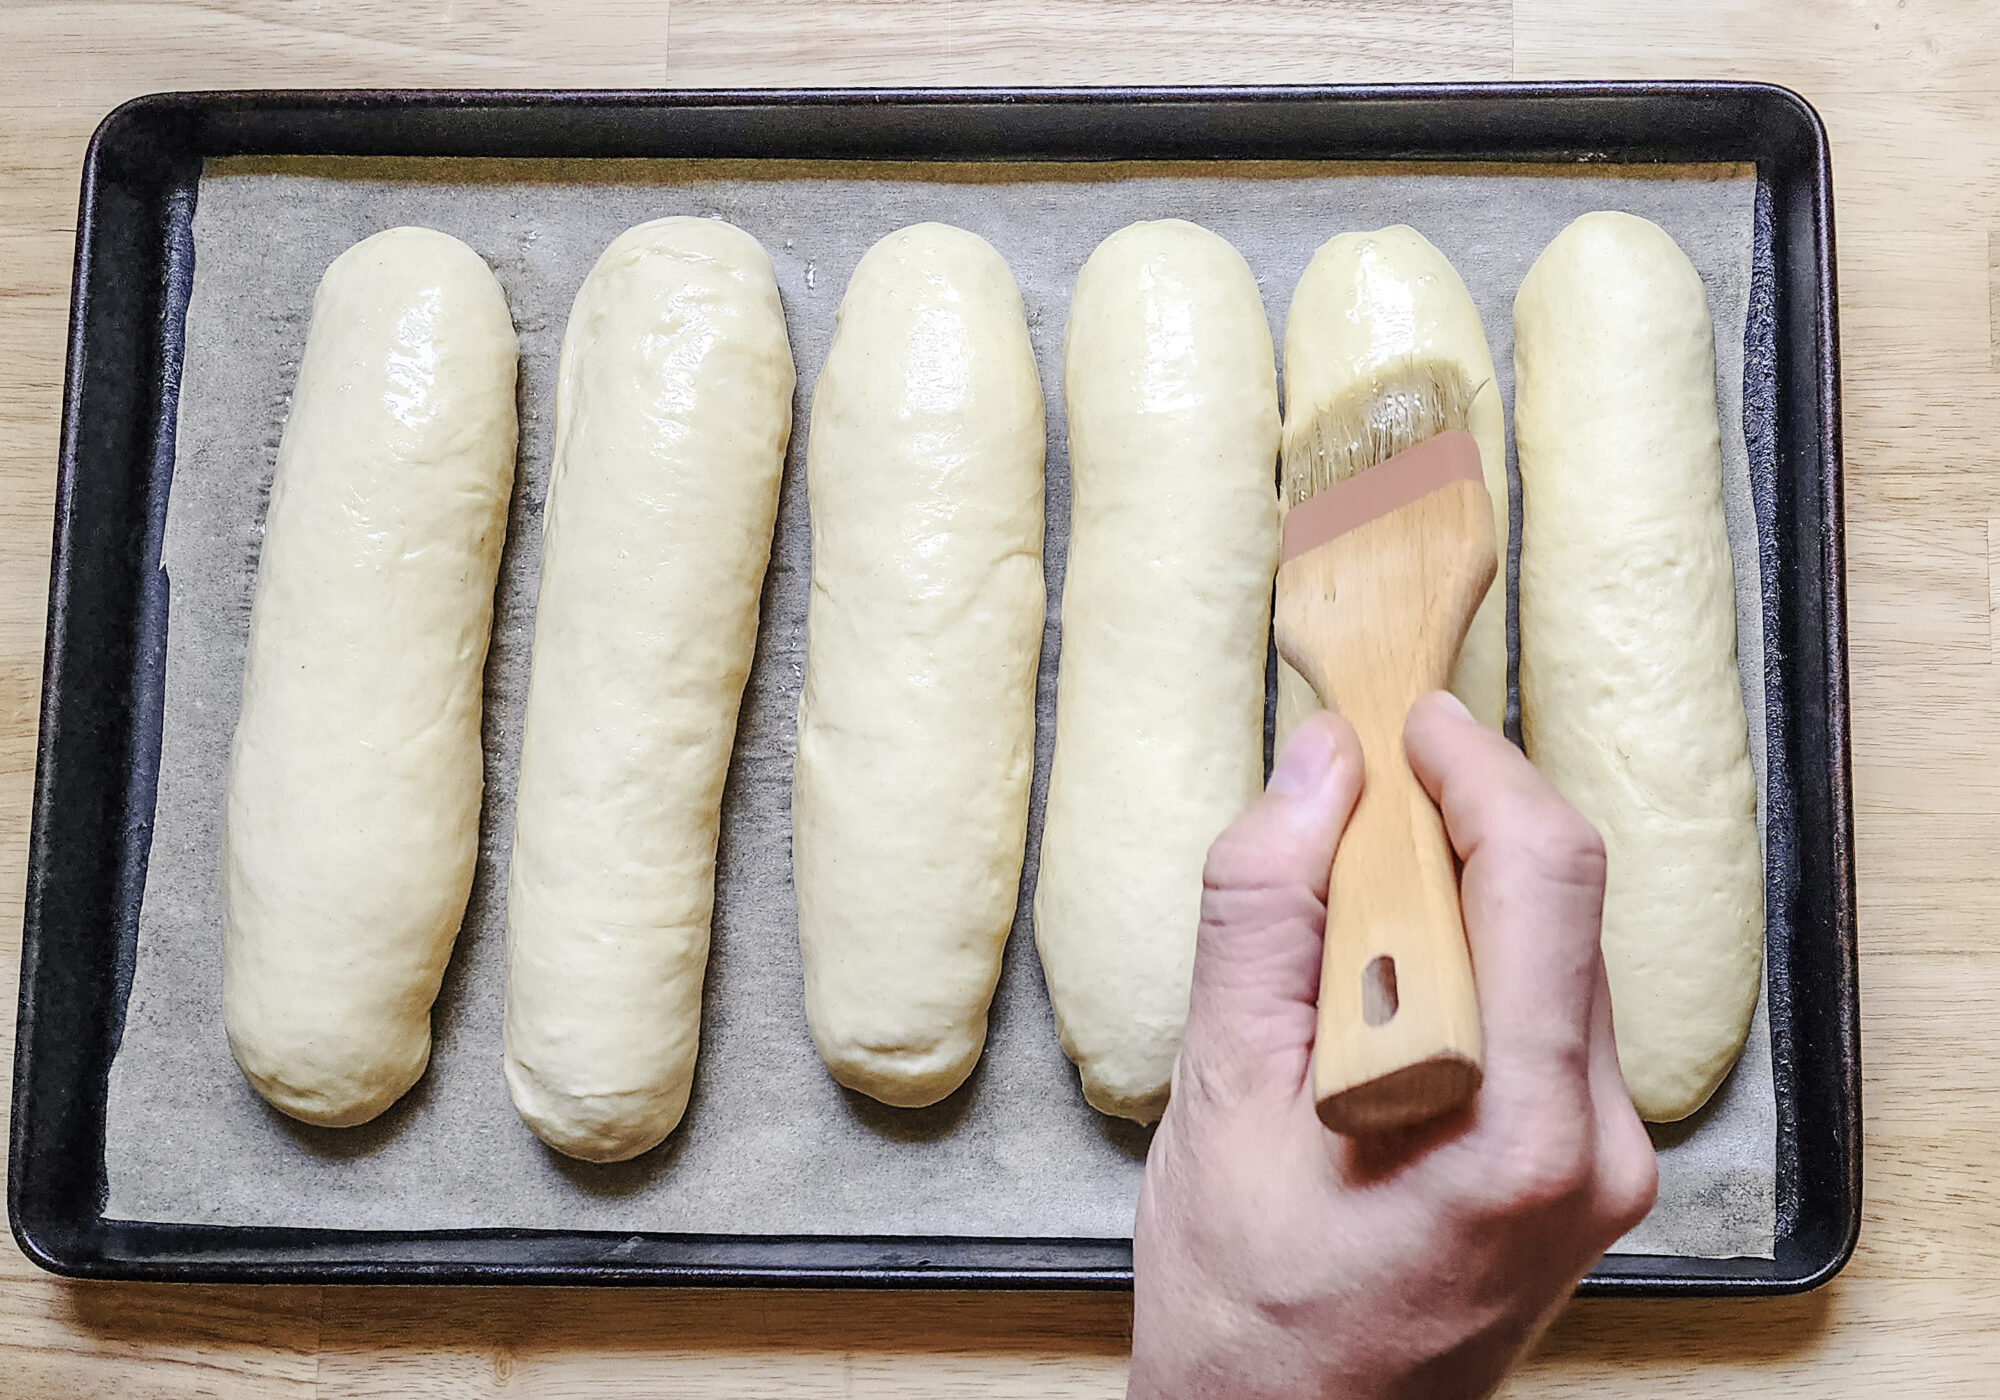
14. Brush the loaves with an egg wash of egg whites and a splash of water. 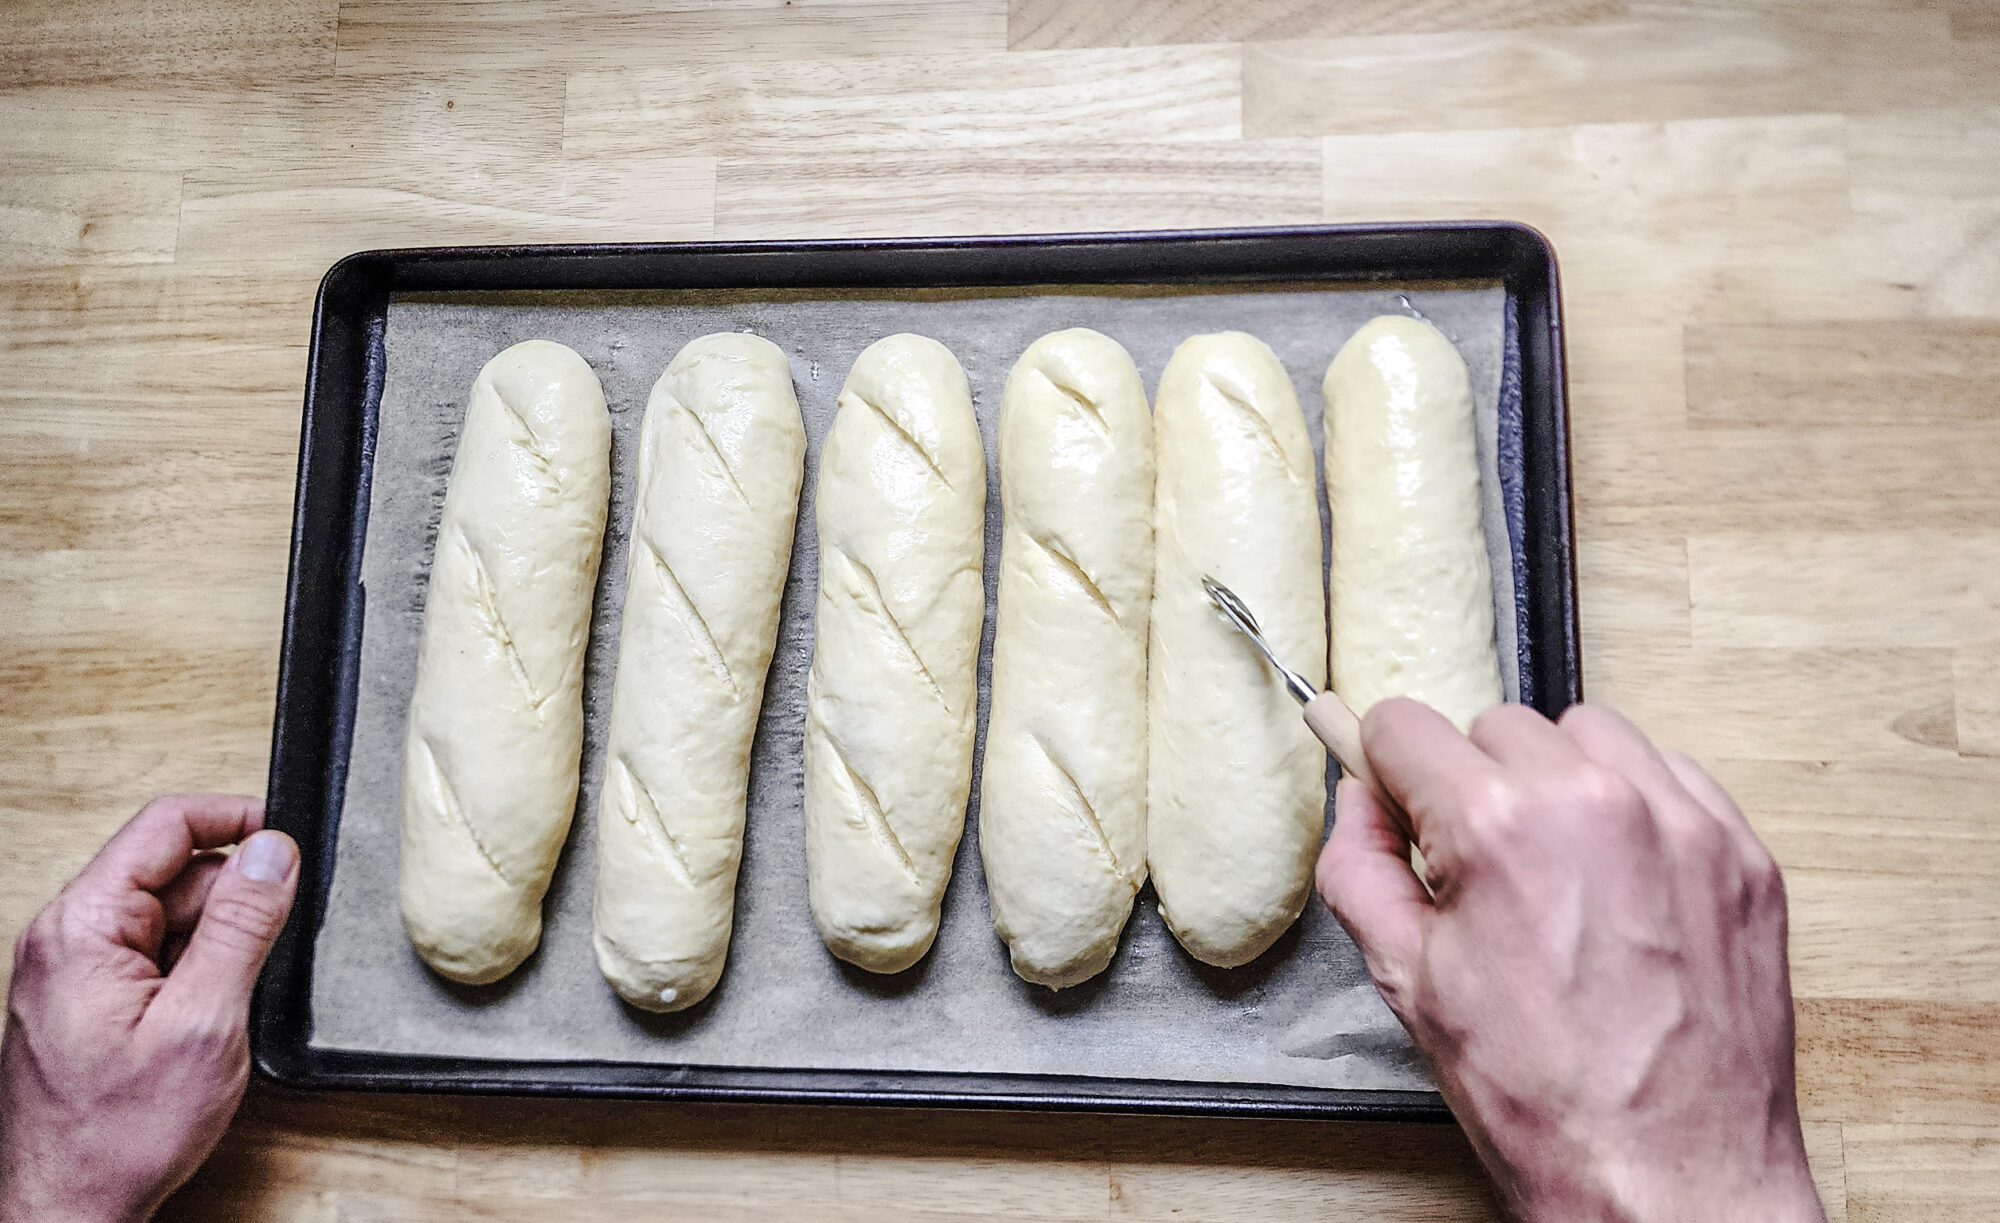
15. Score the loaves in three spots with a sharp knife or razor blade. 
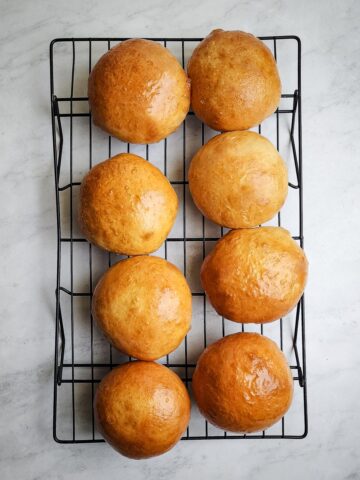
16. Bake for 15 minutes until golden brown.


Did you make this recipe for Handmade Sub Rolls?
Let me know in the comments below how yours turned out, and don't forget to leave a rating!
Recipe

Handmade Sub Rolls
Equipment
- Instant Read Digital Thermometer Optional
- Stand Mixer Optional
- Rolling Pin
- Parchment Paper
Ingredients
- 1 Cup Whole Milk 90℉
- 2 ½ Tablespoons Granulated sugar (30g)
- 2 Teaspoons, or 1 Packet Active Dry Yeast (11g)
- 3 Cups Bread Flour
- 2 teaspoon Fine Sea Salt (12g)
- 2 Eggs Beaten
- 3 Tablespoons Unsalted Butter Cold, Cubed
- 1 Egg White Beaten - For Egg Wash
- 1 Tablespoon Water For Egg Wash
Instructions
- In a medium sized bowl, add the warm milk, sugar, and yeast. Let bloom for 5 to 10-minutes until frothy.
- As the yeast mixture blooms, combine the bread flour and salt in the bowl of a stand mixer.
- Add the yeast mixture and beaten eggs to the flour and salt. Knead on low speed for 3 to 5-minutes until a shaggy dough forms, scraping down the sides of the bowl with a spatula as needed.
- Add in the cold, cubed butter, and knead for an additional 8-10 minutes until butter is fully incorporated and the dough is smooth. (The dough ball should weigh approximately 880g at this point).
- Turn the dough out onto a lightly floured work surface, and roll into a tight ball.
- Lightly grease a large bowl, turning the dough ball to coat and cover. Cover and let rest for 1-hour, or until doubled in sized.
- Turn the dough out onto a lightly floured work surface, and punch the dough down. Divide into six equal pieces (approximately 140g each) and roll into individual dough balls.
- Using a rolling pin, roll each dough ball in to a rectangle that is approximately 9-inches wide, by 5-inches tall. The dough should be between ¼ to ½-inch thick. Starting with the long side, tightly roll the dough into a loaf shape. Pinch the end seams together until they are smooth. Place seam side down on baking sheet lined with parchment paper.
- Cover dough with a damp kitchen cloth, or second baking sheet and and let rise for an additional 30 minutes.
- While the dough is proofing, preheat the oven to 400°F.
- Mix the egg white and water in a small bowl and gently brush over loaves.
- Using a lame, razor blade, or sharp kitchen knife, score the dough ¼ deep in three spots.
- Bake for 15 - 20 minutes until golden brown or they register 195 - 200°F internally on an instant read thermometer. Remove from oven and transfer to a wire rack. Allow them to cool completely before slicing.


Marcela says
Hello, I have a question, I would love to make these rolls but would like to know how much would the 3 cups of flour be in weight? please. thanks!
Spencer Klickman says
Hi, Marcela! If you click on the "Metric" button next to the "ingredients" on the recipe card, it should automatically provide you with the weight in grams! Please let me know if this doesn't work for you.
This recipe uses 450 grams for 3 cups of bread flour, which comes out to about 150g per cup. This is a touch heavier than the "average" recommended weight per cup that King Arthur flour states. The weight called for in the recipe is based off of actual measurements that I've taken in my kitchen. Hope this helps, and please let me know how these turn out!
Irene says
Such a wonderful recipe! I've tried several hoagie roll recipes and haven't found the one I like until now. This was pillowy soft and perfect. I used them with my Italian beef to make Italian beef sandwiches and they were a hit. Only thing I did differently was added 1/2 cup more bread flour like the other comments say and it was perfect. This will now be my go to hoagie recipe!
Spencer Klickman says
Thanks for the kind words, Irene! So glad to hear that they turned out well for you!
Sherriann P says
Have tried this recipe twice! Both times have been great, but my 2nd time they didn’t seem to rise well, any tips for getting them to rise more? But they taste great!
Spencer Klickman says
Hi Sherriann! Thank you for trying out the recipe, glad to hear you enjoy them!
A few things to look out for to make sure these rise well:
- Ensure you are using active/viable yeast. If the yeast doesn't get visibly frothy/bubbly within 5 to 10 minutes of mixing it with the warm milk and sugar, I would recommend getting a new jar of yeast.
- Ensure the milk temperature is warm, but not too warm. Aim for at least 90°F, up to 110°F. Too cold, and the yeast will be sluggish, but anything over 120°F will likely kill the yeast.
- Room temperature is also important during proofing. Colder temperatures can slow down proofing/rising times. My average room temperature is around 70 - 72°F throughout the year, and that is usually adequate. If the dough hasn't doubled/proofed to the recommended size, simply waiting an extra 20 to 30 minutes can do the trick. You can also try keeping the dough in the oven with the light on to create a warmer proofing environment - just take care to not pre-heat the oven with the dough in it!
- Hot oven temperatures also help with oven spring, (this is the final rise that takes place when you bake the dough). Actual oven temperatures can vary widely from what they're set to. I believe most ovens can be calibrated to correct this issue (unless something is broken, of course.)
doubled/proofed to the reccommended size, simply waiting an extra 20 to 30 minutes can do the trick. You can also try keeping the dough in the oven with the light on to create a warmer proofing environment - just take care to not pre-heat the oven with the dough in it!
- Hot oven temperatures also help with oven spring, (this is the final rise that takes place when you bake the dough). Actual oven temperatures can vary widely from what they're set to. I believe most ovens can be calibrated some to correct this issue (unless something is broken, of course.)
Please let me know if any of these tips are helpful! Would love to hear if any of these improve your results.
Erin says
Added about 1/2c more flour and these were perfection! Delicious and so light! I made meatball subs with mine and printed the recipe for my keeper binder!
Spencer Klickman says
Thanks for the review, Erin! So glad you enjoyed the recipe.
Janis Hurkes says
wonderful recipe! I find I did have to add more flour the second time though. 1st time added 3 c.(approx 420 grams) a/p flour and dough was really "moist". rolls were still awesome though. 2nd time added 1/2 c more flour and turned out easier to shape. I do use a bread machine to knead the dough. recommendation for someones post (who had trouble incorporating the butter) maybe trying freezing the butter and grating it instead of cubing) just a suggestion to try as this is definitely a recipe to keep. thank you for a recipe ALL my family loves already!
Spencer Klickman says
Hi, Janis! So glad to hear you enjoyed the recipe!
Freezing and grating the butter is a really great idea - I'll have to test that out next time I make these.
Maggie Rhyne says
I’m on a homemade bread bender & when I saw a girl make your recipe on a social media channel I had to make them. They turned out pretty good for my first time, next time I hope to improve and have them more pillowy. They were excellent for meatball subs and will likely go in my weekly rotation 🙂
Julia K says
So I will probably be getting an engagement ring after making these sandwiches for my partners family kayaking trip. These are THE BEST. I have never made a better bread, I was SO impressed. I made these into an herb and cheese bread and oh my. So soft and pillowy. Make these! I will be making again today! Twice in a week!
Spencer Klickman says
Thanks so much for the review, Julia. Keep us posted on the engagement status haha!
Lindsey says
Made these today . Absolutely delicious. Has a nice soft buttery taste . What’s the best way to store these and how long can I store them ?
Spencer Klickman says
Hi, Lindsey, so glad you gave the recipe a try!
I store them in a ziplock bag once the rolls are completely cooled. Since these don't have any preservatives, they'll only be fresh for about 2-3 days and will start to go stale quicker than store-bought bread. Another option is to store them in the freezer, then thaw them out at room temperature for a few hours before ready to use them again. Hope this helps!
Abby says
So good! I doubted these after I shaped them because they didn't seem to rising enough. But they really puffed up while baking. Thanks for the recipe, will definitely be making again.
Spencer Klickman says
Hi, Abby! So glad hear that they turned out well for you. Thanks for giving this recipe a shot!
Lissette says
So delicious! I made this recipe for my own meatball sub sandwich and.. oh. my. lord! This hit the spot! One of the best breads Ive ever made! Soft, durable, and a little sweet. Just amazing!
Spencer Klickman says
Hi, Lissette! So glad you gave this recipe a shot, and I appreciate the kind words!
Curtis Young says
First time making these sandwich rolls and they came out perfect. Only change I made was substitute 1-1/2 table spoons local honey for some of the sugar.
Spencer Klickman says
Glad to hear it, Curtis! Honey is a great idea, and will have to try that the next time I make these.
Taz says
I have now made these several times. I cheat a little and use a bread machine on the dough setting. We love these for hoagies, philly cheesesteaks, burgers, and more. Thank you for a great recipe..
Spencer Klickman says
Thanks so much for the feedback, Taz! I really appreciate the kind words, and I'm so happy to hear that you and your family like this recipe so much!
Claudette Palakiko says
I don't have a stand mixer so I did it by hand but the cold butter part turned out messy. It seeped out of the dough and leaked everywhere. Not sure what I did wrong
Spencer Klickman says
Hi, Claudette! Sorry to hear about the troubles. It sounds to me like the butter wasn't able to fully incorporate into the dough and ended up separating. How long did you knead the dough for? With the high amount of butter called for in this recipe, I can see hand kneading taking a very long time to fully mix in.
Claudette Palakiko says
Ok...definitely will try again. I also live in Hawaii so it's hot and humid so not sure if that makes a difference but thank you for responding.
Spencer Klickman says
Thanks for the info Claudette - the ambient temperature can definitely have an impact on the final outcome. If you feel the butter start to melt before it gets a chance to incorporate into the dough, I would throw everything in the fridge for 5 to 10 minutes to let the butter firm back up, and repeat until you have a smooth dough and the butter is incorporated.
Please let me know how these turn out if you try them again!
Anna says
I have a bread machine also. Did you follow the recipe or did you make any tweaks to it?
Thanks