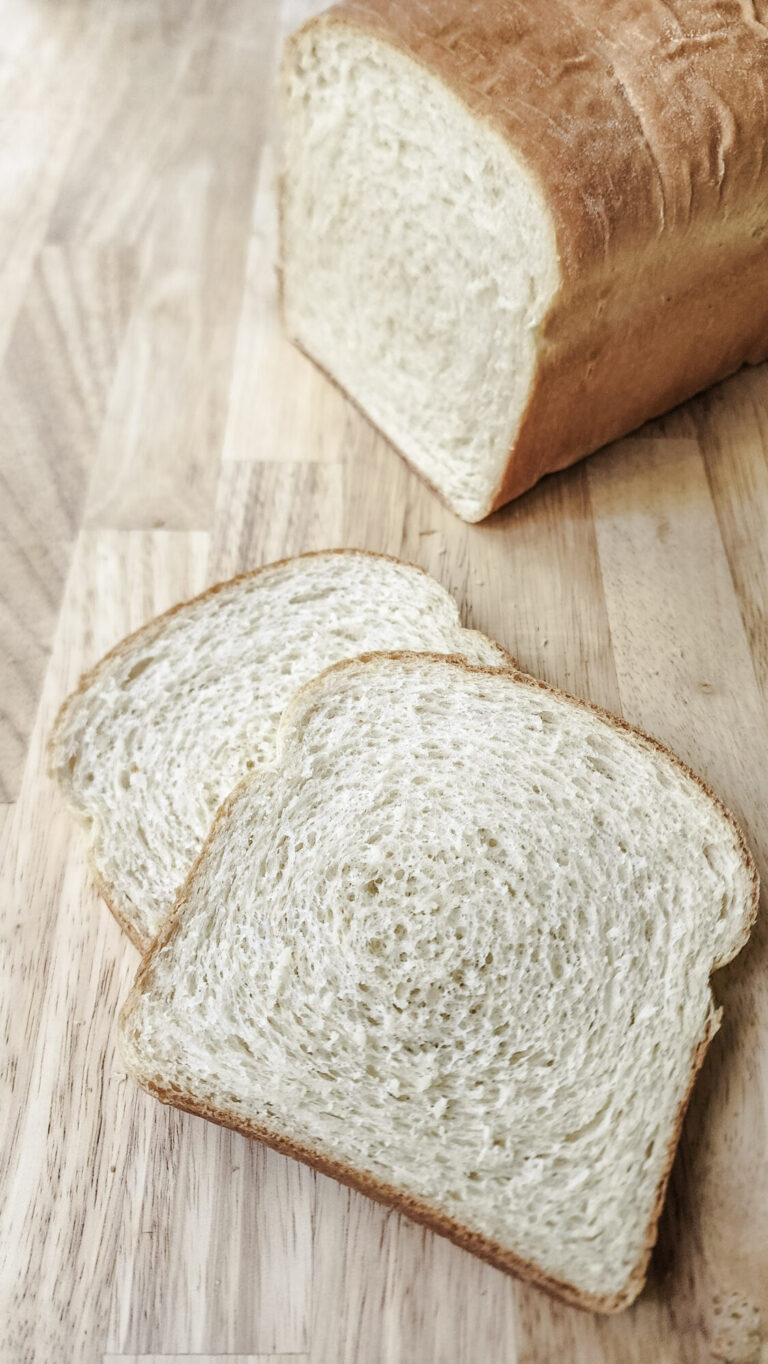
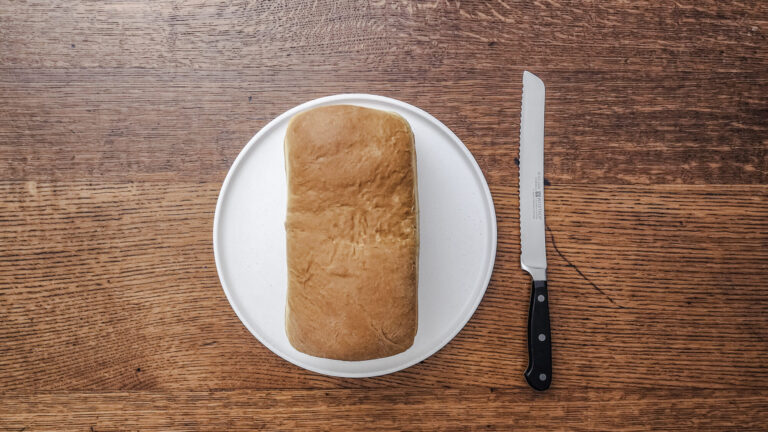
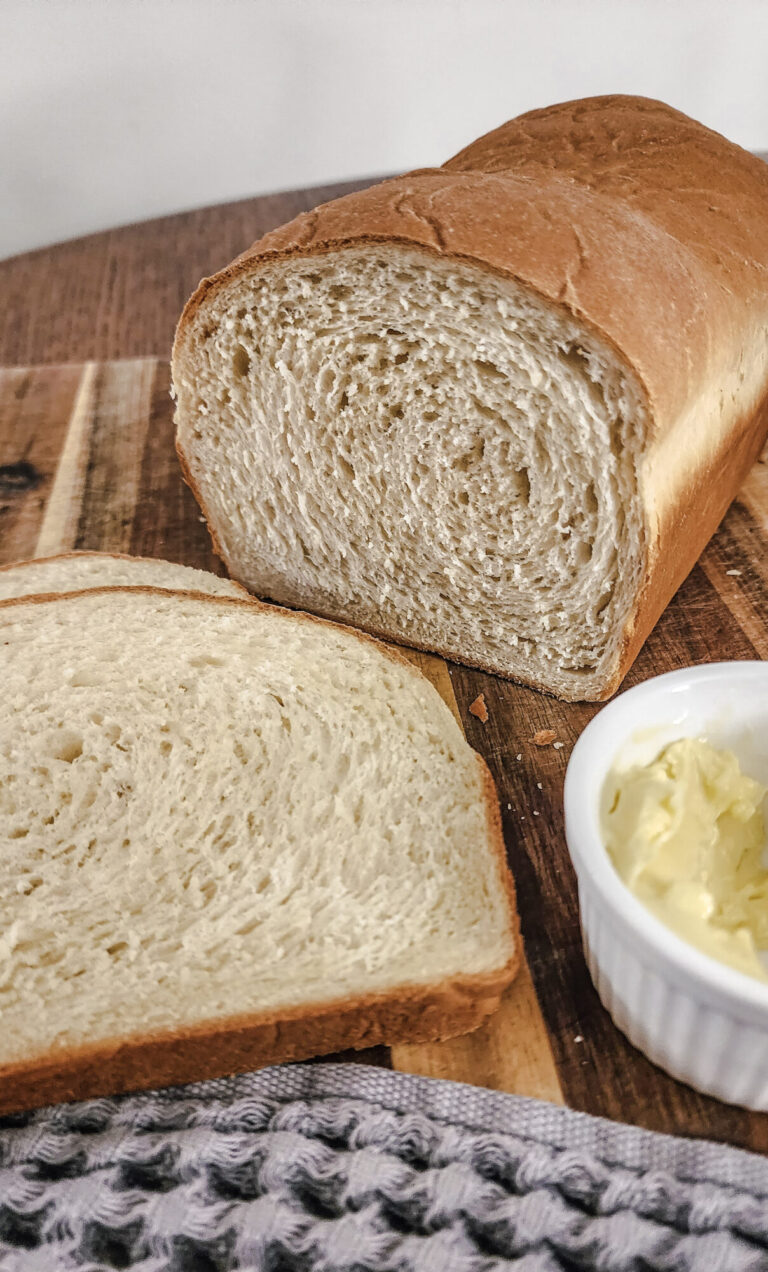
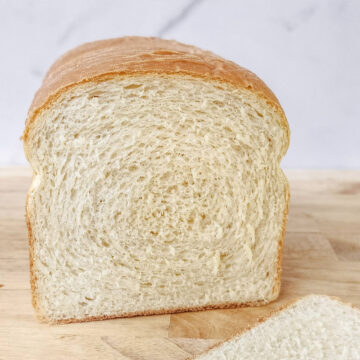
This Perfect Homemade White Bread is a favorite of my whole family. It's super soft, buttery, fluffy and has just a hint of sweetness. It's perfect for sandwiches, toast with butter and jam, or just on it's own with butter and a small pinch of salt.

The best part about this recipe (besides how delicious it is!) is that you only have about 15 to 20-minutes of active, hands-on time. The rest of the time commitment is to allow for proofing (or rising), which is totally hands-off.
There is a legendary bakery on the south side of Chicago called Wolf's Bakery. They have been in business since 1939, and are well know for their butter cookies and lemon fluff cake. My favorite was their simple white bread. It was so flavorful, and was like nothing else that you can get from the grocery store. My mom's side of the family is from Evergreen Park, where the bakery is located and still operating.
When I was eight years old, my Oma and Opa (German slang for Grandma and Grandpa) moved in with our family which was several towns over. They would make special trips back to Evergreen Park on the weekends just to pick up some of their butter cookies and several loaves of the white bread. It was always a special treat to have this bread in the house. This recipe is the closest I have come to replicating it, and I am so excited to share a small piece of my childhood with you!
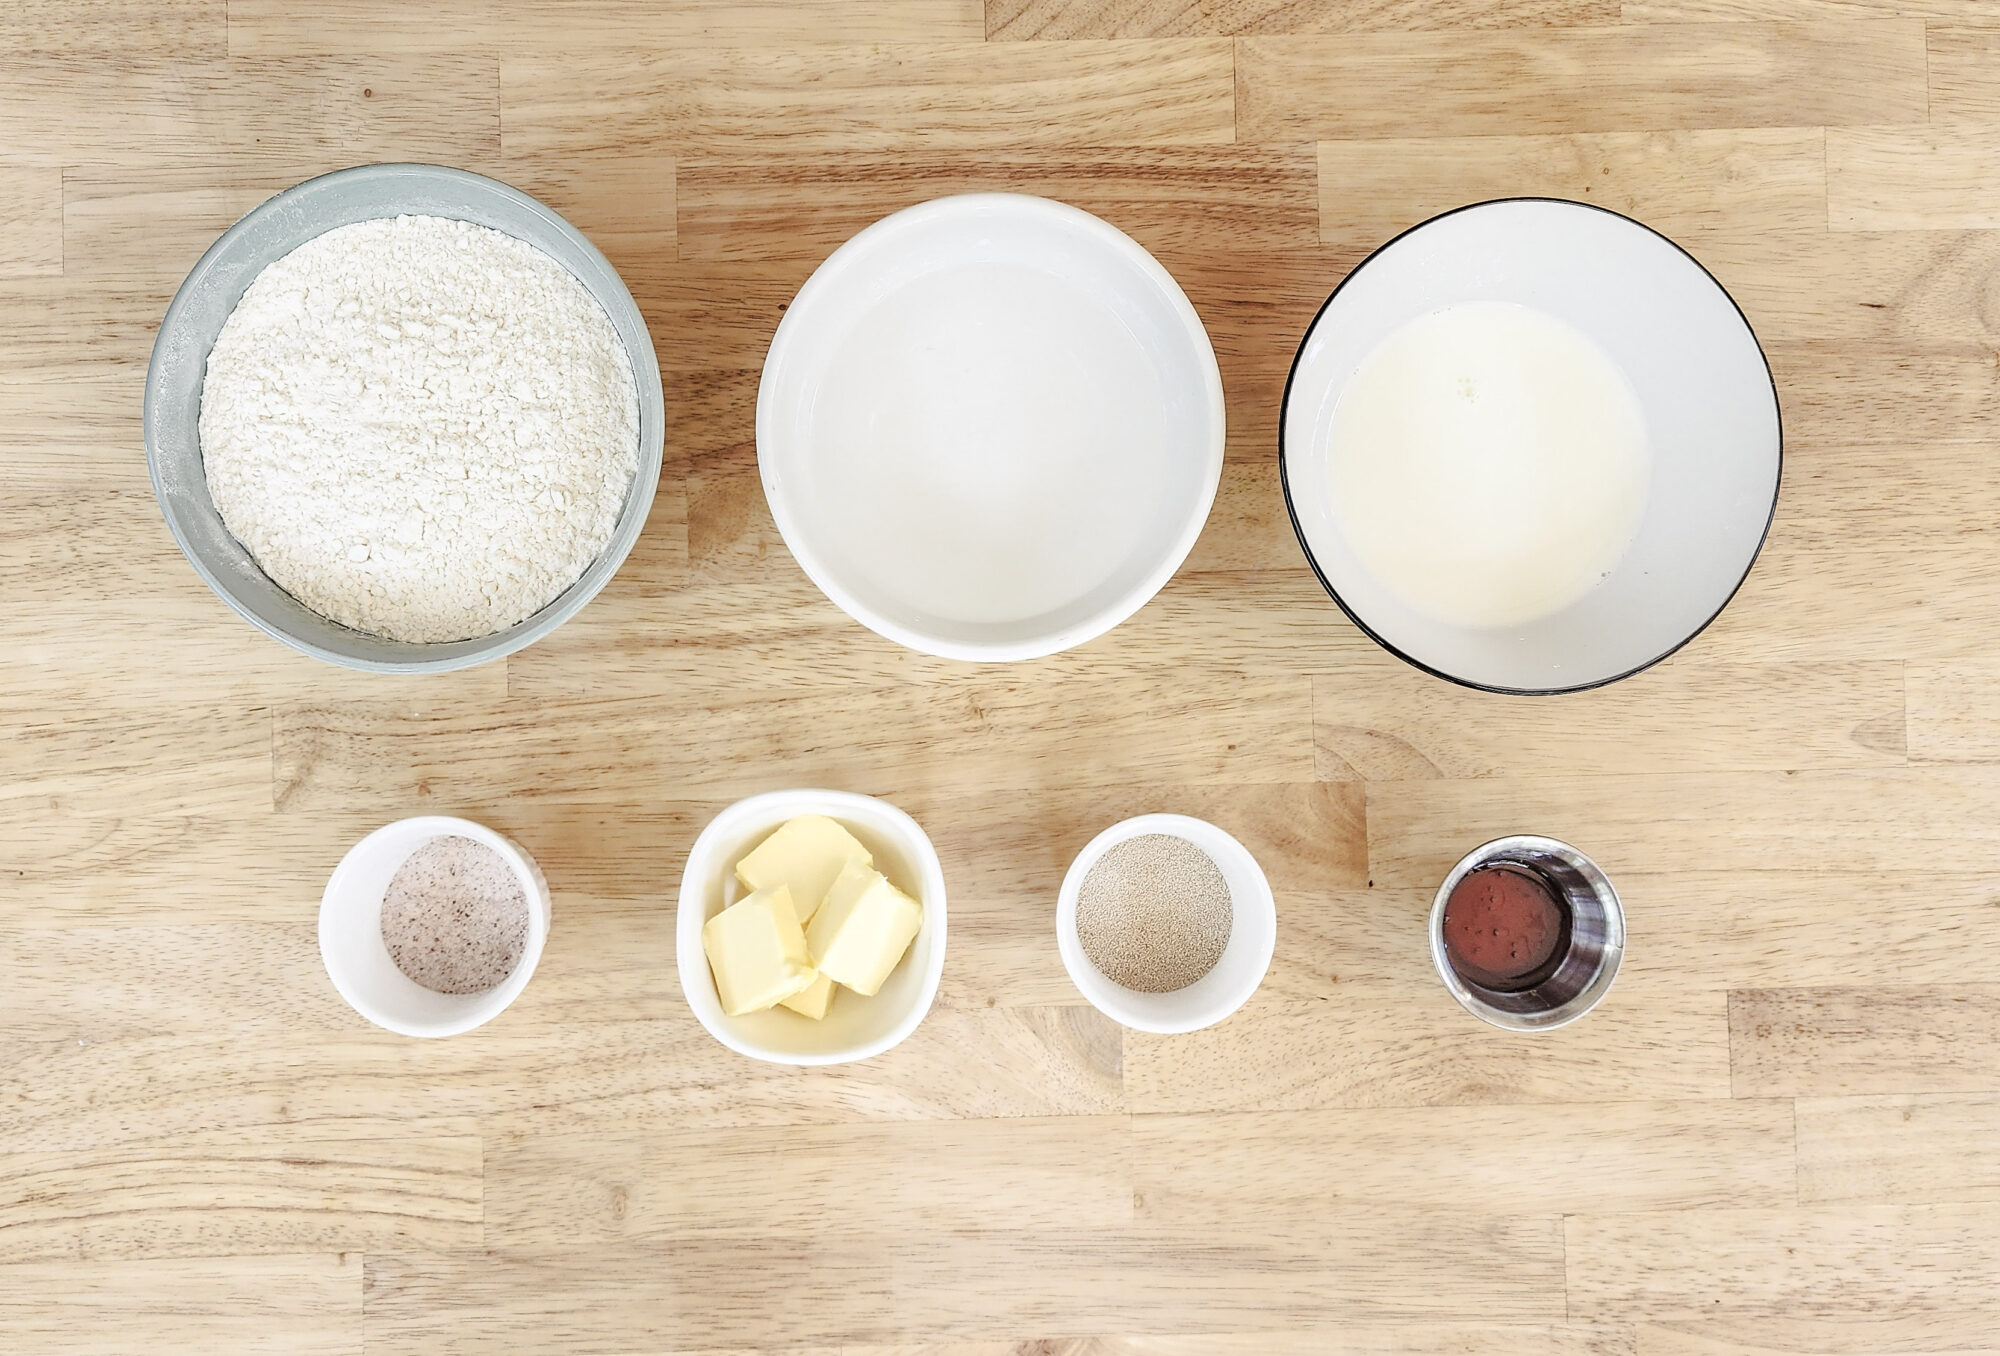
White Bread Ingredients
This white bread uses all purpose flour, water, whole milk, honey, salt, unsalted butter, and active dry yeast. I'm not much of a gambling man, but I would venture to guess that you probably have most of these items on hand already. You can substitute the honey for the same amount of granulated sugar if desired. I believe that the honey adds the perfect amount of sweetness and just a hint of extra flavor that's missing if you use plain sugar.
Begin by combining the warm water, and milk and heat until it reaches 90°F. Remove from the heat and add your honey and yeast, stirring until it's combined. Allow to bloom for 5 to 10-minutes.
While the yeast is blooming, whisk the flour, and salt in the bowl of the stand mixer. Once the yeast is proofed, add the yeast mixture to your dry ingredients, and combine on medium-low speed. Scrape down the sides of the bowl as needed. After mixing for several minutes, a shaggy dough will begin to form. Turn the speed up for several more minutes to begin kneading and developing the gluten network. This is a fancy term for the long-chain sugar network that provides structure for your dough - this is very important for your proofing or rising. Add the softened butter one tablespoon at a time and knead until completely incorporated, and smooth.

White Bread Proofing and Shaping Process
After mixing, the dough is ready to rise, or proof. This dough goes through two proofs. One initial bulk proof, then a second proof in the loaf pan to give us our shape and final texture.
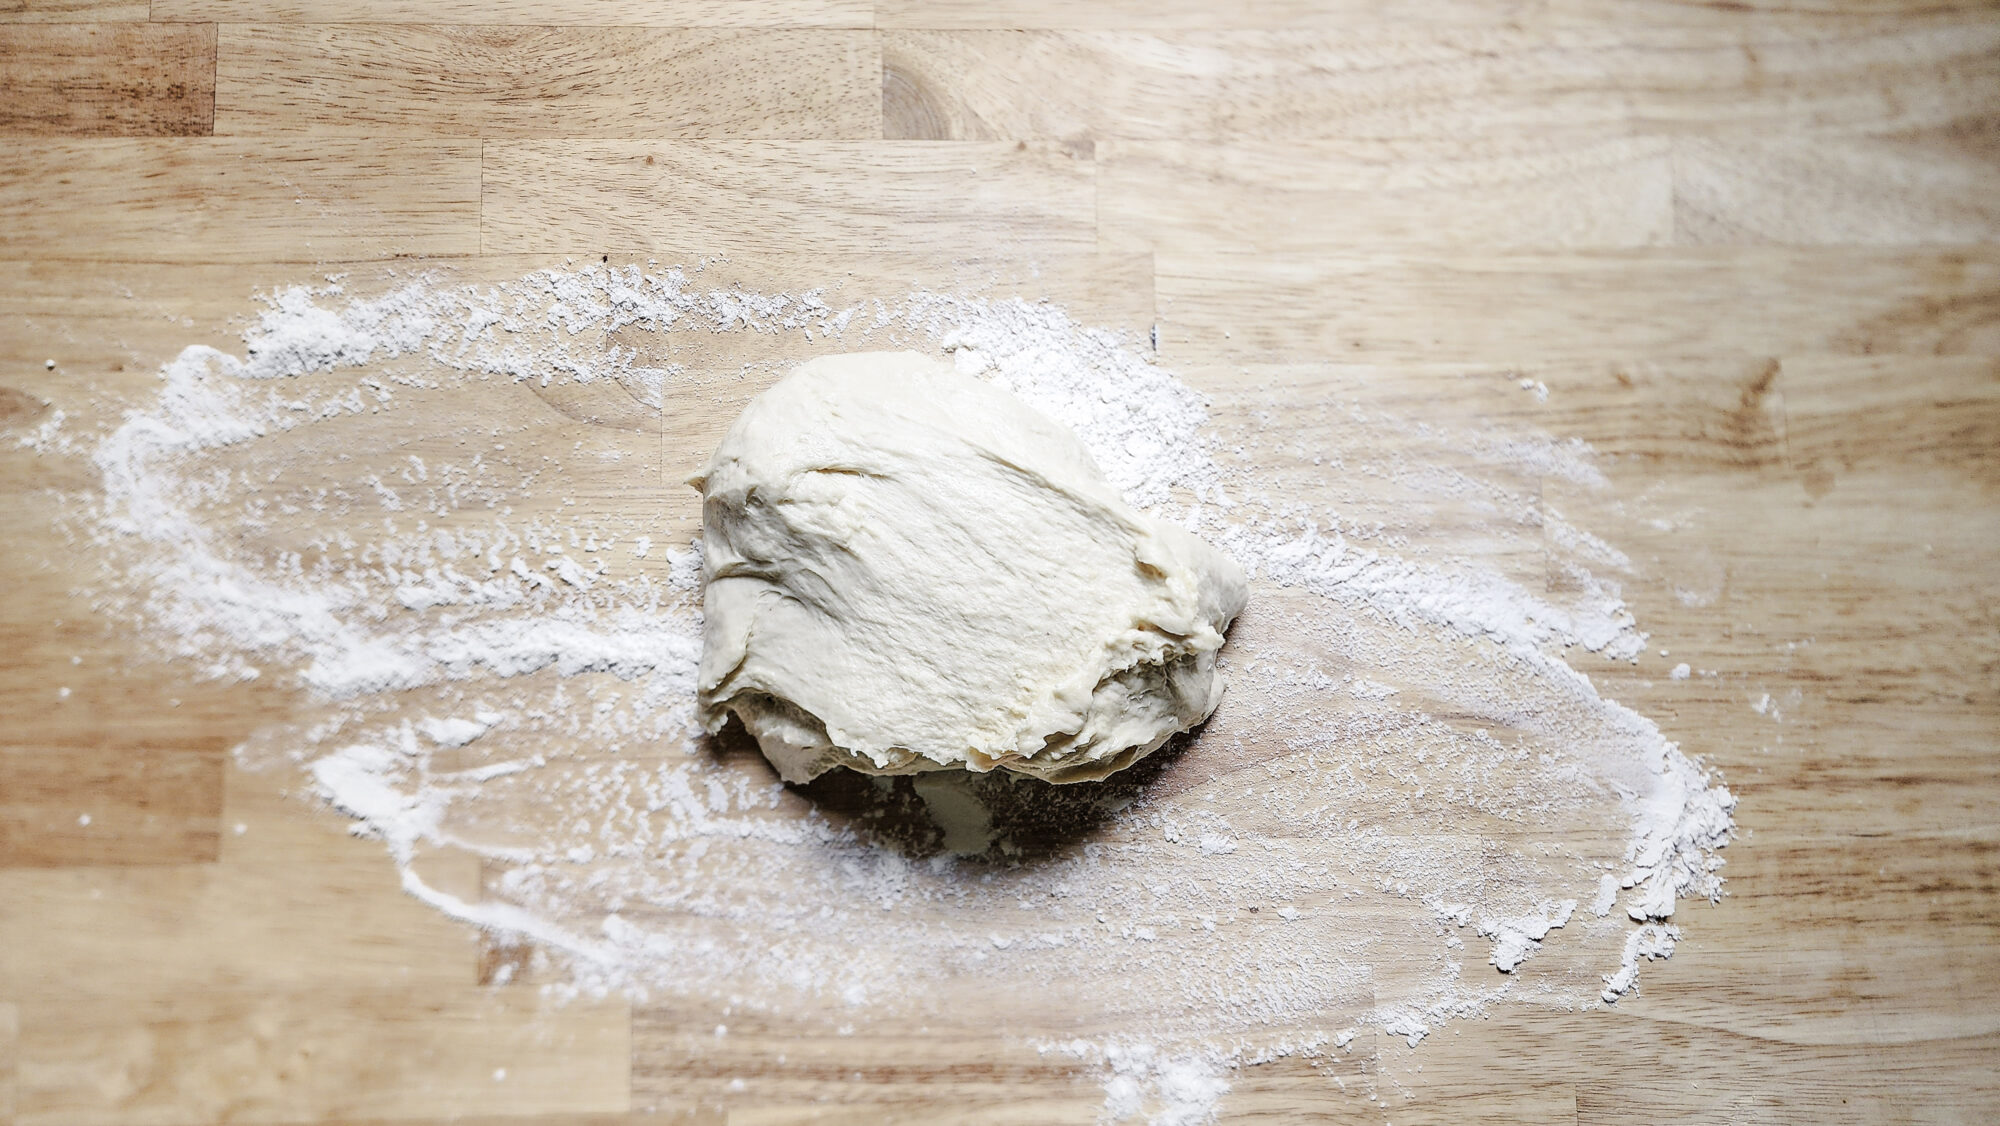
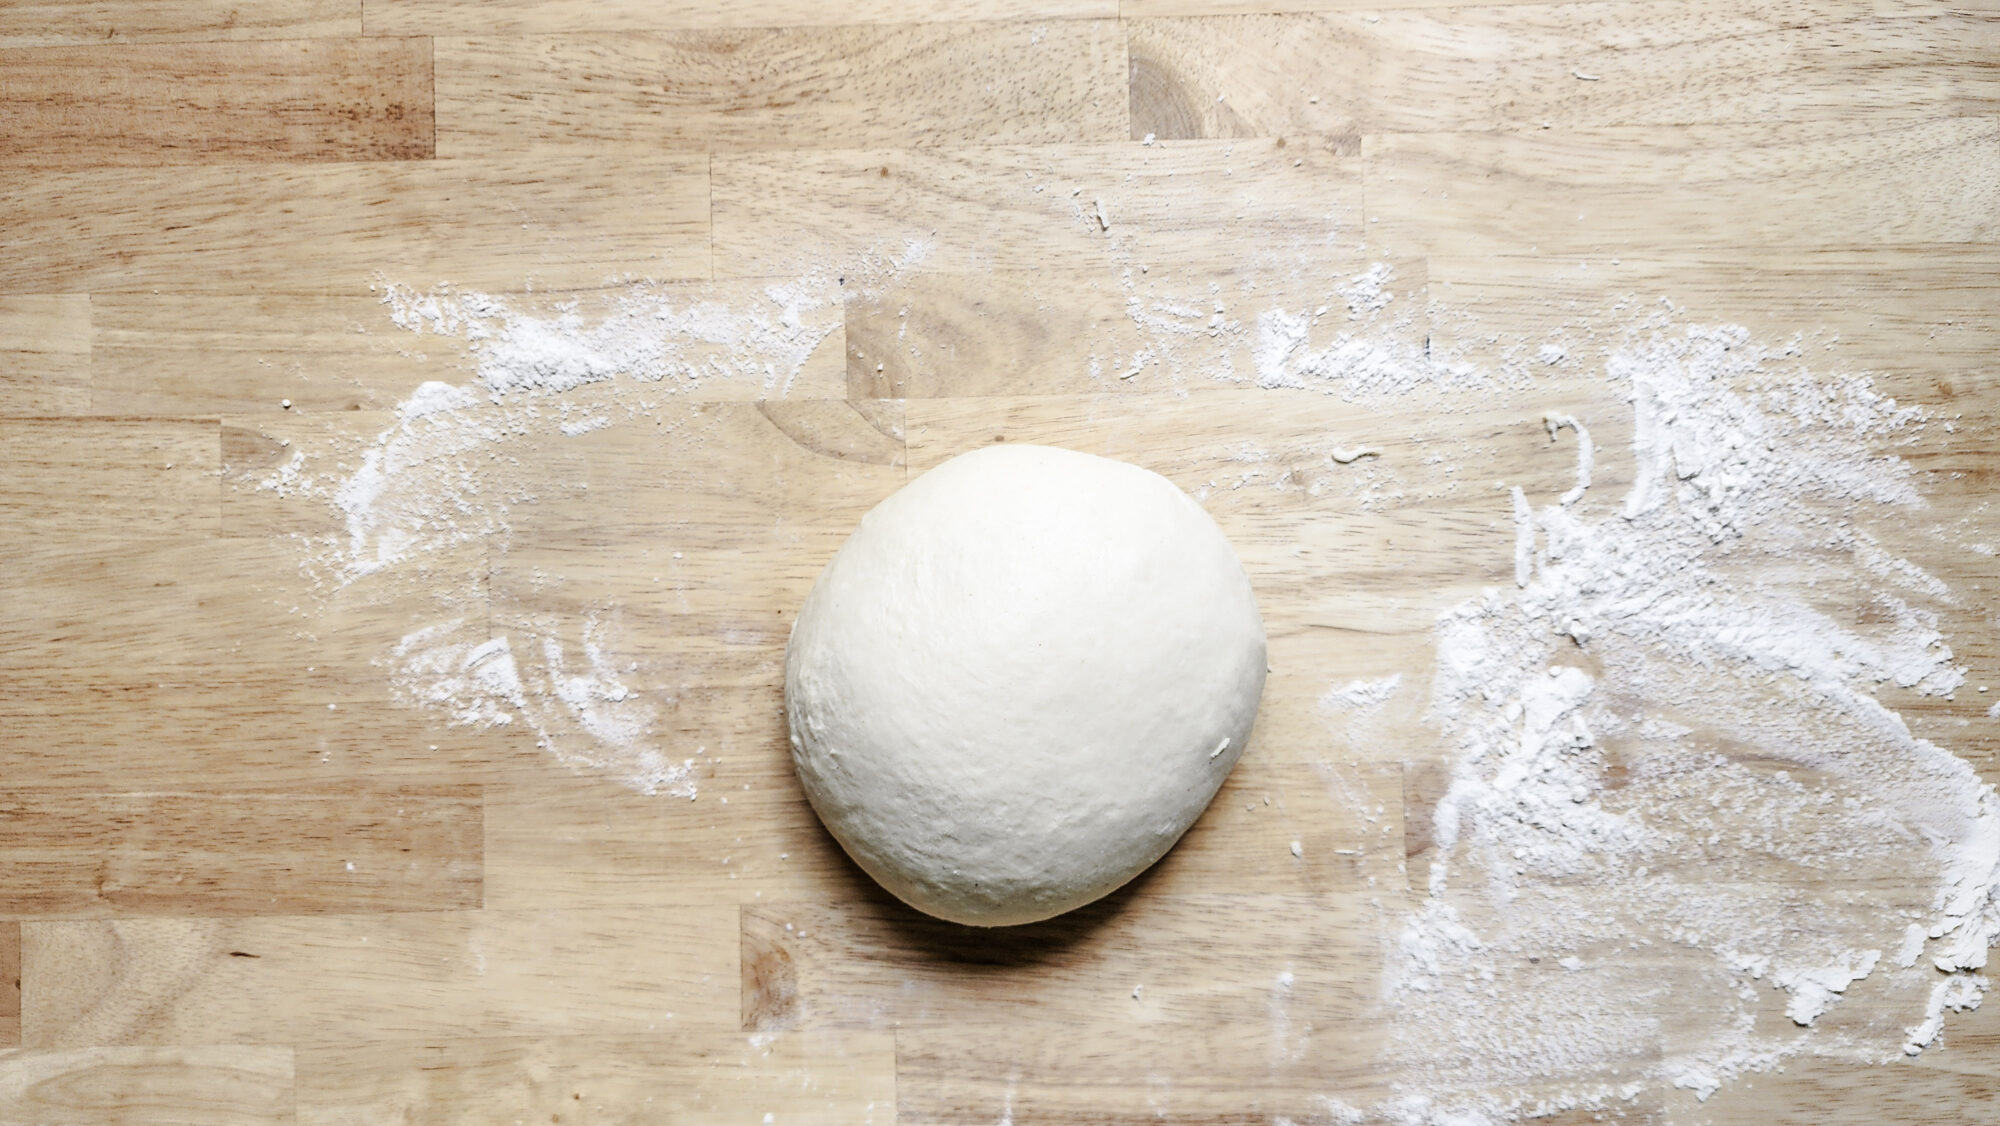
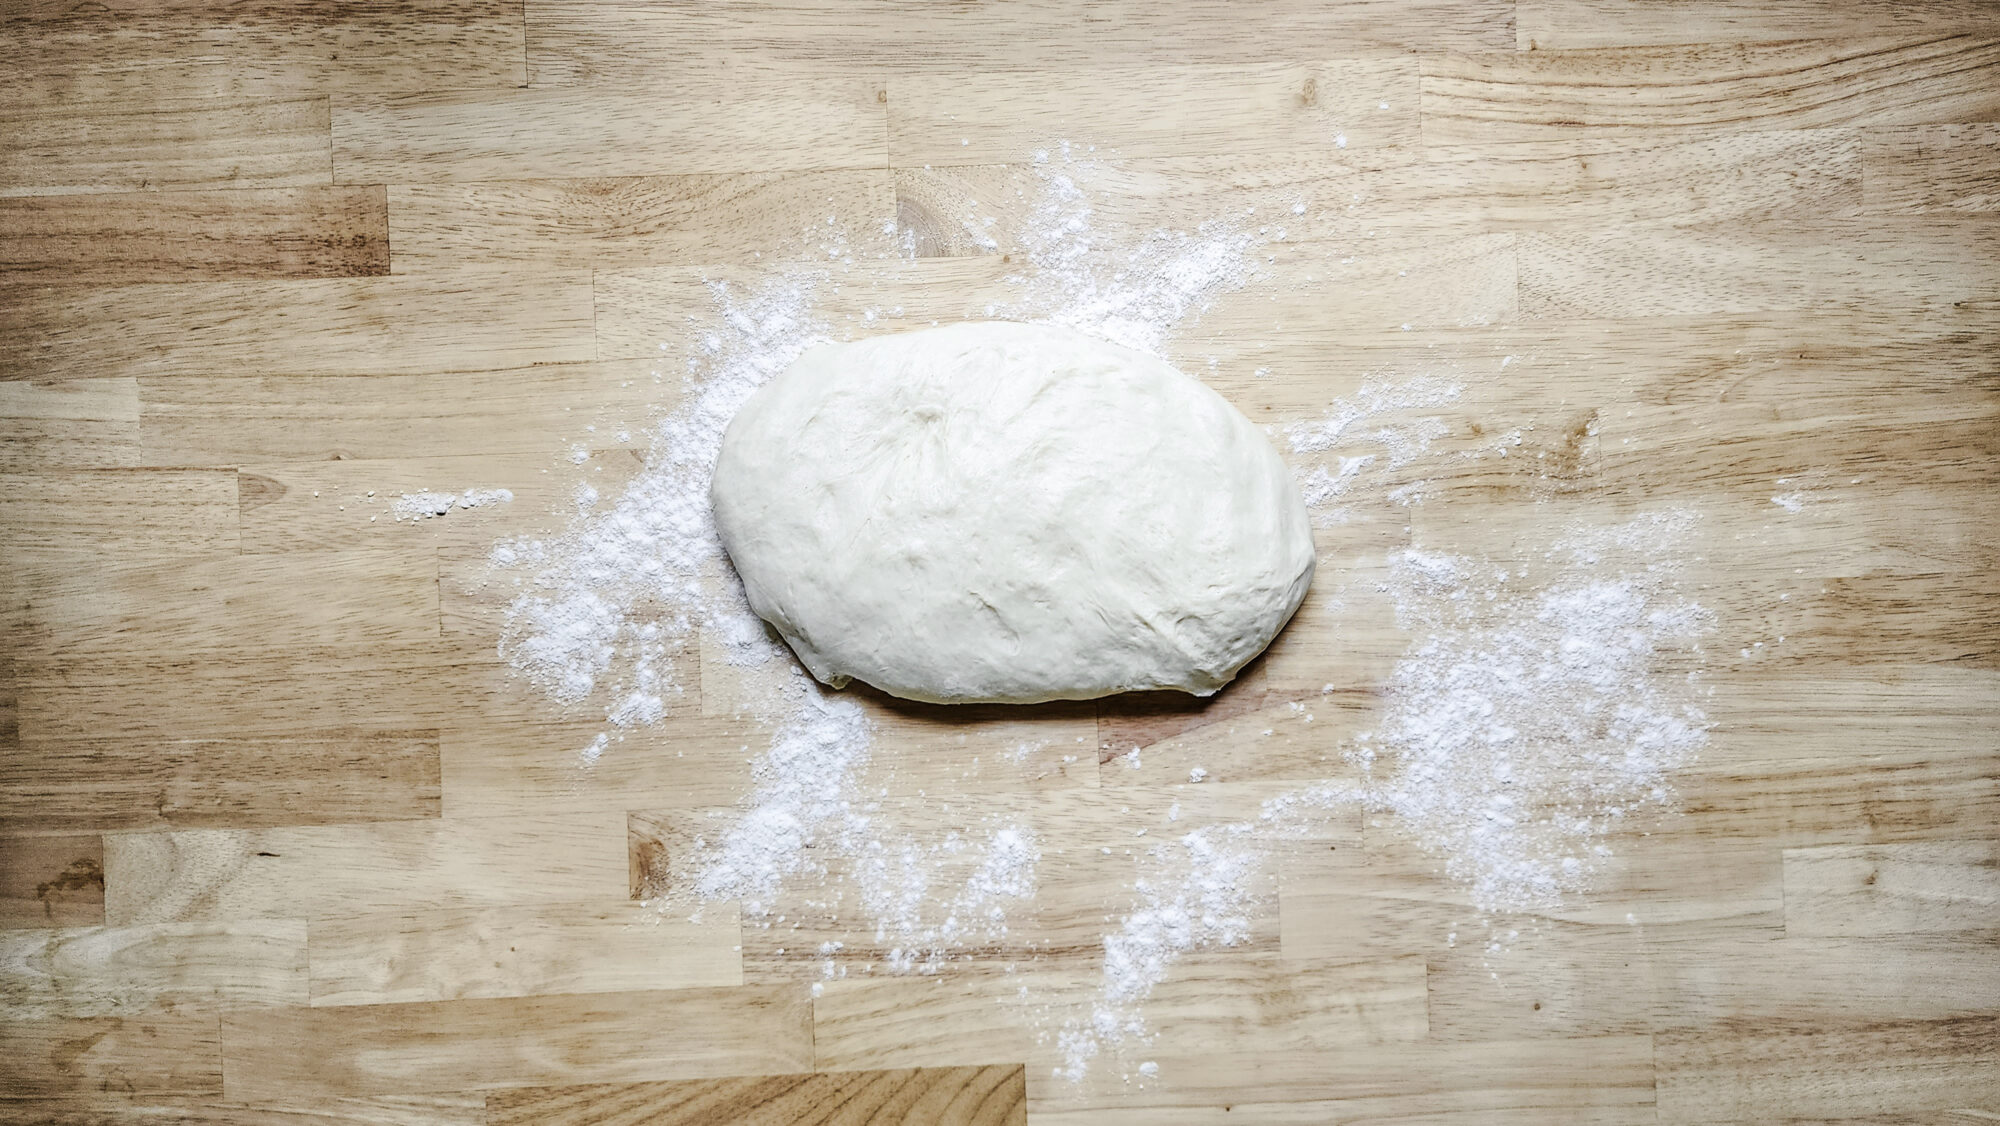
The dough starts in the stand mixer and then it is transferred to the countertop to "stretch and fold" and to "pre-shape". The "stretch and fold"/"pre-shaping" steps help develop gluten as mentioned above, and to create a very smooth dough ball. The smoother your dough ball is at the start, the easier the final shaping will be.
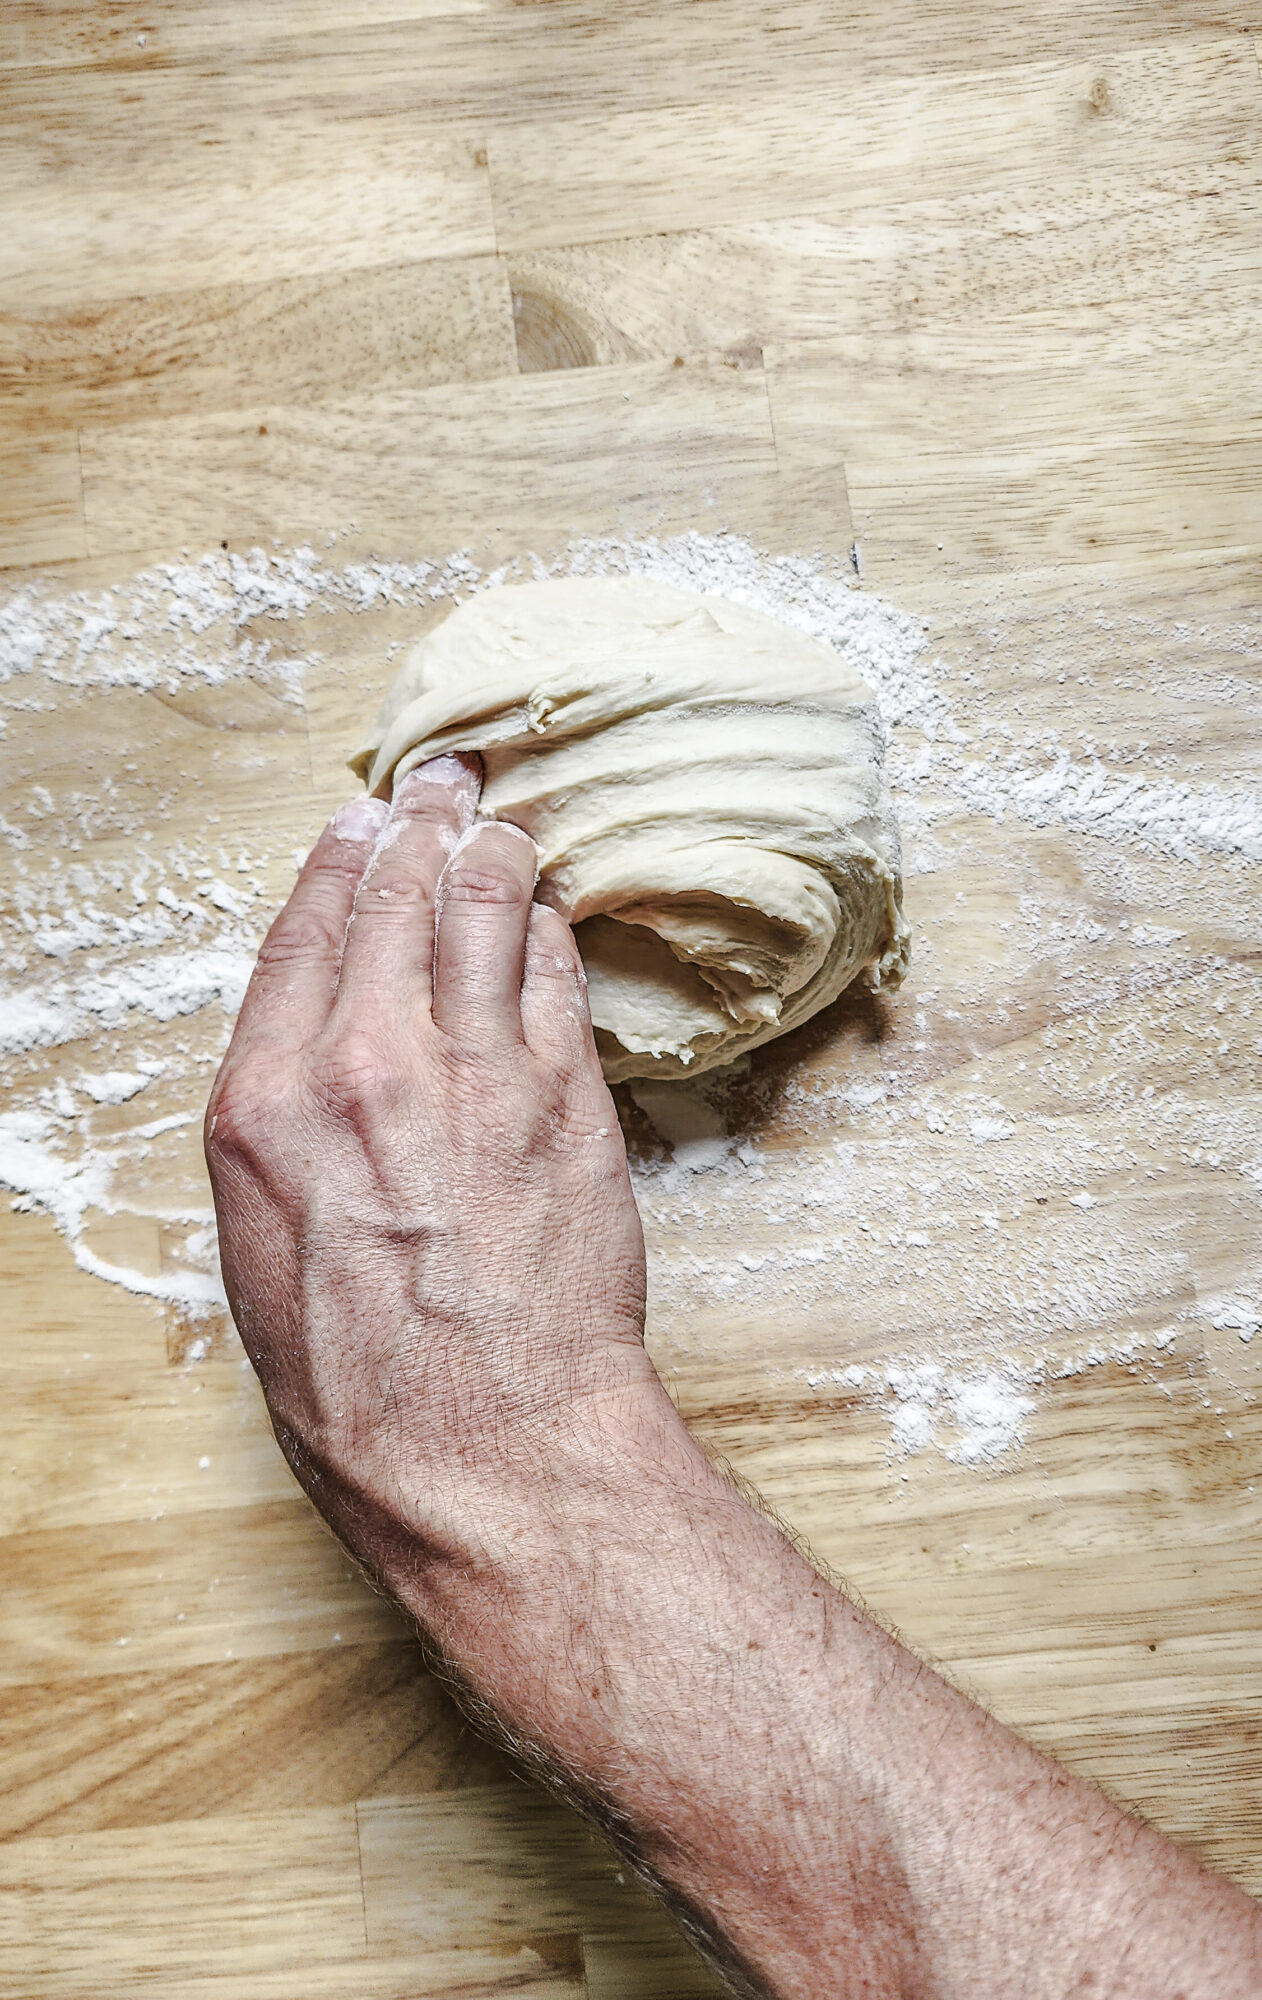
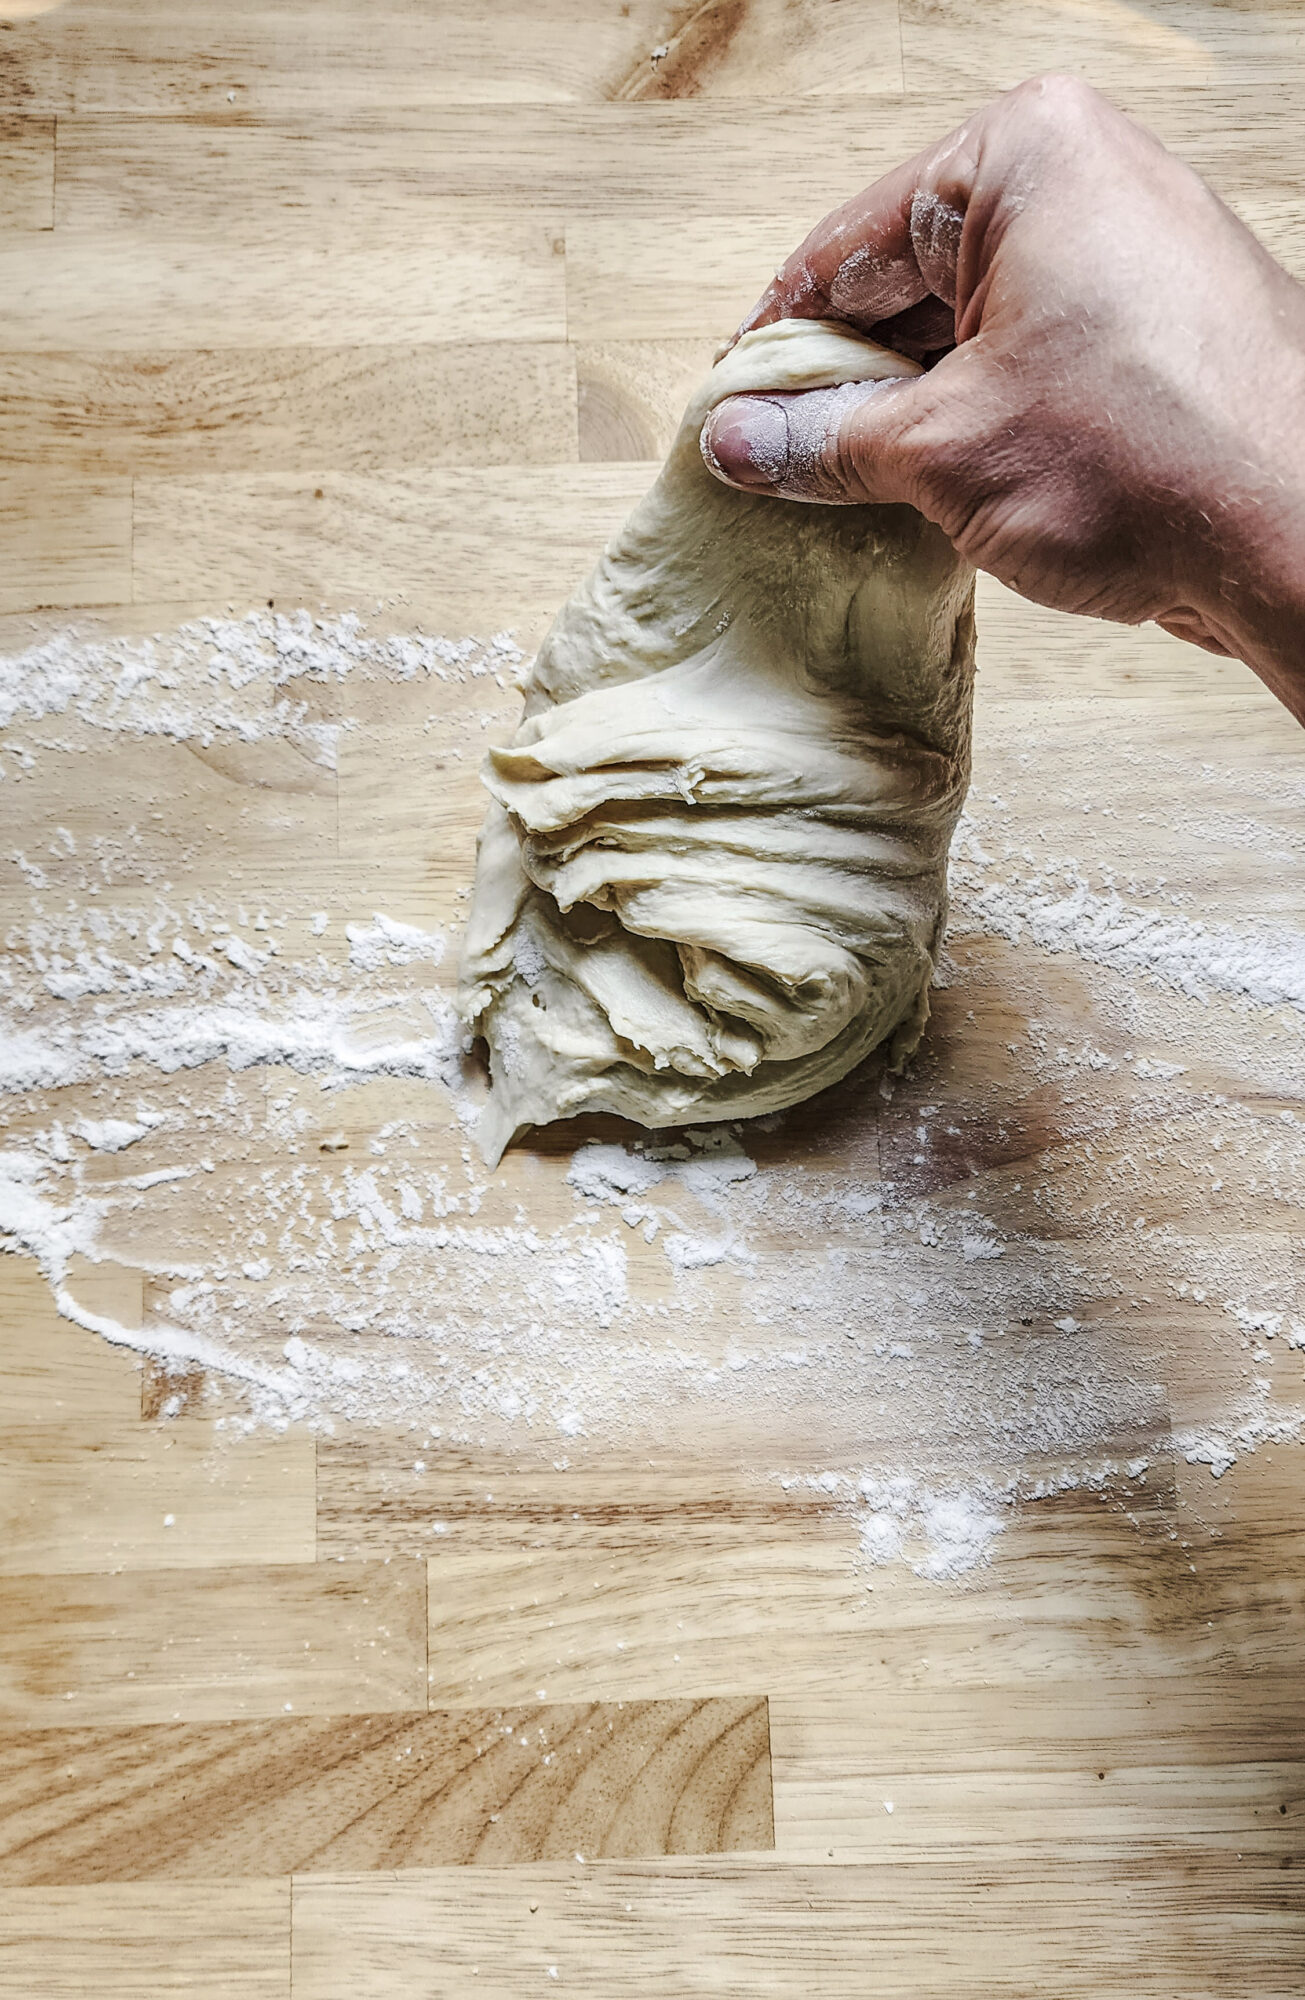
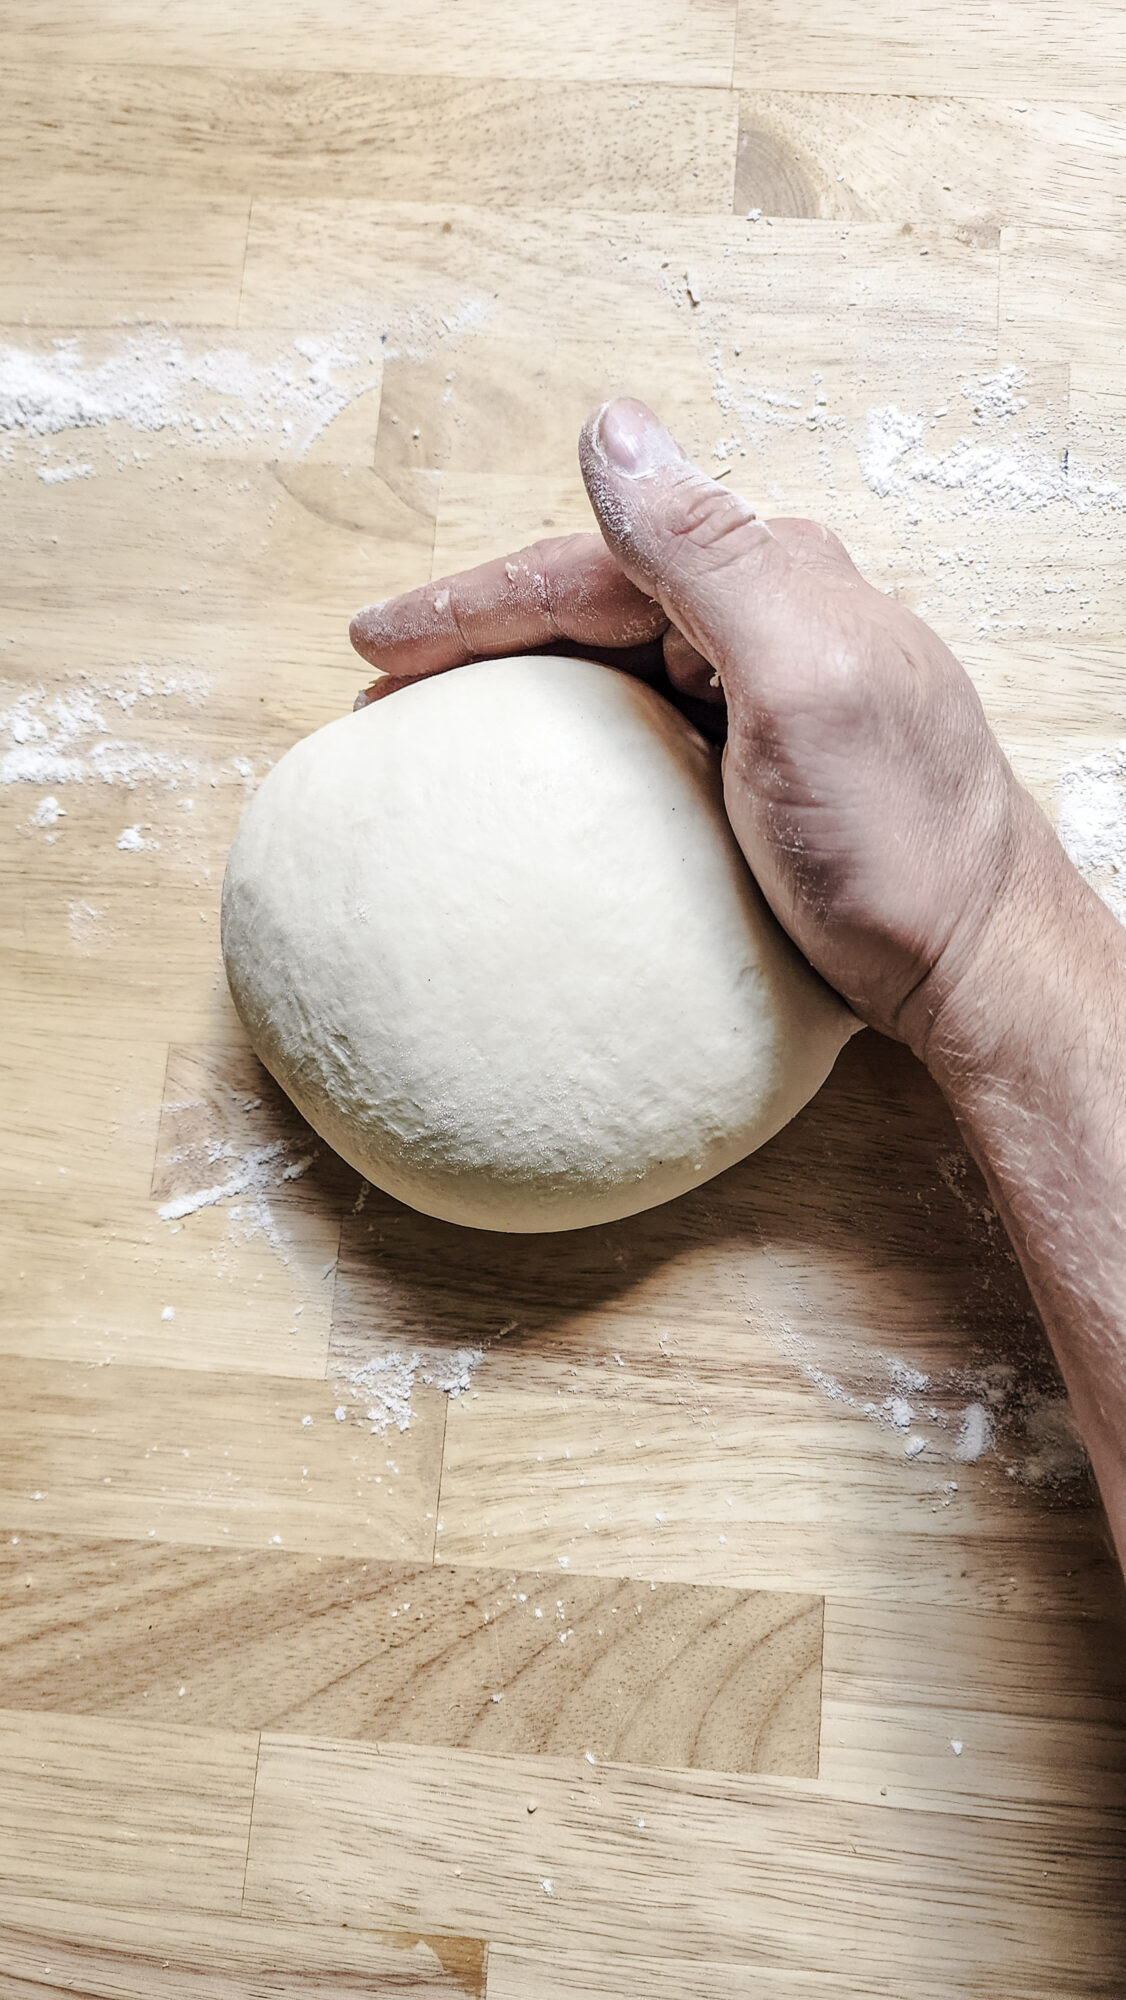
"Pre-shaping" / Stretch and Fold Seps

1. Dough After Being Combined 
2. Stretch and fold one edge of the dough onto itself. 
3. Repeat the stretch and fold process with the remaining three sides of the dough 
4. Press the dough firmly together, and begin to shape into a ball. 
5. Use your hands to scoop and drag the dough across your work surface. This seals bottom of the dough, and creates a more round shape. -
6. The rounder you can get your dough ball, the easier shaping will be later in the process. This dough ball is ready for proofing.

First Proof & Final Shaping
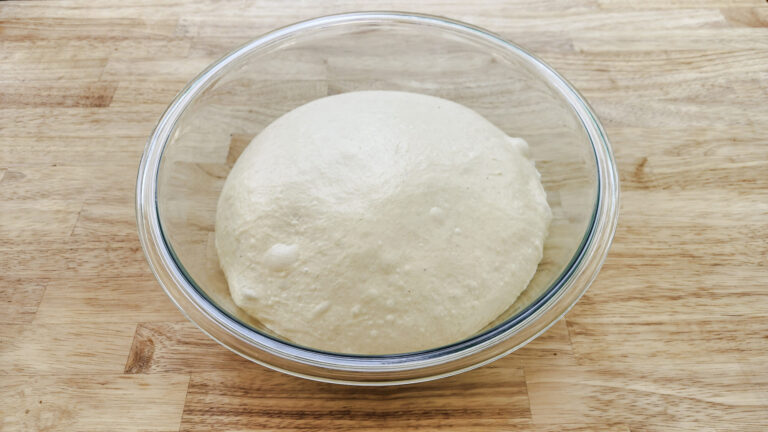
Cover the dough with greased plastic wrap, the lid for your container, or a damp kitchen towel and let it rest for one to one and a half hours until doubled in size. Uncover and punch it down.
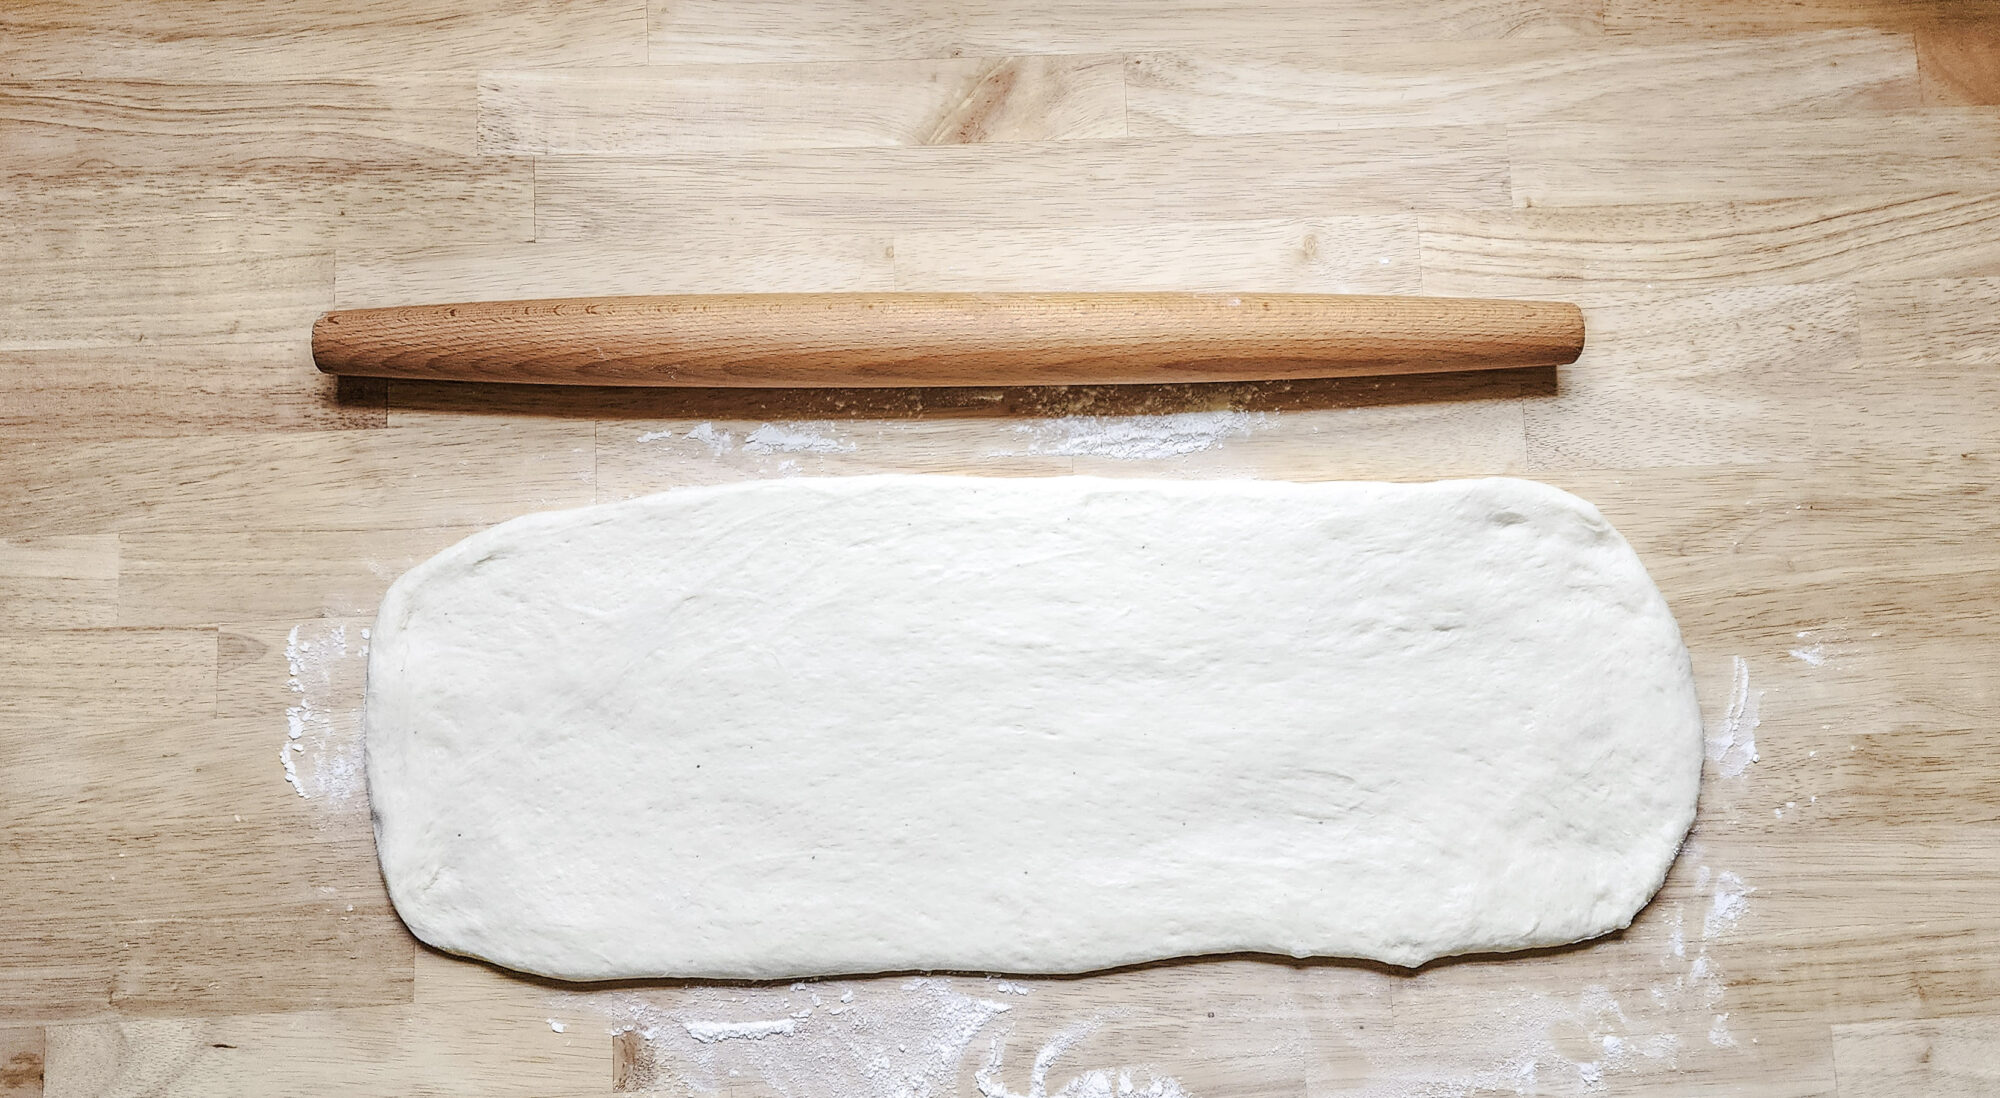
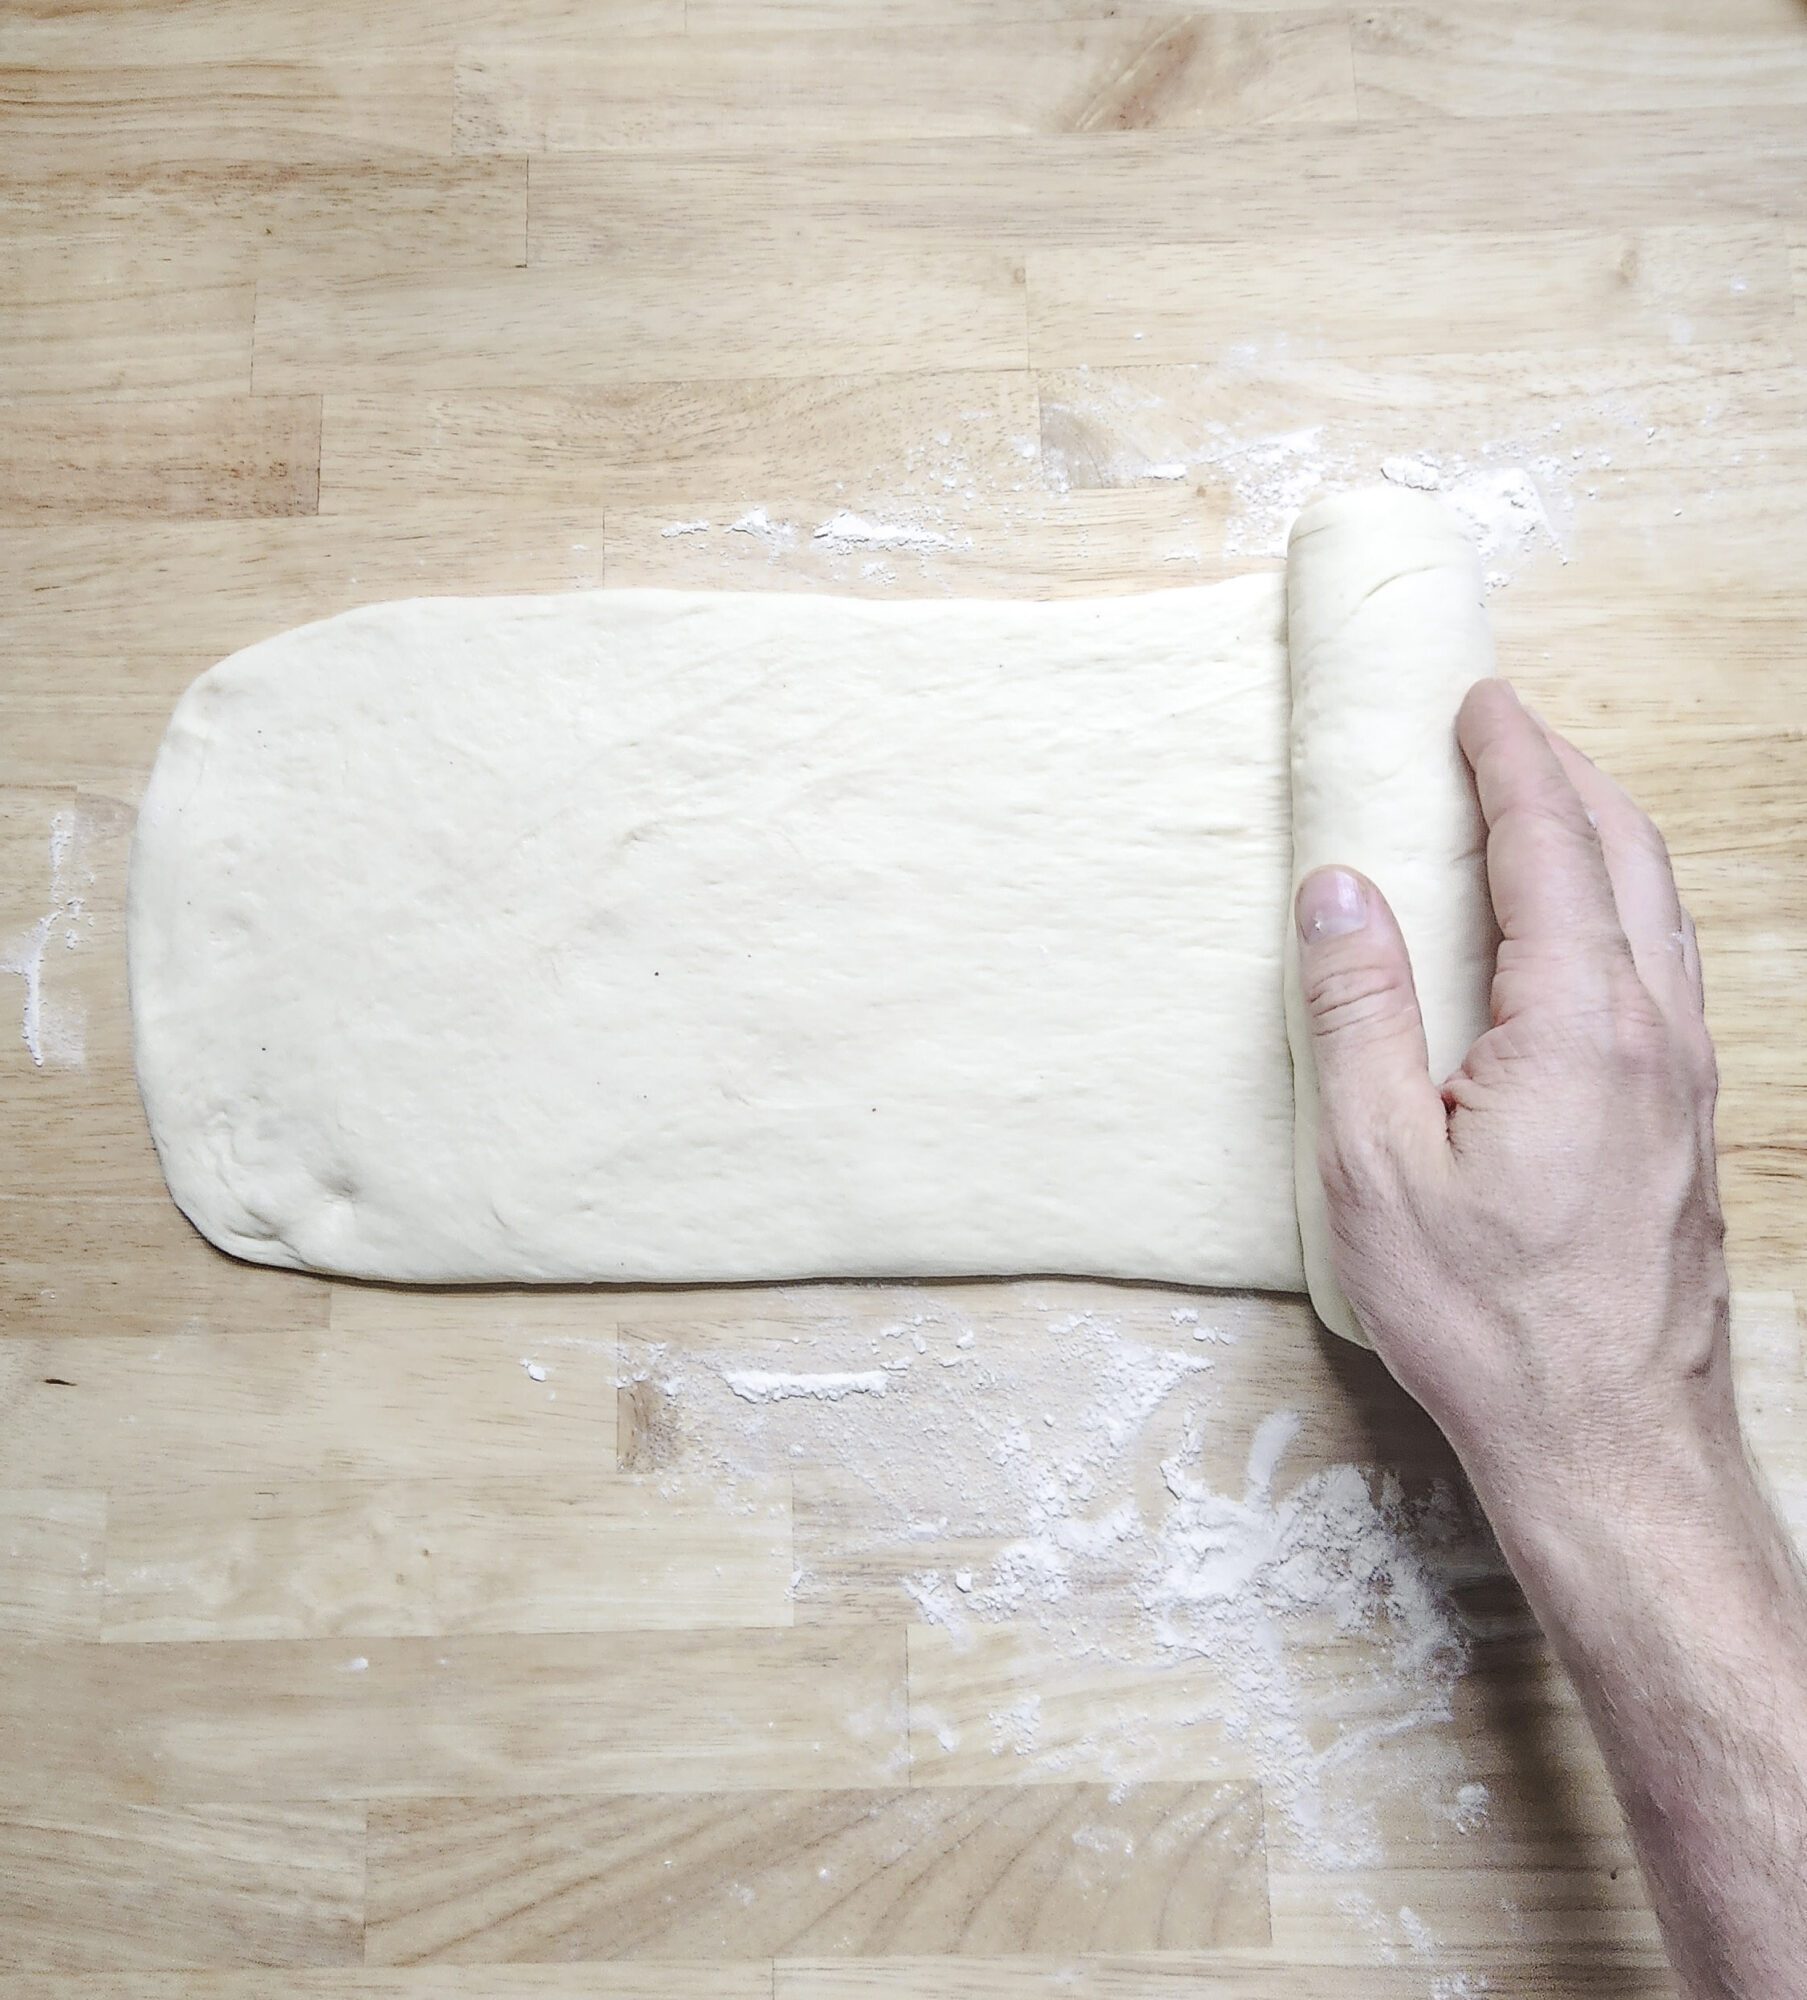
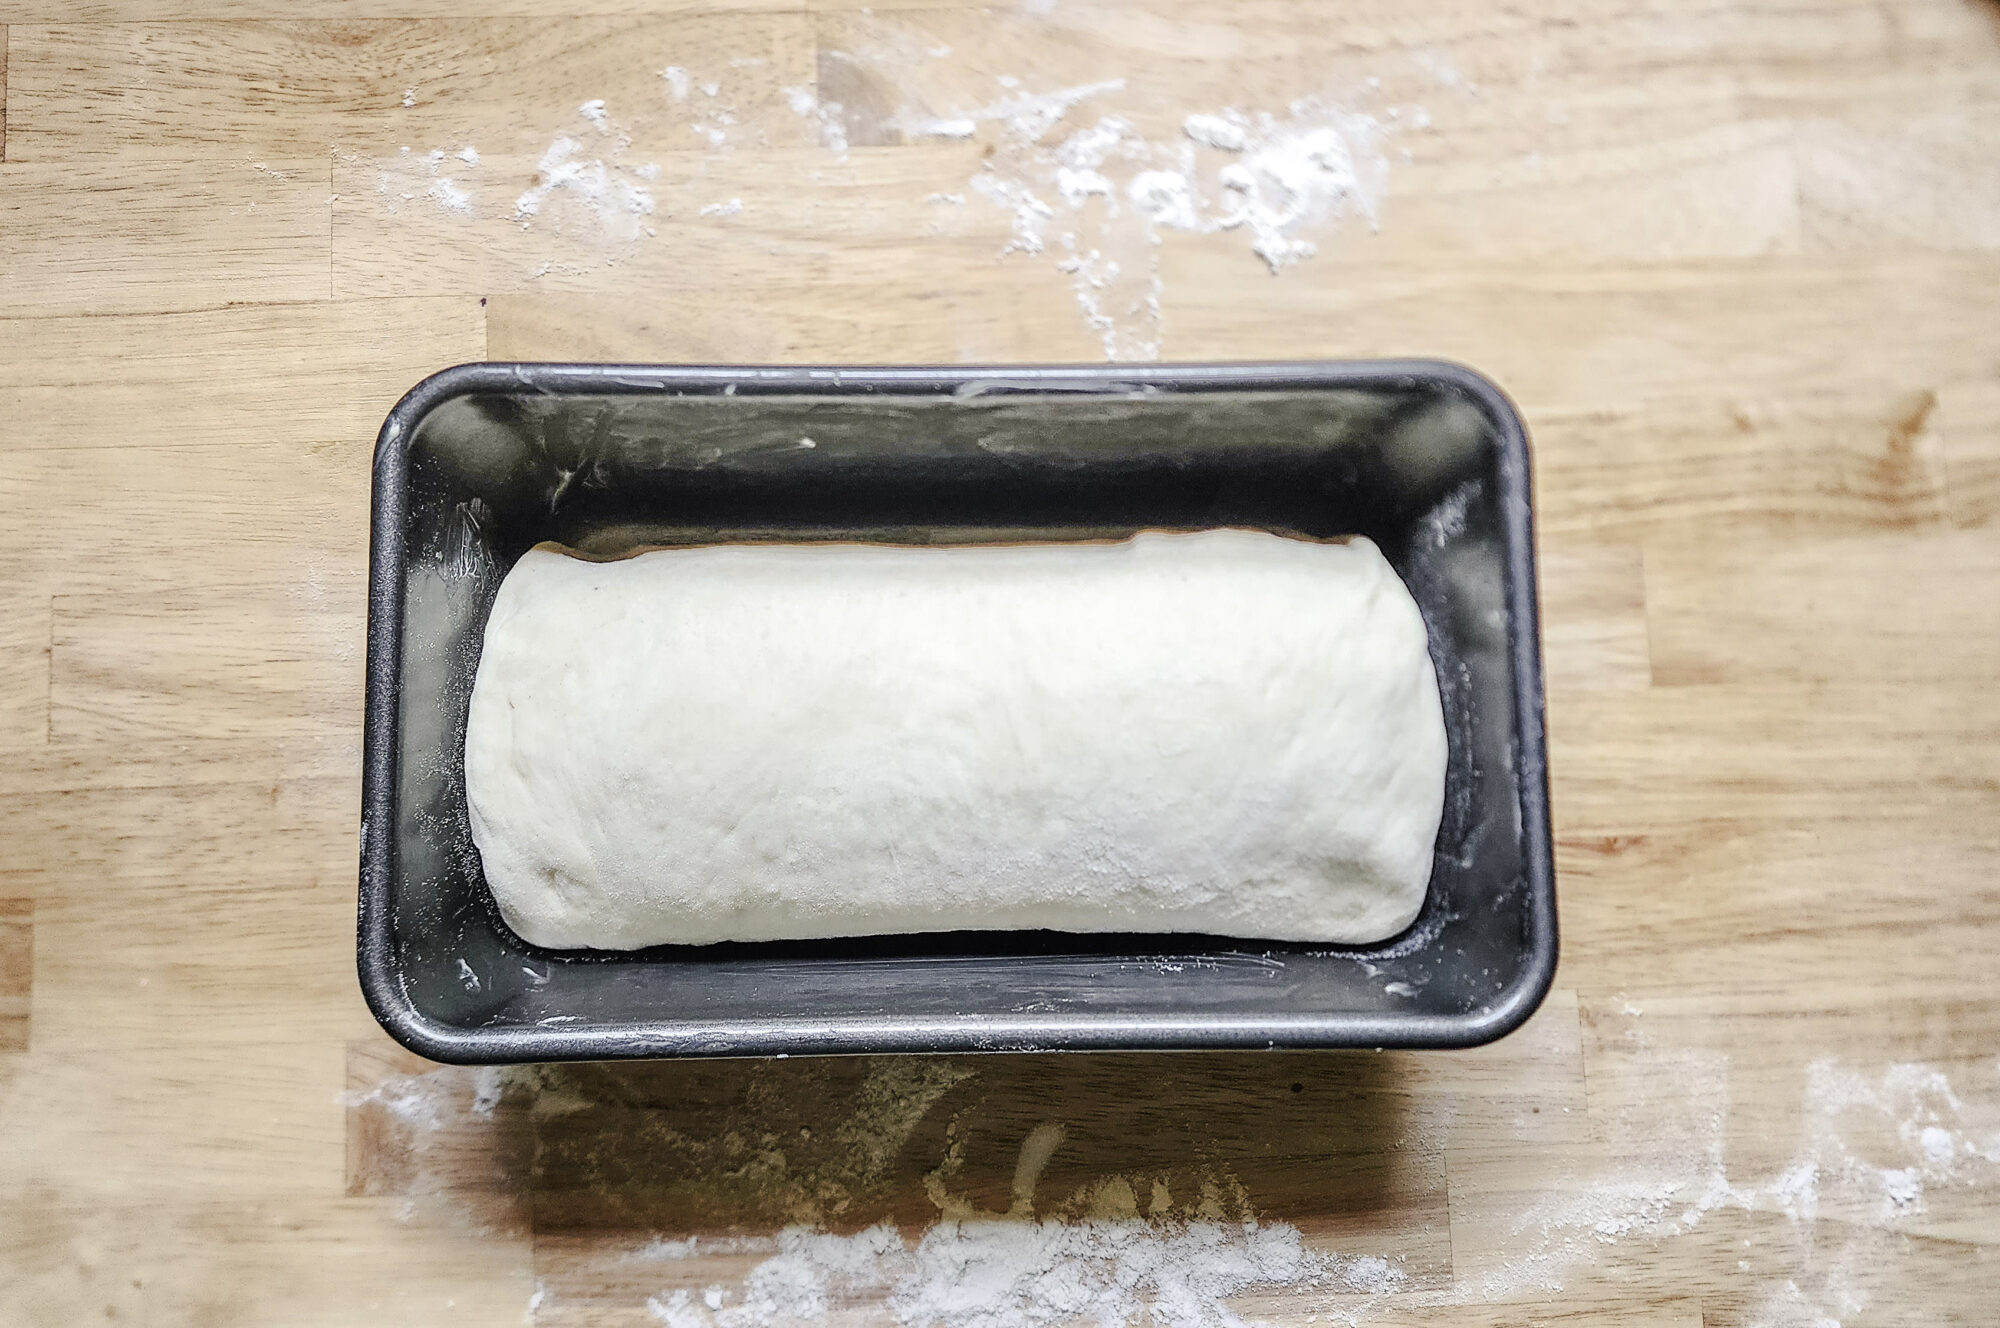
The next step is to shape your dough and prepare it for the second and final proof. Place the dough on a floured work surface, then roll it into a rectangle that is roughly 9-inches by 20-inches. The dough should be about ½ of an inch thick at this point. Tightly roll the dough into a loaf shape, then place seam side down into your greased loaf pan.
-
1. Turn the dough out onto a floured work surface 
2. Roll into a rectangle that's roughly 9-inches by 20-inches. 
3. Pull the outer corners to ensure that your dough stays in a rectangle shape, then begin tightly rolling into loaf. 
4. Place seam sided down into a greased loaf pan to prepare for the second proof.
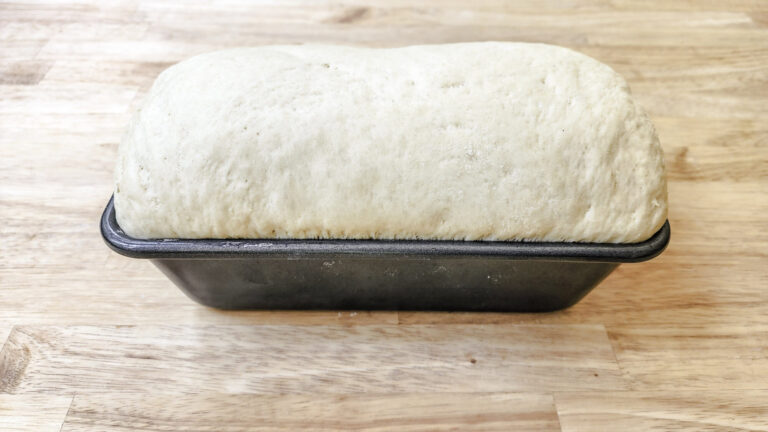
Loosely cover the pan with a damp kitchen towel, Press-N-Seal cling wrap, or greased saran wrap. Allow this to rest another 45-minutes to one hour until the dough has doubled in size again. Uncover and bake for 30 to 35-minutes.
This recipe easily doubles, and would provide enough bread for a family of four for about a week. It also freezes very well, so enjoy one loaf now and throw the other loaf in the freezer for later!
Serving Suggestions
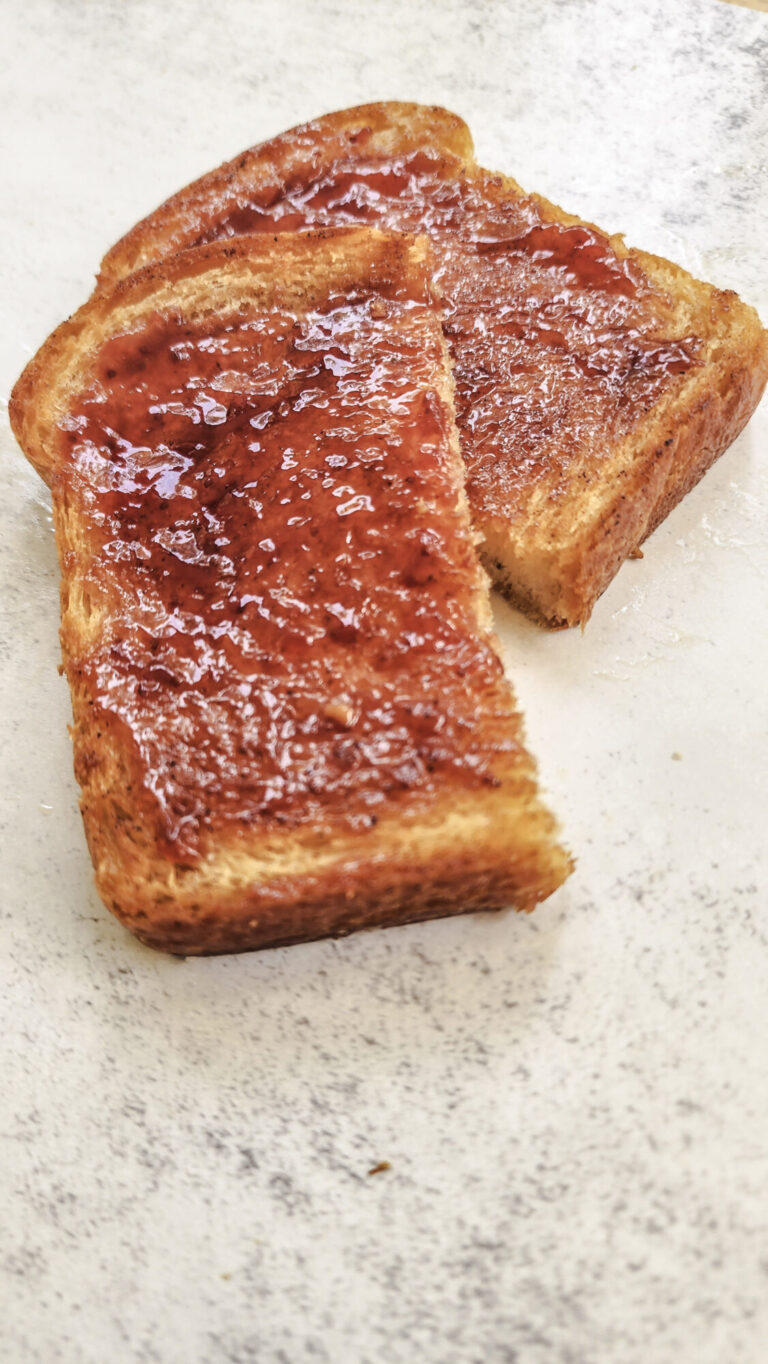
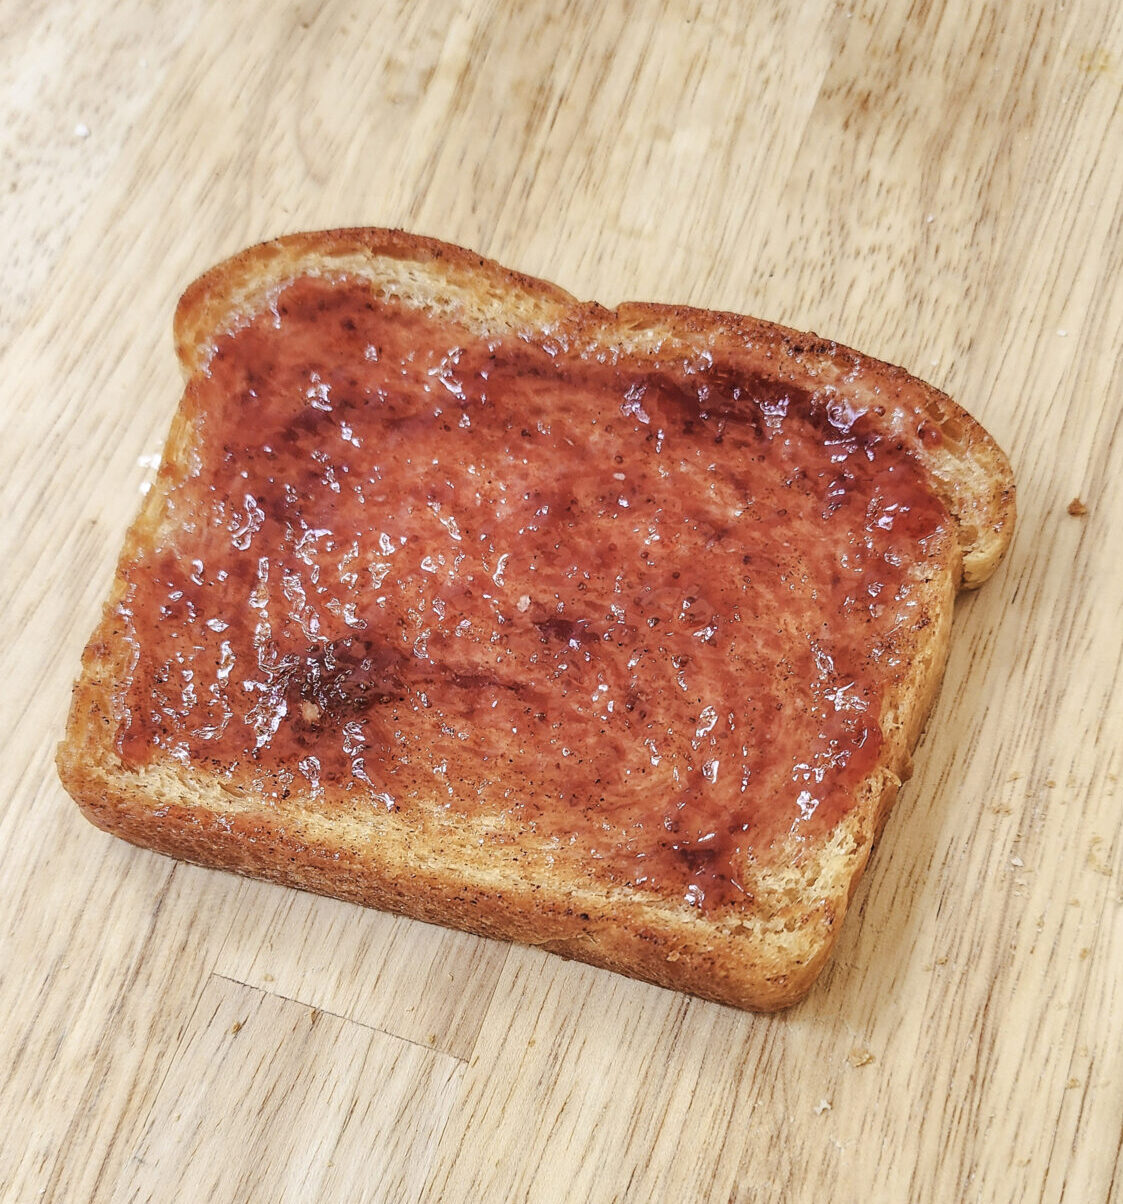
One of my absolute favorite things to eat is a slice of this white bread that has been toasted in a pan with copious amounts of butter, sprinkled with a small pinch of kosher salt, then covered with a thin layer of strawberry jelly. It's simplicity at it's finest, but absolutely could not be more delicious!
This is also ideal for sandwiches, French toast, or it can be used in my recipe for Breakfast Strata with Sausage. Go check it out and let me know what you think!
One of the hardest parts of this bread recipe is to resist the urge to eat it all in one evening - seriously, it doesn't last long!
Did you make this recipe for The Perfect Homemade White Bread?
Let me know in the comments below how yours turned out, and don't forget to leave a rating!
Recipe
The Perfect Homemade White Bread
Equipment
- 1 Stand Mixer Optional
- 1 4 ½ by 9-inch Loaf Pan or Pullman Pan Greased
Ingredients
- 175 ml Water 90-100°F
- 125 ml Whole Milk 90-100°F
- 30 g Honey
- 9 g Active Dry Yeast 1 Packet
- 420 g All Purpose Flour Can substitute an equal amount of bread flour.
- 10 g Fine Sea Salt
- 57 g Unsalted Butter Softened - Plus More for Greasing
Instructions
- In a medium saucepan, combine water and whole milk. Heat over medium heat until temperature reads 90°F on an instant read thermometer.
- Remove from heat and add honey, stirring until completely dissolved.
- Add active dry yeast and mix to combine. Let bloom for 5 - 10 minutes until frothy.
- While yeast mixture is blooming, combine salt and flour in the bowl of a stand mixer and whisk together. Switch the attachment out for the dough hook.
- Once yeast is bloomed, add liquid ingredients to the dry ingredients and mix on low to combine. Scrape down the sides of the bowl with a rubber spatula as needed.
- Continue to mix until a cohesive dough has formed, approximately 5-minutes. Increase speed to medium-low and knead for an additional 3 - 5-minutes until the dough is completely smooth and pulls away from the sides of the bowl.
- Reduce the speed back down to low and add the softened unsalted butter 1-tablespoon at a time until completely incorporated into the dough. Knead for as much time as it needs to completely incorporate and the dough is soft. This should take 5 - 7 minutes.
- Turn the dough onto a lightly floured work surface and form the dough into a rough ball shape. Fold one edge of dough over on itself, and repeat with the remaining three sides edges of the dough. Cup your hands and drag the dough across the counter into itself to form into a tight ball.
- Transfer to a large bowl and cover with plastic wrap, or lid. Let rest for 1 to 1 ½ hours in a warm spot in the kitchen until doubled in size.
- At the end of the first rise, lightly grease a 4 ½ by 9-inch loaf pan or pullman pan with unsalted butter.
- Punch the dough down, and transfer to a lightly floured work surface.
- Roll the dough into a long rectangle with a rolling pin until it is approximately ½-inch thick. The short edge of the rectangle should be about 9-inches long, and the long edge will be about 18 to 20-inches wide. The more even and smooth you make this rectangle, the smoother your finished product will be.
- Pull the corners of the dough with your hands to ensure it is shaped into an even rectangle. Starting with the short edge, tightly roll the dough into a cylinder. Place the rolled dough into the greased loaf pan with the seam side down.
- Cover lightly with greased plastic wrap or a damp kitchen towel and let proof an additional 45-minutes to 1-hour until doubled in size.
- Begin preheating the oven to 350°F towards the end of the second rise.
- Once the dough has gone through the second proof, uncover and add the dough to the oven. Bake for 35 - 40 minutes until golden brown. Let cool for about 5-minutes in the pan, and transfer to a wire rack to cool completely before slicing and serving.


Harry says
This is, no joke, some of the best bread I've ever eaten, let alone made! Now, I haven't made a whole lot of bread, but I sure have eaten a lot of it! I simply couldn't get over just *how* good this was compared to the store bought stuff. It's really easy too! I scaled up the recipe 1.5x for my bigger 5" X 13" pans and it worked beautifully!
It made excellent BLT's and pimento cheese sandwiches. And it really shined when toasted in lots of butter with jam/jelly spread on top like the recipe calls for! It's to die for! I know I said I haven't made a lot of bread, but I have a feeling that is going to change! Thanks to this recipe, I think I'm fully converted! The effort to flavor ratio is off the charts with this one! It's a winner!
Spencer Klickman says
Thanks for the high praise! So glad you enjoyed this recipe and that it's helped convert you over to homemade bread - there's really nothing quite like it!
I definitely see some BLT's in my future too.....
Miles says
I can’t get over how good this bread is. It’s so light and airy, and the flavor is delicious with the perfect amount of sweetness.
I was a little worried about how wet the dough was and being able to work with it, but it was surprisingly easy to work with as long as I had enough flour on my hands and rolling pin.
Not only is the bread delicious, but it’s also unbelievably easy to make. I was shocked when it came out of the oven and it looked just like the pictures! He’s not wrong when saying it will be hard to go back to store-bought bread. I will absolutely be making this again soon!
Spencer Klickman says
Awesome! I'm so glad to hear you liked it! We can't get enough of it in our house either.
Carrie says
This truly is the perfect white bread. My family enjoyed having it around the house for toast and sandwitches. Will be making this again very soon!
Spencer Klickman says
Thanks Carrie! So glad you and your family like the recipe. My family definitely never complains when I make it!