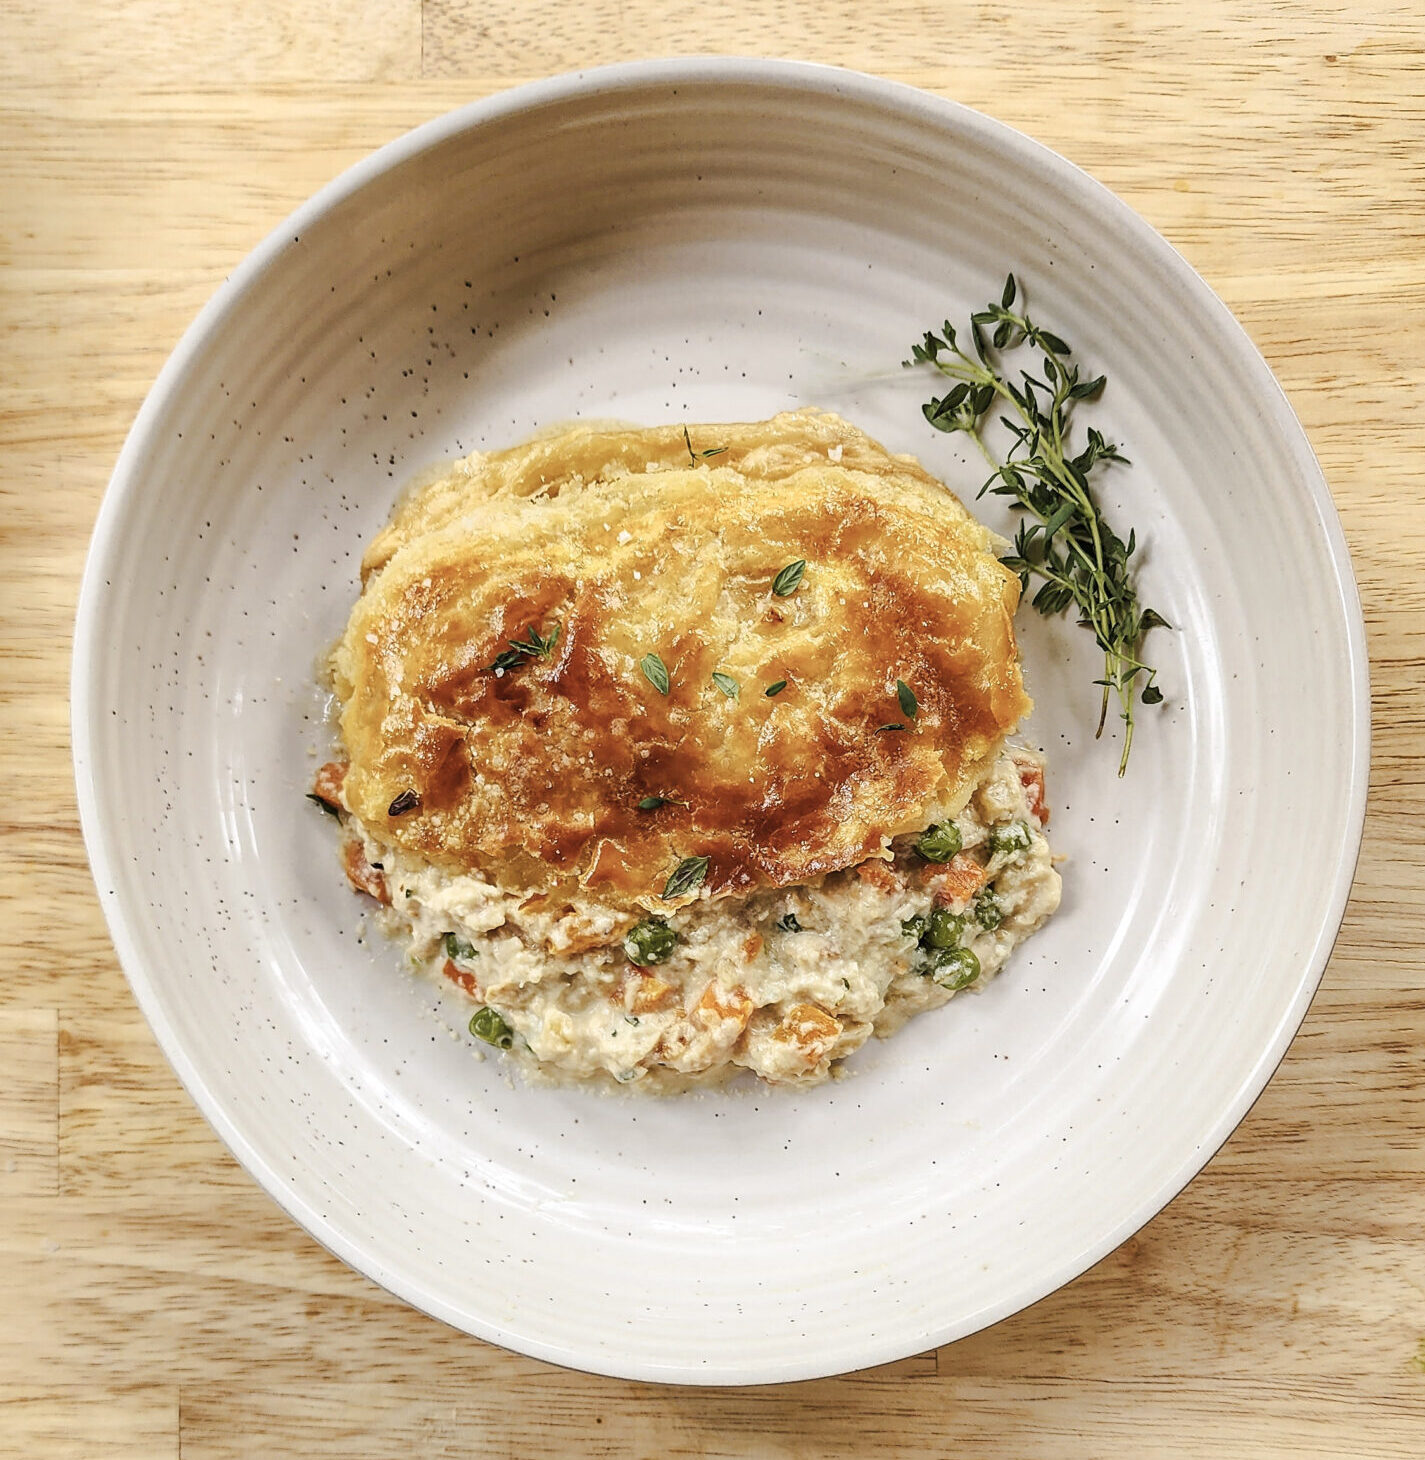
This Rustic Chicken Pie is simplicity and comfort all rolled into the perfect package. Seared chicken breasts and sauteed vegetables are simmered in a hearty cream sauce, and then everything is topped off with an irresistibly buttery and flaky homemade crust. This dish is a family favorite in our house and usually makes enough to have leftovers!

For more classic chicken comfort, check out my Chicken Schnitzel with Lemon Cream Sauce - it's crispy, bright, and weeknight-friendly!
Rustic Chicken Pie Components and Ingredients
This dish is composed of two main parts: the crust and the filling. The pie crust does need a short rest in the refrigerator, so start this recipe by making the crust.

The pie crust is my standard, go-to pie crust recipe: Lisa Donovan's Pie Dough. I came across her pie crust recipe in Food & Wine magazine several years ago and it has been a staple ever since. It's so incredibly flaky and buttery, and it is the absolute best! As always, if you don't feel like making everything from scratch, feel free to substitute your favorite store-bought pie crust or puff pastry here.
The filling is a very basic cream sauce with sauteed chicken breasts. Don't let the simplicity fool you, though. This filling is extremely satisfying and full of flavor! It just takes a little bit of technique to get the most out of your ingredients. It's so savory, so creamy, and extra comforting.
Homemade Crust
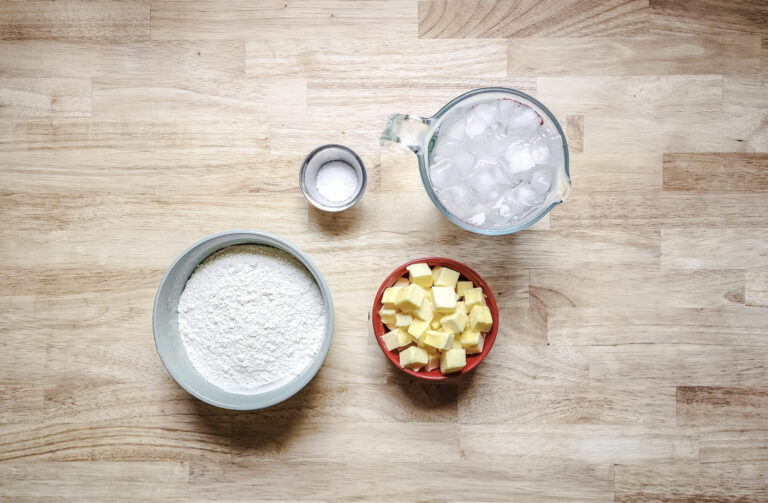
This pie crust is very simple and delicious. It contains all-purpose flour, unsalted butter, kosher salt, and a small amount of ice-cold water. The key is to work the cold, cubed butter into the flour with your hands to create small flakes of flour-coated butter. These flakes are what make the crust so tender and crispy.
After you combine the dough together, wrap it in plastic wrap and let it rest in the fridge for at least 30-minutes. The pie crust can be made up to 3-days ahead of time as long as it's stored in the fridge. While it's resting, you can start with the filling.
Chicken Pie Filling
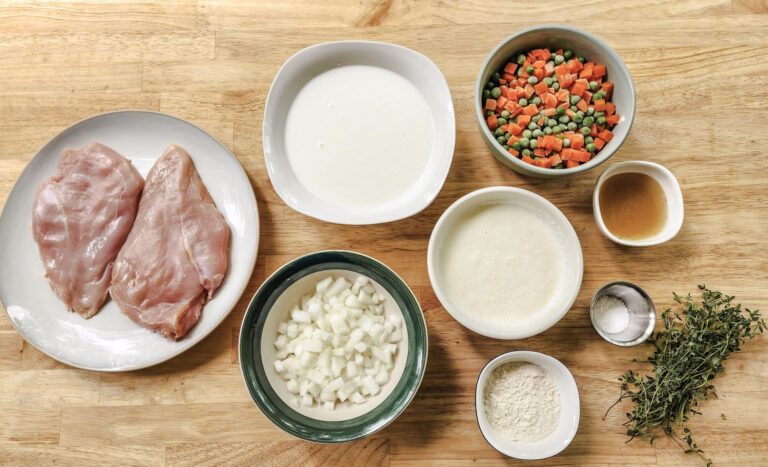
The filling begins with high-quality chicken breasts, a touch of salt, and some oil. Sear them over medium-high heat in a large cast iron skillet for about 8 to 10 minutes per side. You want them to be golden brown on the outside and cooked to 165°F internally. Reserve and let rest while the rest of the sauce cooks. In the same pan, add your onion and sauté until soft, about 5-minutes. Add all-purpose flour and cook for 2 minutes. Slowly add the chicken stock and deglaze the pan, scraping up all of the brown bits from the bottom of the pan. Add in your kosher salt, heavy cream and milk, and bring to a simmer. Reduce the heat and cook for 10 to 15 minutes, stirring occasionally, until the sauce leaves a trail when dragged across the pan.
While the sauce is simmering, shred your chicken with two forks or pull it apart with your hands into bite-sized pieces. Give the chicken a quick, rough chop if the pieces are still too big after shredding/pulling. Be sure to reserve any of the juices that have collected on your plate. Once the sauce has thoroughly thickened, add the shredded chicken (and juices), frozen peas and carrots, and fresh thyme to the sauce, stirring to incorporate. Remove from the heat and allow to cool for several minutes. At this point you're ready to assemble your chicken pie.
Assembly
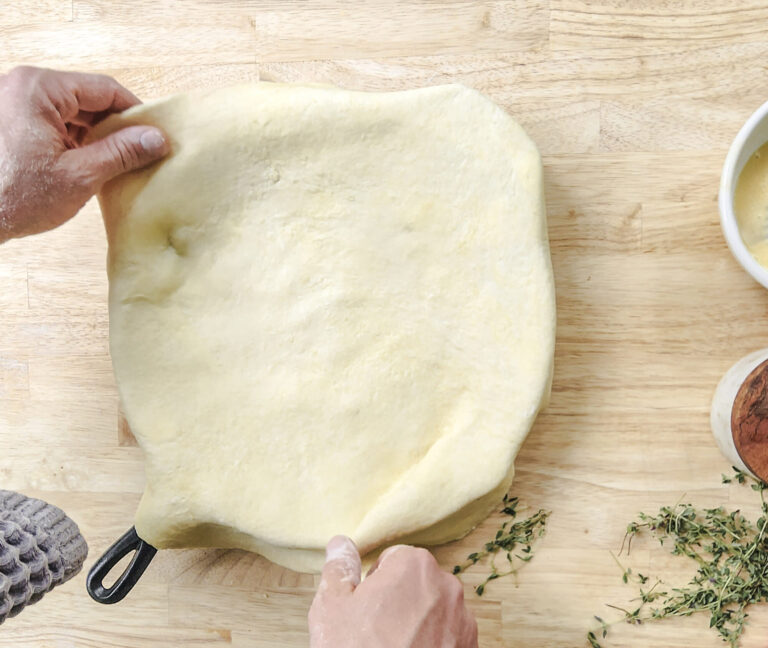
Assembly begins with removing the dough from the fridge and rolling it out to ¼ of an inch thick on a floured work surface. Drape the crust over your skillet, and gently press down into the corners of the pan to completely cover the filling.
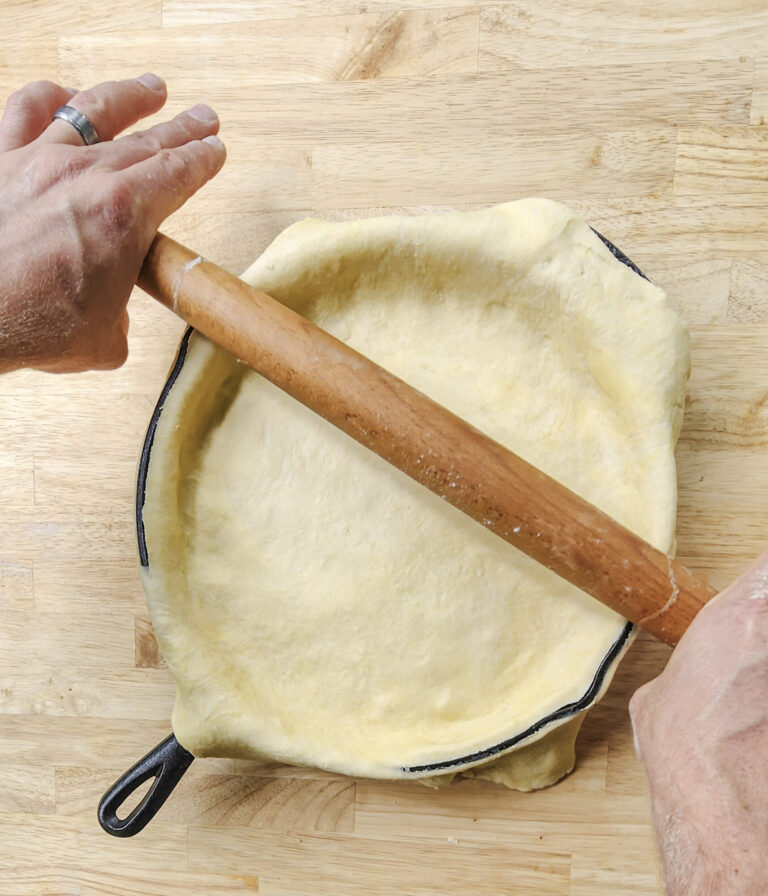
The dough will hang over the edge of your pan, which is exactly what you want. Next, take your rolling pin and roll it over the skillet. Pro tip: begin The excess crust will get pinched between the rolling pin and the edge of the pan and will "cut" the excess crust off. You'll be left with a neatly covered chicken pie! The edges of the dough will retract a little bit after you cut the extra off, which is normal.
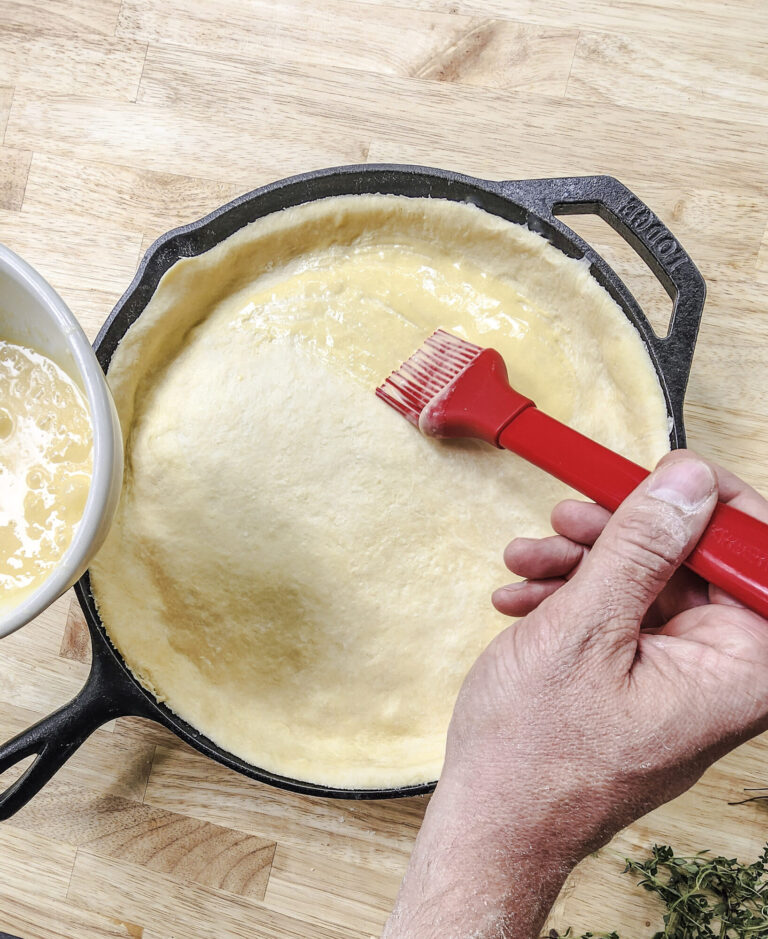
Gently brush the crust with an egg wash consisting of one egg and a splash of heavy cream. This will give you a really nice and shiny crust. Cut a few slits in the middle of the pie to allow for steam to escape. If you forget this step, the crust can tend to bubble up and not cook evenly.
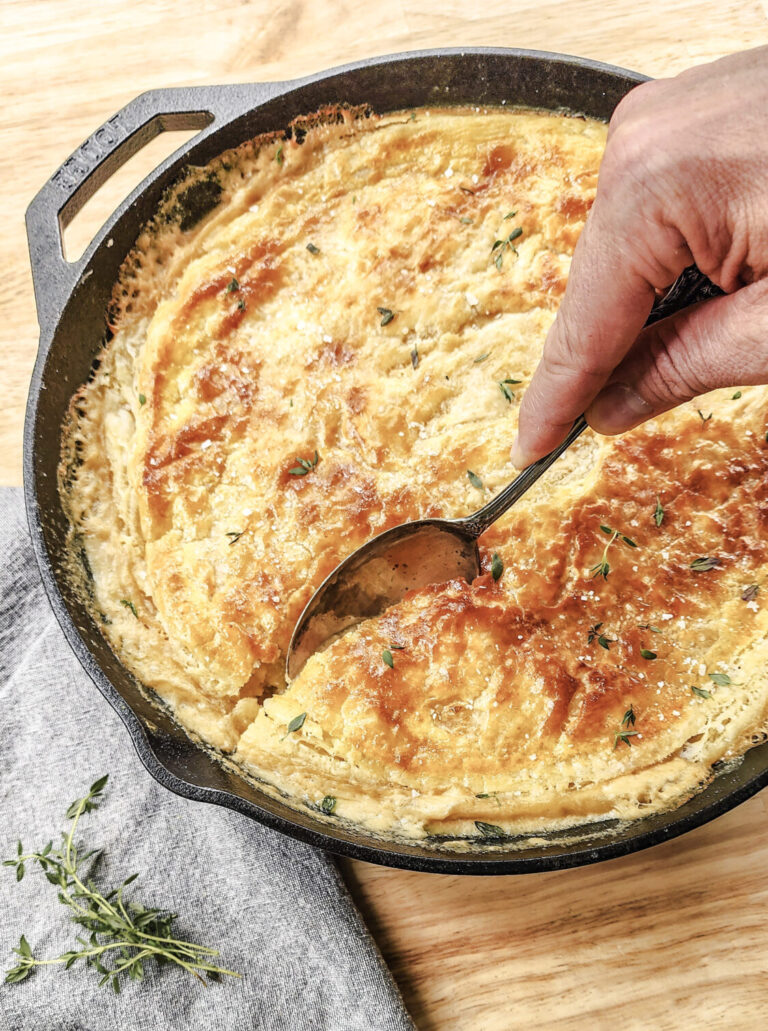
Throw the whole thing into an oven preheated to 375°F for 25 to 30-minutes. Remove and allow to cool for several minutes. Sprinkle with flakey salt and some fresh thyme and serve!

Pairing Recommendations
This dish is hearty enough that it can be served all on it's own, but I recommend pairing it with several of my other recipes listed below. Go check them out!
This chicken pie goes great with my recipe for Diner Inspired Macaroni and Cheese, Crunchy Pepper Slaw, or Crispy Oven Roasted Potatoes.
Did you make this recipe for Rustic Chicken Pie?
Let me know in the comments below how yours turned out, and don't forget to leave a rating!
Recipe
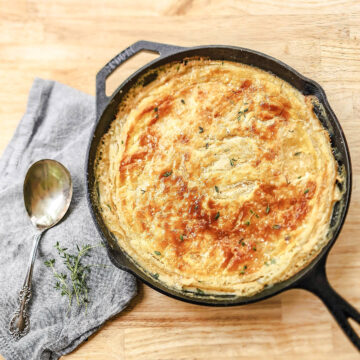
Rustic Chicken Pie
Equipment
- Large Mixing Bowl
- Plastic Wrap
- 12-Inch Cast Iron Skillet
- Rolling Pin
Ingredients
Lisa Donovan's Pie Crust
- 1 ½ Cups Unsalted Butter 3 Sticks
- 2 ⅓ Cups All Purpose Flour280g
- 2 ¼ Teaspoons Kosher Salt
- 2 Cup Measuring Cup Filled to the brim with ice and topped with cold water
Egg Wash
- 1 Egg Beaten
- 1 Tablespoon Heavy Cream
Chicken Pie Filling
- 2 - 3 Tablespoons Neutral Cooking Oil
- 2 Large Chicken Breasts About 1 Lb., Pounded Flat to approx. ½-Inch Thick
- 1 Onion Diced
- 3 Tablespoons Flour
- ¼ Cup Chicken Stock
- 3 Cups Milk
- 1 Cup Heavy Cream
- 1 ¼ Teaspoon Kosher Salt
- 2 ½ Cups Frozen Peas and Carrots
- 1 Teaspoon Fresh Thyme Minced
Instructions
Lisa Donovan's Pie Crust
- Fill a 2-cup measuring cup with ice. Top measuring cup off with water (at least ½ cup). Set aside.
- Cube butter into ½-inch to 1-inch pieces with varying rough chops. Toss together flour and salt in a large bowl.
- Toss butter cubes into flour mixture, and separate cubes with your fingers before beginning to work together. Work in butter using your hands, making smears and buttery flakes. Do not use a machine or a pastry cutter; using your hands will help you discern the temperature and feel of the flour. You are looking to incorporate all the butter into the flour without overworking. Every piece of butter should be smeared with some flour before you begin to add the ice water; there should be no untouched pieces of butter. Doing this deftly is key; if the butter starts to feel too warm, use your refrigerator as a tool-place bowl in freezer or refrigerator at any time to cool off. Preferably, though, you will be able to work the butter in quickly without too much fuss.
- To incorporate the ice water, start by drizzling about 3 tablespoons water (do not add ice) into flour mixture. Using your hands slightly cupped as paddles (do not use your fingers or do any kneading), toss the water into the flour until it is fully absorbed. Add additional water, 1 tablespoon at a time, paddling with hands between each addition, until mixture begins to form a shaggy dough. You will likely use about ¼ cup to ⅓ cup water total, depending on the humidity. The dough should feel moist but not wet or sticky. Turn dough out onto a clean work surface. Give dough a few strong kneads to work it all together (about 4 turns). Your dough should feel tacky and supple but not sticky.
- Form each into a flat disk and wrap in plastic wrap. Chill in refrigerator at least 30-minutes, or up to 3-days.
Pie Filling
- Preheat oven to 400°F
- While the dough is resting, heat a 12-inch cast iron skillet over medium high heat. Add 2 to 3-tablespoons of neutral cooking oil.
- Generously salt your chicken breasts and add to the pan. Cook for approximately 8 to 10-minutes per side until the outside is golden brown and the internal temperature reaches 165°F. Remove the chicken from the pan and allow to cool.
- Add your onion with a pinch of kosher salt and cook for 5 to 7-minutes, stirring occasionally, until softened. Add more oil if needed.
- Add the chicken stock to deglaze, scraping up any browned bits from the bottom of the pan.
- While stirring constantly, sprinkle in flour to evenly coats the onions. Cook for 2 to 3-minutes.
- While whisking/stirring constantly, slowly add in your measured kosher salt, milk and heavy cream. Bring to a boil, and reduce heat to medium-low. Simmer for 8 to 10-minutes, stirring occasionally until sauce is thickened, and begins to leave a bare spot in the pan when a spoon is dragged through it.
- While sauce is simmering, use two forks to shred (or your hands to pull) cooked chicken into bite-sized pieces. Rough chop the chicken if the pieces are too big after pulling/shredding, Do not drain any of the juices that have collected.
- Remove the sauce from heat and add your frozen peas and carrots, shredded chicken (and juices), and fresh thyme.
- Season to taste with kosher salt and pepper. Allow to cool for several minutes.
Assembly
- While filling and pan is cooling, remove pie crust from the fridge. Unwrap and roll out on a floured work surface until ¼-inch thick with a floured rolling pin.
- Pick up the pie crust and drape the it over the pan, allowing the dough to extend past the edges. Gently press the dough into the corners of the pan to completely cover the filling.
- Starting in the middle of the pan, press down with your rolling pin and roll it over the top of the skillet to "cut" the excess pie dough off. Discard or freeze your excess dough (there will be extra).
- Brush your egg wash mixture evenly over your pie dough (there will be excess egg wash - just discard it when done). Cut two to three slits in the center of the dough to allow steam to vent.
- Bake for 40 to 45-minutes until the filling is bubbling around the sides and the crust is golden brown.
- Remove and allow to cool for 10 to 15-mintues before serving. Garnish with flaky salt and fresh thyme.


Brittany says
To be honest I was a little intimidated by this recipe, but I got the ingredients and set my mind to it. It was a lot easier than I expected, so worth it!!!
Spencer Klickman says
So glad you liked it!