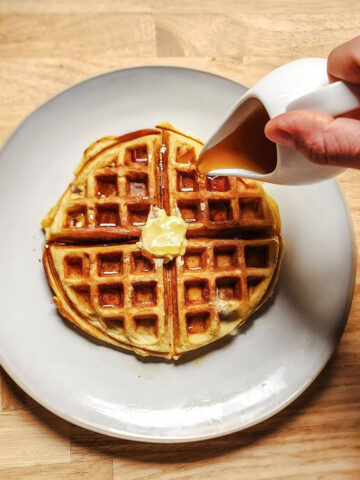
These Crispy Buttermilk Pancakes are soft and fluffy in the center, with buttery, golden-brown edges that crisp up beautifully in a cast-iron skillet. If you want all the comfort of classic buttermilk pancakes with even more texture and flavor, this is the recipe to make.

I developed this recipe to recreate my wife's late grandmother's long-lost pancake recipe. My wife always remembered Mamaw Gene's pancakes for their signature crispy edges - the kind of old-fashioned skillet pancakes cooked in butter until the edges turned golden and crisp. Since I never got the chance to try them myself, I spent years testing and tweaking until I finally created a version that brought those memories back to life.
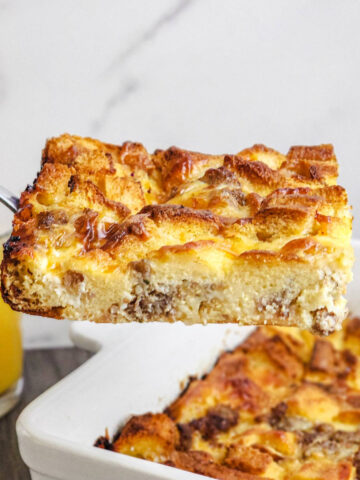
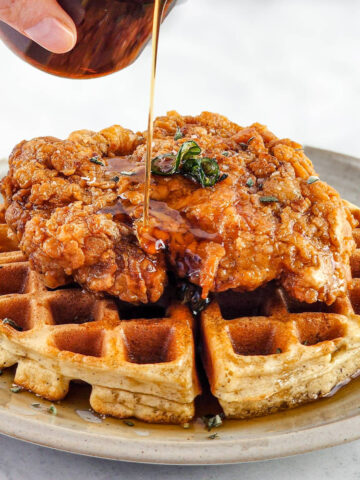
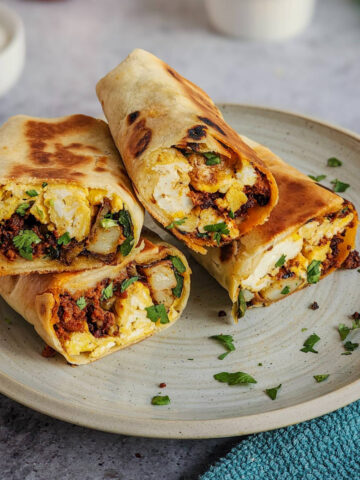
Craving more breakfast ideas? Check out my Easy Chorizo Breakfast Burritos, or Breakfast Strata with Sausage for more!
Quick Look: Crispy Buttermilk Pancakes
- Prep Time: 10 minutes
- Cook Time: 30 minutes
- Total Time: 40 minutes
- Yield: 10 Pancakes
- Texture: Light and fluffy inside with buttery, crispy golden-brown edges
- Flavor Profile: Classic buttermilk tang with rich, buttery flavor and a lightly sweet finish
Ingredient Notes & Easy Swaps
These crispy buttermilk pancakes use simple pantry staples, but a few ingredients are key to their signature texture and flavor. Buttermilk gives the pancakes their tangy, tender crumb, the extra egg yolk adds richness, and the sugar and butter in the pan help create those deeply golden edges.

A handful of simple ingredients are what make these pancakes stand out from a standard fluffy stack. Here are the ones doing the heavy lifting:
- Buttermilk: Real buttermilk gives the best flavor and tang. Milk mixed with lemon juice or vinegar works in a pinch, but the pancakes will be slightly less tangy and flavorful.
- Unsalted butter: Salted butter works if that's what you have - just reduce the measured salt a bit so the pancakes don't taste overly salty.
- Extra egg yolk: Don't skip it if possible - it adds richness, color, and a more tender texture.
- All-purpose flour: This is my preferred flour for the best balance of tenderness and structure. I have not tested this recipe with any other flours.
Refer to the recipe card below for the complete list of ingredients and quantities.
Optional Add-ins & Toppings
For the best texture, sprinkle most add-ins onto each pancake after the batter hits the skillet instead of stirring them into the bowl.
- Chocolate chips: For a classic chocolate chip pancake - a favorite of kids (and kids-at-heart) everywhere.
- Blueberries: Add a few fresh blueberries to each pancake after the batter hits the skillet for little bursts of juicy sweetness.
- Chopped pecans or walnuts: A few tablespoons add crunch and a little nutty richness.
- Banana slices: Thin slices of banana add natural sweetness and pair especially well with warm maple syrup. (If you love banana-forward breakfasts, my Bananas Foster Dutch Baby is another great option.)
- Cooked crumbled bacon: For a sweet-savory option that plays really well with the buttery skillet flavor.
How to Make Crispy Buttermilk Pancakes
These crispy buttermilk pancakes come together with simple ingredients, but a hot buttered skillet - especially cast iron - is what gives them their signature golden edges.

Step 1 - Whisk Sugar, Baking Powder & Salt: Whisk the sugar, baking powder, and salt together until evenly combined.

Step 2 - Add Egg & Egg Yolk: Add the egg and egg yolk and whisk until the mixture turns pale yellow and slightly foamy.

Step 3 - Add Buttermilk, Flour & Butter: Add the buttermilk, flour, and melted butter, whisking just until combined. A few small lumps are perfectly fine.

Step 4 - Preheat Skillet & Melt Butter: Heat a cast-iron skillet over medium-high heat and melt in several tablespoons of butter. Don't be shy here - the butter helps create those crispy edges. Aim for a surface temperature of 350°F to 400°F.

Step 5 - Cook: Working in batches, portion ¼ cup of batter per pancake into the hot skillet. Cook until bubbles form across the surface and the edges begin to set, about 3 to 4 minutes.

Step 6 - Flip: Flip and cook for 2 to 3 minutes more, until the second side is deeply golden brown and the edges are crisp. Add more butter as needed and repeat with the remaining batter.

Top Tips for Crispy Buttermilk Pancakes
- Rest the batter for 20 to 30 minutes if you can: It gives the flour time to hydrate and can make the pancakes even lighter and fluffier.
- Keep the skillet between 350°F and 400°F: The sugar content helps these pancakes brown and crisp beautifully, but it also means they can burn quickly if the pan gets too hot.
- Don't let the pan run too cool: If it does, the pancakes can soak up too much butter and turn greasy.
- Be generous with the butter: The bottom of the skillet should stay coated so the pancakes brown evenly and get those buttery, golden edges.
Crispy Buttermilk Pancakes FAQs
The biggest factors are a well-buttered pan, steady heat, and a batter that browns well without scorching. For this recipe, keeping the skillet between 350°F and 400°F and making sure the bottom of the pan stays coated in butter are what help create those crisp, golden edges.
The most common causes are not enough butter in the pan or a skillet that is too cool. If the pan is not hot enough, the batter can absorb the butter instead of frying lightly in it, which leads to softer or greasier pancakes instead of crisp edges.
You want a batter that is thick but still scoopable. It should spread a little in the pan, but not run thin like crepe batter. A few small lumps are perfectly fine, and overmixing can make the pancakes tougher.
Yes, but cast iron gives the best browning and crisp edges. A griddle will still work, especially if it is well preheated and buttered, but the final texture may be a little less crisp around the edges.
Buttermilk adds classic tang and helps keep the pancakes soft and tender in the middle. It also gives them more depth of flavor than regular milk, which works especially well with the buttery, deeply browned edges.
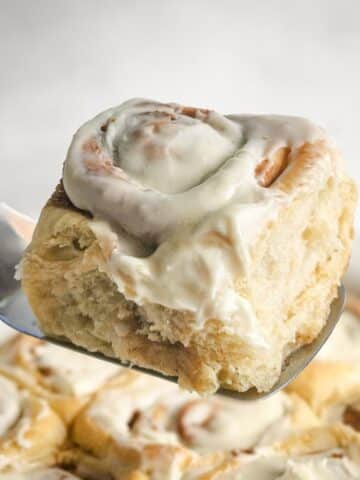
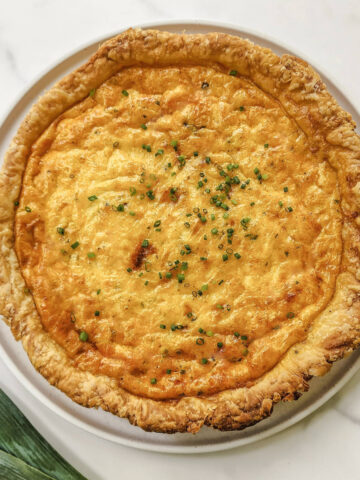
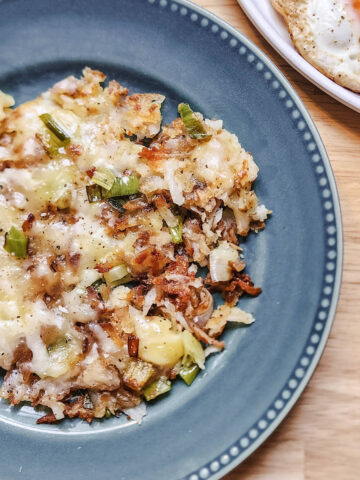
More Breakfast Recipes to Try
Check out a few of my other delicious ideas to make for your next breakfast or brunch!
Did you make these Crispy Buttermilk Pancakes?
Let me know how yours turned out in the comments below, and don't forget to leave a rating!
Recipe

Crispy Buttermilk Pancakes
Equipment
- Medium Bowl
- Whisk
- Large Cast Iron Skillet
- ¼ Measuring Scoop
- Infrared Thermometer Optional but recommended
Ingredients
- 2 Tablespoons Baking Powder
- 2 Tablespoons Sugar
- 1 Teaspoon Kosher Salt
- 1 Large Egg
- 1 Egg Yolk
- 1 ¼ Cups Buttermilk
- 1 Cup All-Purpose Flour
- 2 Tablespoons Unsalted Butter Melted
- 1 Stick Unsalted Butter For Pan
- Warm Maple Syrup
Instructions
- In a medium bowl, combine baking powder, granulated sugar, and salt. Whisk until combined.
- Add the egg and egg yolk. Whisk until the mixture is pale yellow and slightly foamy.
- Add the buttermilk, flour, and two tablespoons of melted butter, stirring until just combined and slightly lumpy.
- Heat a large cast-iron skillet over medium-high heat until well preheated. An infrared thermometer should read between 350°F and 400°F.
- Add 2 to 3 tablespoons of unsalted butter to the skillet and melt. Using a ¼-cup measuring scoop, portion the batter into the hot skillet. Cook for 3 to 4 minutes, until bubbles begin to form and the edges start to set.
- Flip and cook for an additional 2 to 3 minutes, until the second side is golden brown and crisp. Add more butter to the pan as needed and adjust the heat as needed. Repeat with the remaining batter.
Notes
- An optional 20 to 30 minute batter rest can make the pancakes lighter and fluffier.
- For the best crispy edges, keep the skillet between 350°F and 400°F.
- If the pan runs too cool, the pancakes can soak up too much butter and turn greasy.
- Make sure the skillet stays coated in butter so the pancakes brown evenly and crisp around the edges.
Jenn H says
I've made these pancakes twice now, and they are seriously some of the best pancakes I've ever tasted! The right buttermilk makes a difference, so I try to use naturally cultured over homemade or Big box store bought brands. I've also decreased the baking powder to two tablespoons and that is sufficient to keep them from being bitter. My only other variation is to add a scant teaspoon of vanilla if you like sweet or pancakes, and I love sprinkling hemp hearts on the tops of the pancakes before flipping. Also, cast iron over griddle everyday. A nice coating of butter helps the edges fry up nicely and keep them super crispy if you have any leftovers!
Spencer Klickman says
Thanks for the feedback, Jenn! I'm so glad to hear that you like them so much. I love adding fresh vanilla bean or vanilla extract to these from time to time. I'll have to try out the hemp hearts though; that sounds really great!
I also agree that you get better results using cast iron since you essentially shallow-fry them in butter and it gives you those super crispy edges! I do like making these on my griddle to help get these on the table as fast as possible, though. I've got two hungry boys that are currently developing their "patience muscles" lol!
Wendy says
I made these exactly as written and I’m wondering if instead of 2 1/2 tablespoons of baking powder it should’ve been 2 1/2 teaspoons? They were bitter.
Spencer Klickman says
Hi, Wendy! I've never had any issues with bitterness when I've made this recipe, so I'm sorry to hear that. These have been thoroughly tested to make sure that everything is just right, and I make them at least once a month (at my family's request!) without any issues.
Few things that might be leading to your issue:
- Accidentally using baking soda vs. baking powder (I've done it plenty of times before!)
- Some brands of double acting baking powder contain sodium aluminum sulfate, which is the leavening agent that reacts to heat. This ingredient can come across as bitter tasting to some people. Single acting baking powder doesn't contain this and would be a great way to remove that variable. Just be sure to use the batter right away since you're removing the leavening agent that will hang around in the batter until they are cooked.
- Old buttermilk can be excessively sour/bitter tasting.
I'd encourage you to give this recipe another shot using single acting baking powder to see if that fixes your issue. You can certainly use less baking powder as well, they just may not be quite as fluffy!
Bekah says
We made these for the first time 2 weeks ago, and they are seriously the best flavored, crispy but soft pancakes I’ve ever had. Our kids LOVED them. Thanks for sharing!!
Harry K says
I made these for the first time last weekend and they were incredible! The contrast of the crunchy exterior and fluffy interior seriously is SO hard to beat. Never would have expected that from a pancake, but you have to try it! It's delicious!
Curt says
May I ask why no baking soda? Most recipes call for that as well
Spencer Klickman says
Hi Curt! Thanks for the great question! This recipe uses baking powder as the only leavener, and it rises well because baking powder includes both baking soda and its own acids (so it works even without buttermilk). As written, it already gives plenty of lift — so I don’t add extra baking soda.
Speaking candidly: I originally developed this recipe with whole milk, so baking powder was the straightforward choice. When I later switched to buttermilk, I didn’t add baking soda because the texture and rise were already exactly what I wanted. Baking soda can work with buttermilk, but it often mellows the tang and increases browning, and it can change the flavor/crumb if you don’t rebalance the amounts.
Hope this helps!
Michelle says
Best Pancakes ever! I bet your son who LOVES pancakes really enjoys these!