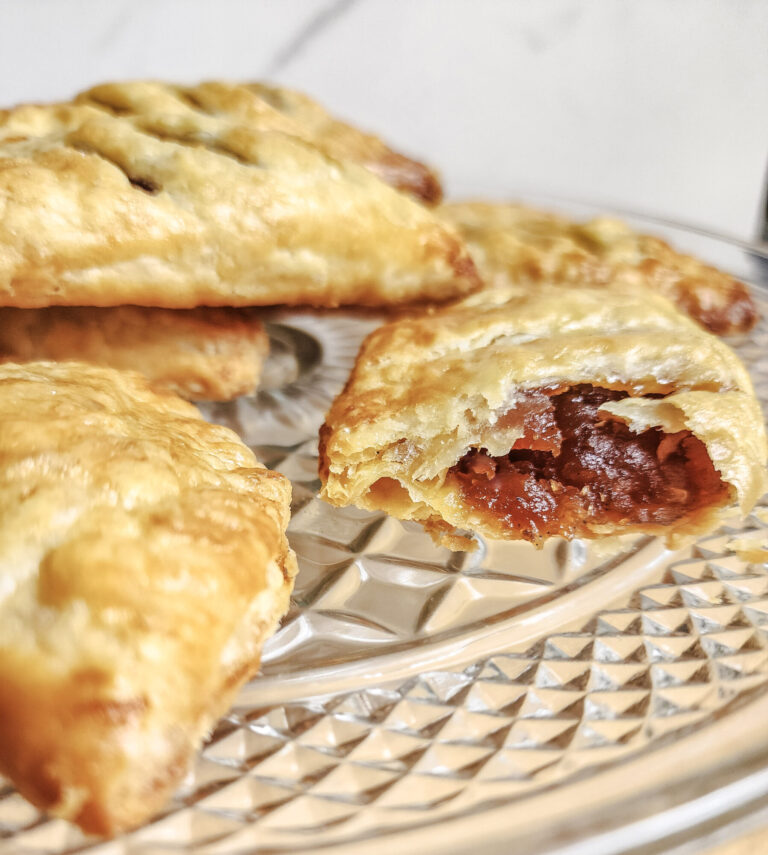
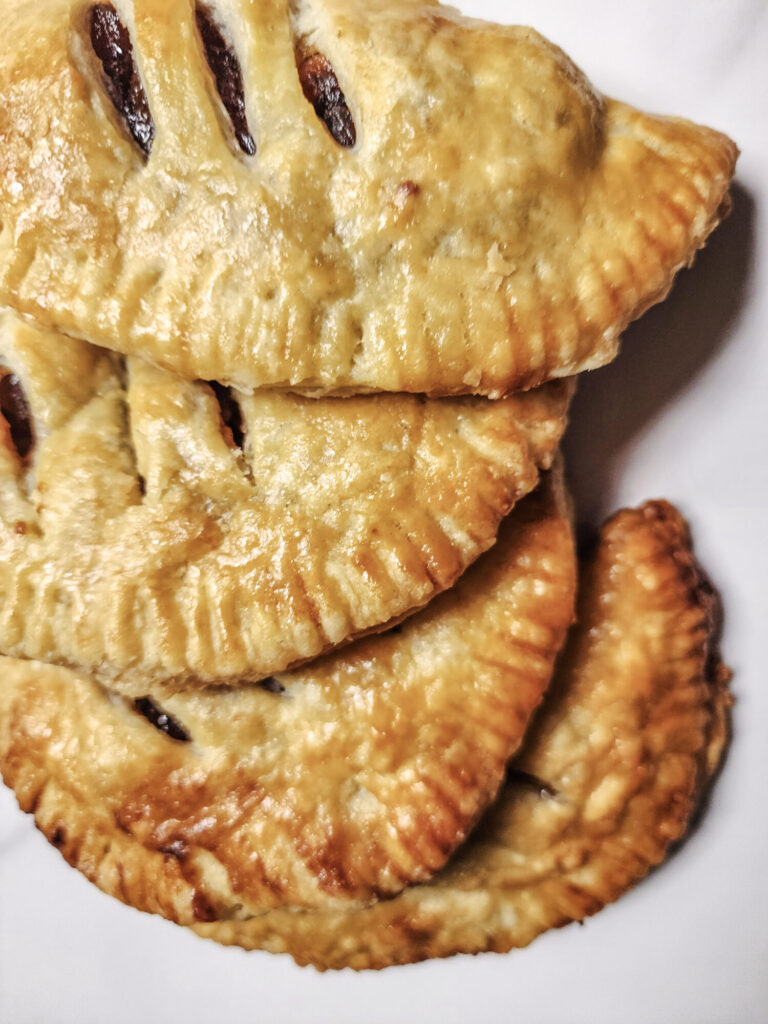
This recipe for Harvest Apple Hand Pies is quite possibly my favorite dessert on the planet, and I'm so excited to be sharing it with you! These have absolutely everything that I look for in a pie: an almost shatteringly flaky, buttery crust and a warmingly spiced apple filling that's not overly sweet. This recipe is my favorite way to use up those fresh-picked apples during the fall.

Ingredients and Processes
The two main components of this recipe are the apple pie filling and the ultra-flaky, homemade pie crust. Below outlines the ingredients and how to
Apple Pie Filling
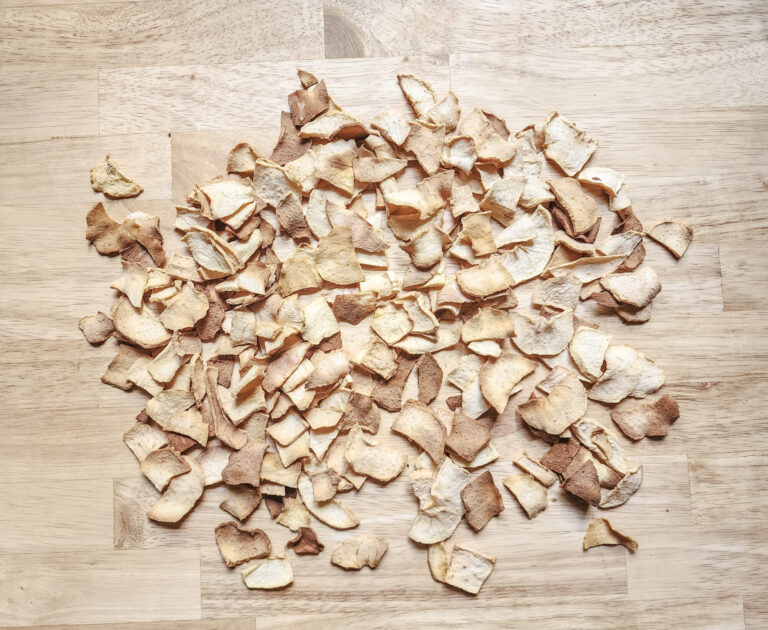
The filling in this recipe uses dried apples instead of fresh. Store-bought dried apples will work perfectly fine, or you can make your own by thinly slicing them and then baking them in a low oven for several hours (this is my preferred method, although it does take a bit more time). Using dried apples does a few things: it keeps the filling from being overly runny and helps to create a really intense, concentrated apple flavor. In essence, it makes these pies taste more "apple-y" (using a technical term here).
I need to take a minute to mention that your house will smell absolutely INCREDIBLE while you make this filling. My wife always jokes that I need to find a way to bottle the smell that comes from the kitchen when I'm making this, because it's almost intoxicating!

The filling is made of the following ingredients:
- Dried Apple Slices
- Unsweetened Apple Juice
- Nutmeg
- Cinnamon
- Whole Cloves
- Whole Black Peppercorns
- Light Brown Sugar
- Lemon Zest
- Lemon Juice
- Kosher Salt
- Vanilla Bean
Apple Varieties
As far as apple varieties go, any red apple that is semi-sweet with some tartness will work great. Granny Smith apples are a popular option for pies; however, I don't recommend them in this recipe as they're too tart. I know a bit of personal preference is at play here, so feel free to choose what you like! Here are a few of the varieties I would recommend for this recipe:
- Gala
- Fuji
- Mcintosh
- Honeycrisp
- Golden Delicious
Apple Hand Pie Filling Process
To make the filling, begin by hydrating the dried apples in several cups of unsweetened apple juice with some toasted spices for an hour. Bring the liquid to a simmer and cook, stirring frequently, until most of the liquid has dissolved, about 40 minutes. Remove from the heat and add brown sugar, lemon zest, lemon juice, vanilla bean, and salt.
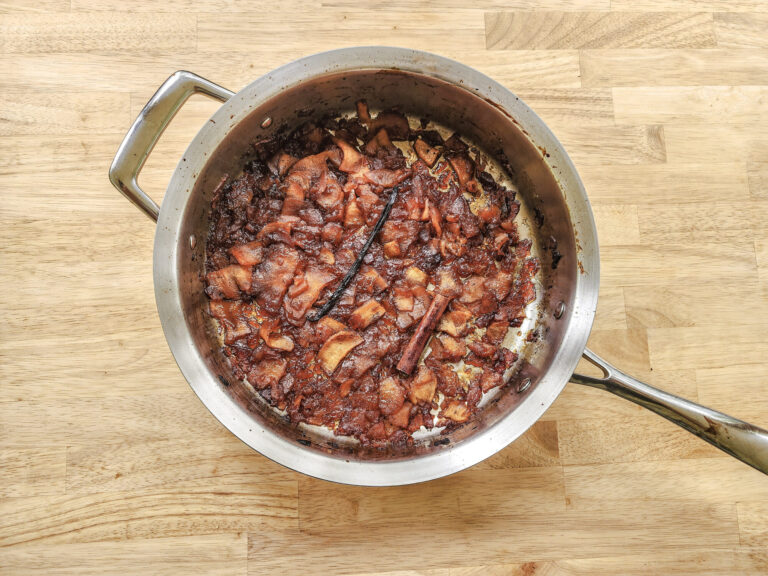
Transfer the pan to a 400°F oven and bake for an additional 20 minutes until the apples are soft. Remove from the oven and allow the mixture to cool completely. This is a crucial step that you should not miss. Ensuring that the filling has cooled completely will help keep the filling in the pies while they bake. Discard the vanilla bean pod and cinnamon stick, and your filling is ready for the pies.
Pie Crust Ingredients and Process
As the name suggests, these pies are mind-blowingly flaky and absolutely jam-packed with flavor. This is thanks to the all-butter pie crust. If you've been around my blog for any amount of time, you'll know that I'm a huge fan of Lisa Donovan's Pie Dough. I came across her pie crust recipe in Food & Wine magazine several years ago, and it has been my go-to pie crust recipe ever since. It's so incredibly flaky and buttery, and it's the absolute best! As always, if you don't feel like making everything from scratch, feel free to substitute your favorite store-bought pie crust or puff pastry here. Who can say "no" to homemade pie dough, though?? (Say that five times fast!)
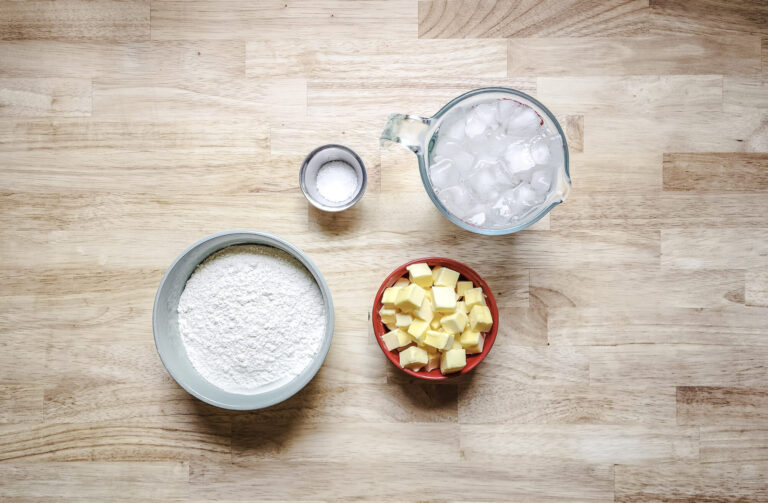
The pie crust contains all-purpose flour, unsalted butter, kosher salt, and a small amount of ice-cold water. The key is to work the cold, cubed butter into the flour with your fingertips and thumbs to create small flakes of flour-coated butter. These pieces of cold butter are what make the crust so flaky.
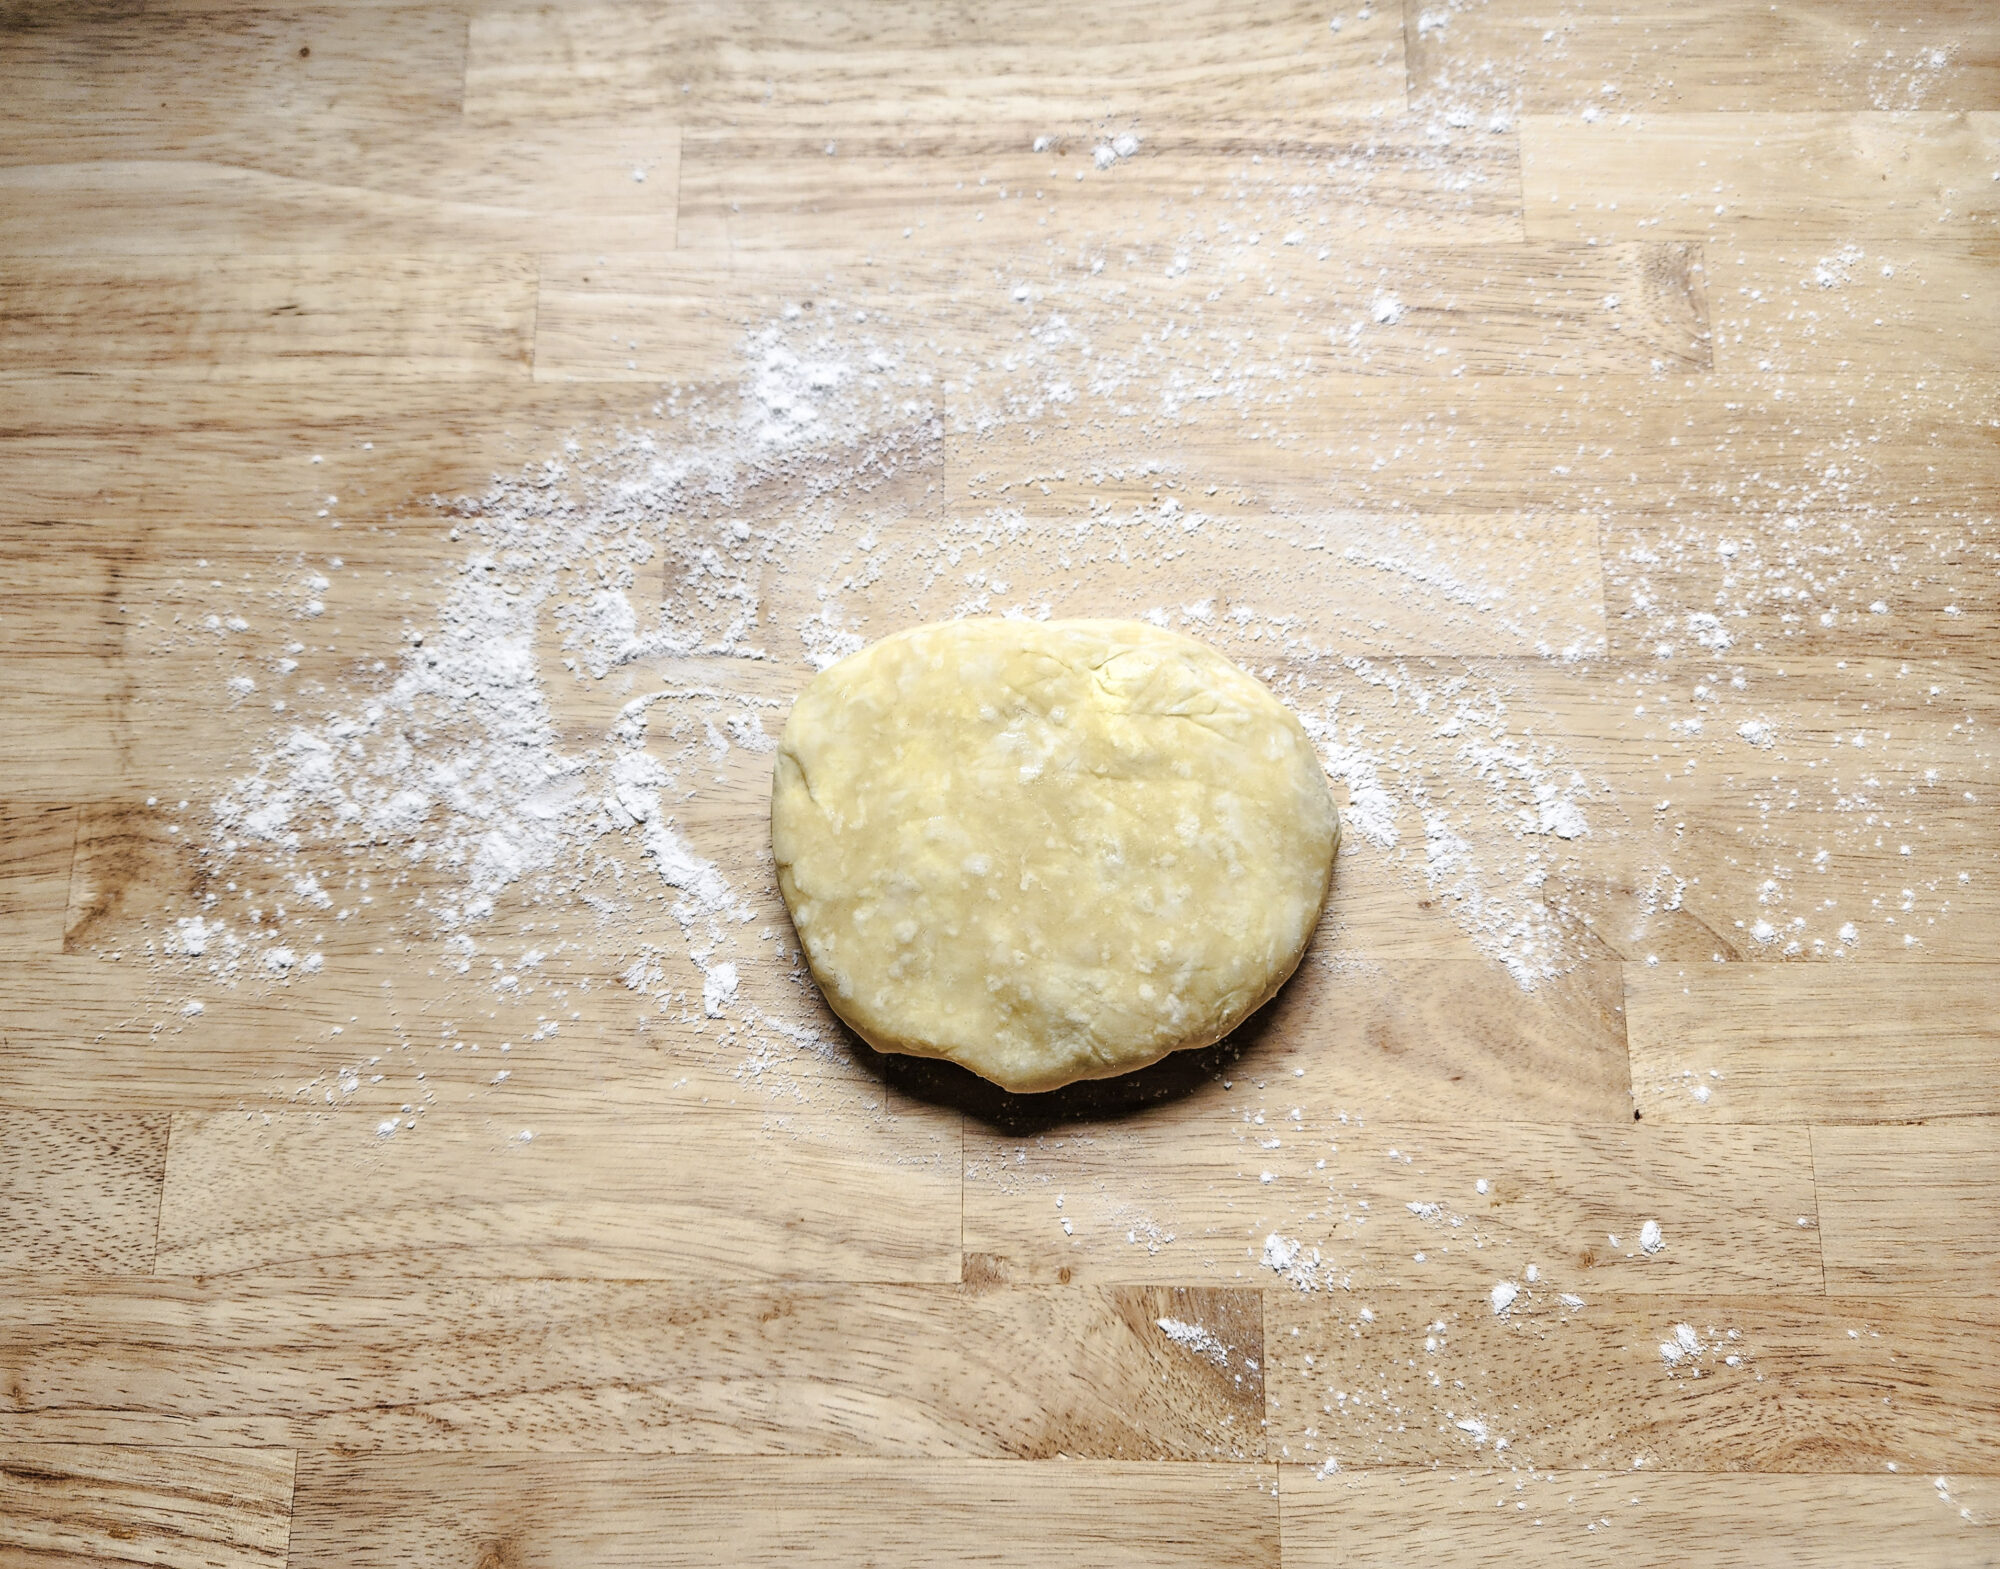
After you combine the dough, wrap it in plastic wrap and let it rest in the fridge for at least an hour. This allows the butter to set back up. As mentioned previously, keeping the butter as cold as possible is important for the pie dough.
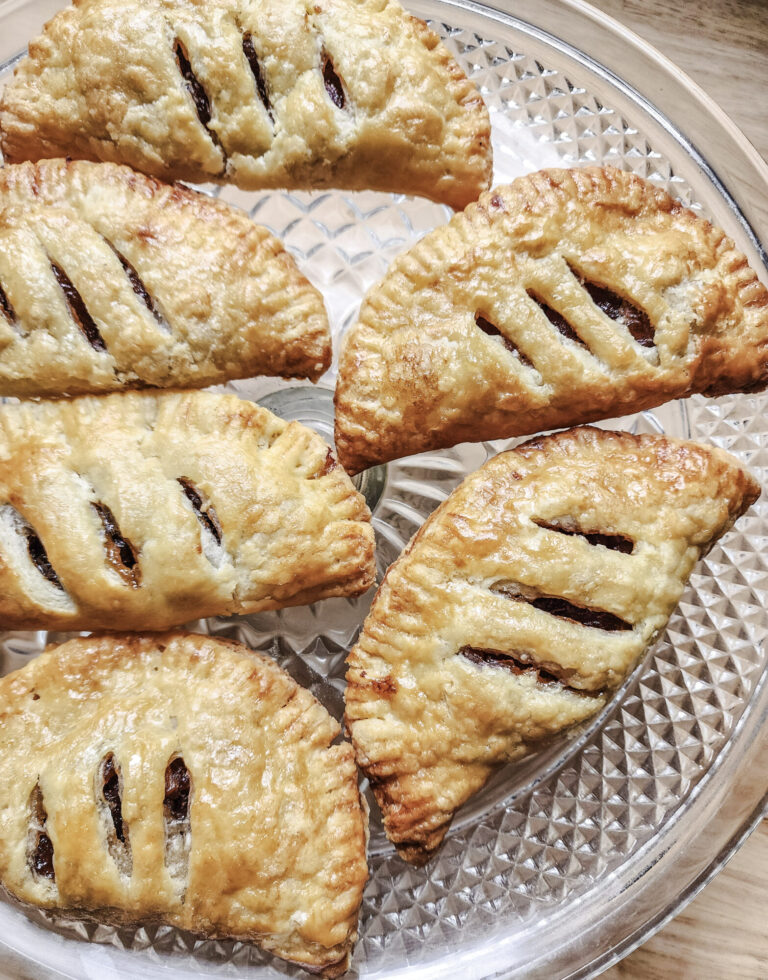
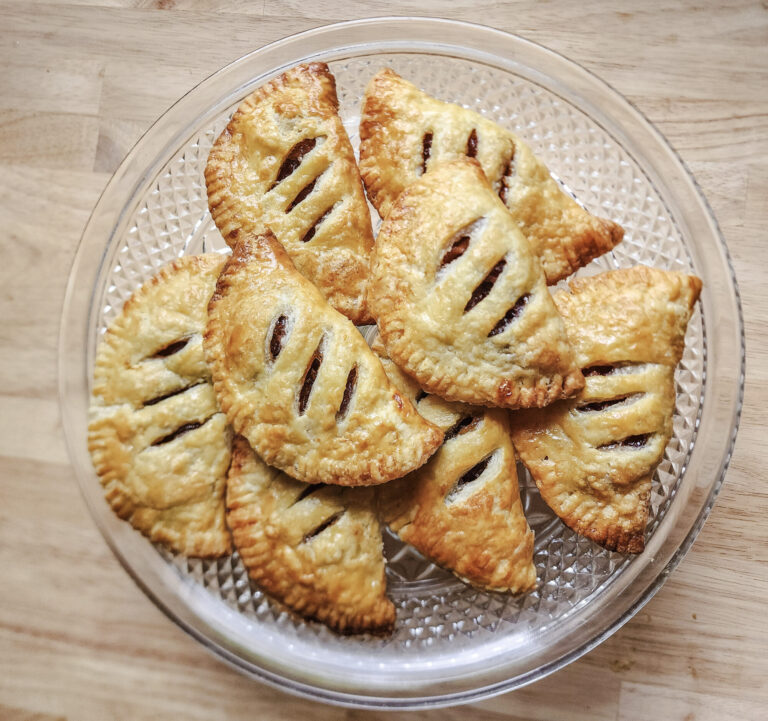
Harvest Apple Hand Pie Assembly
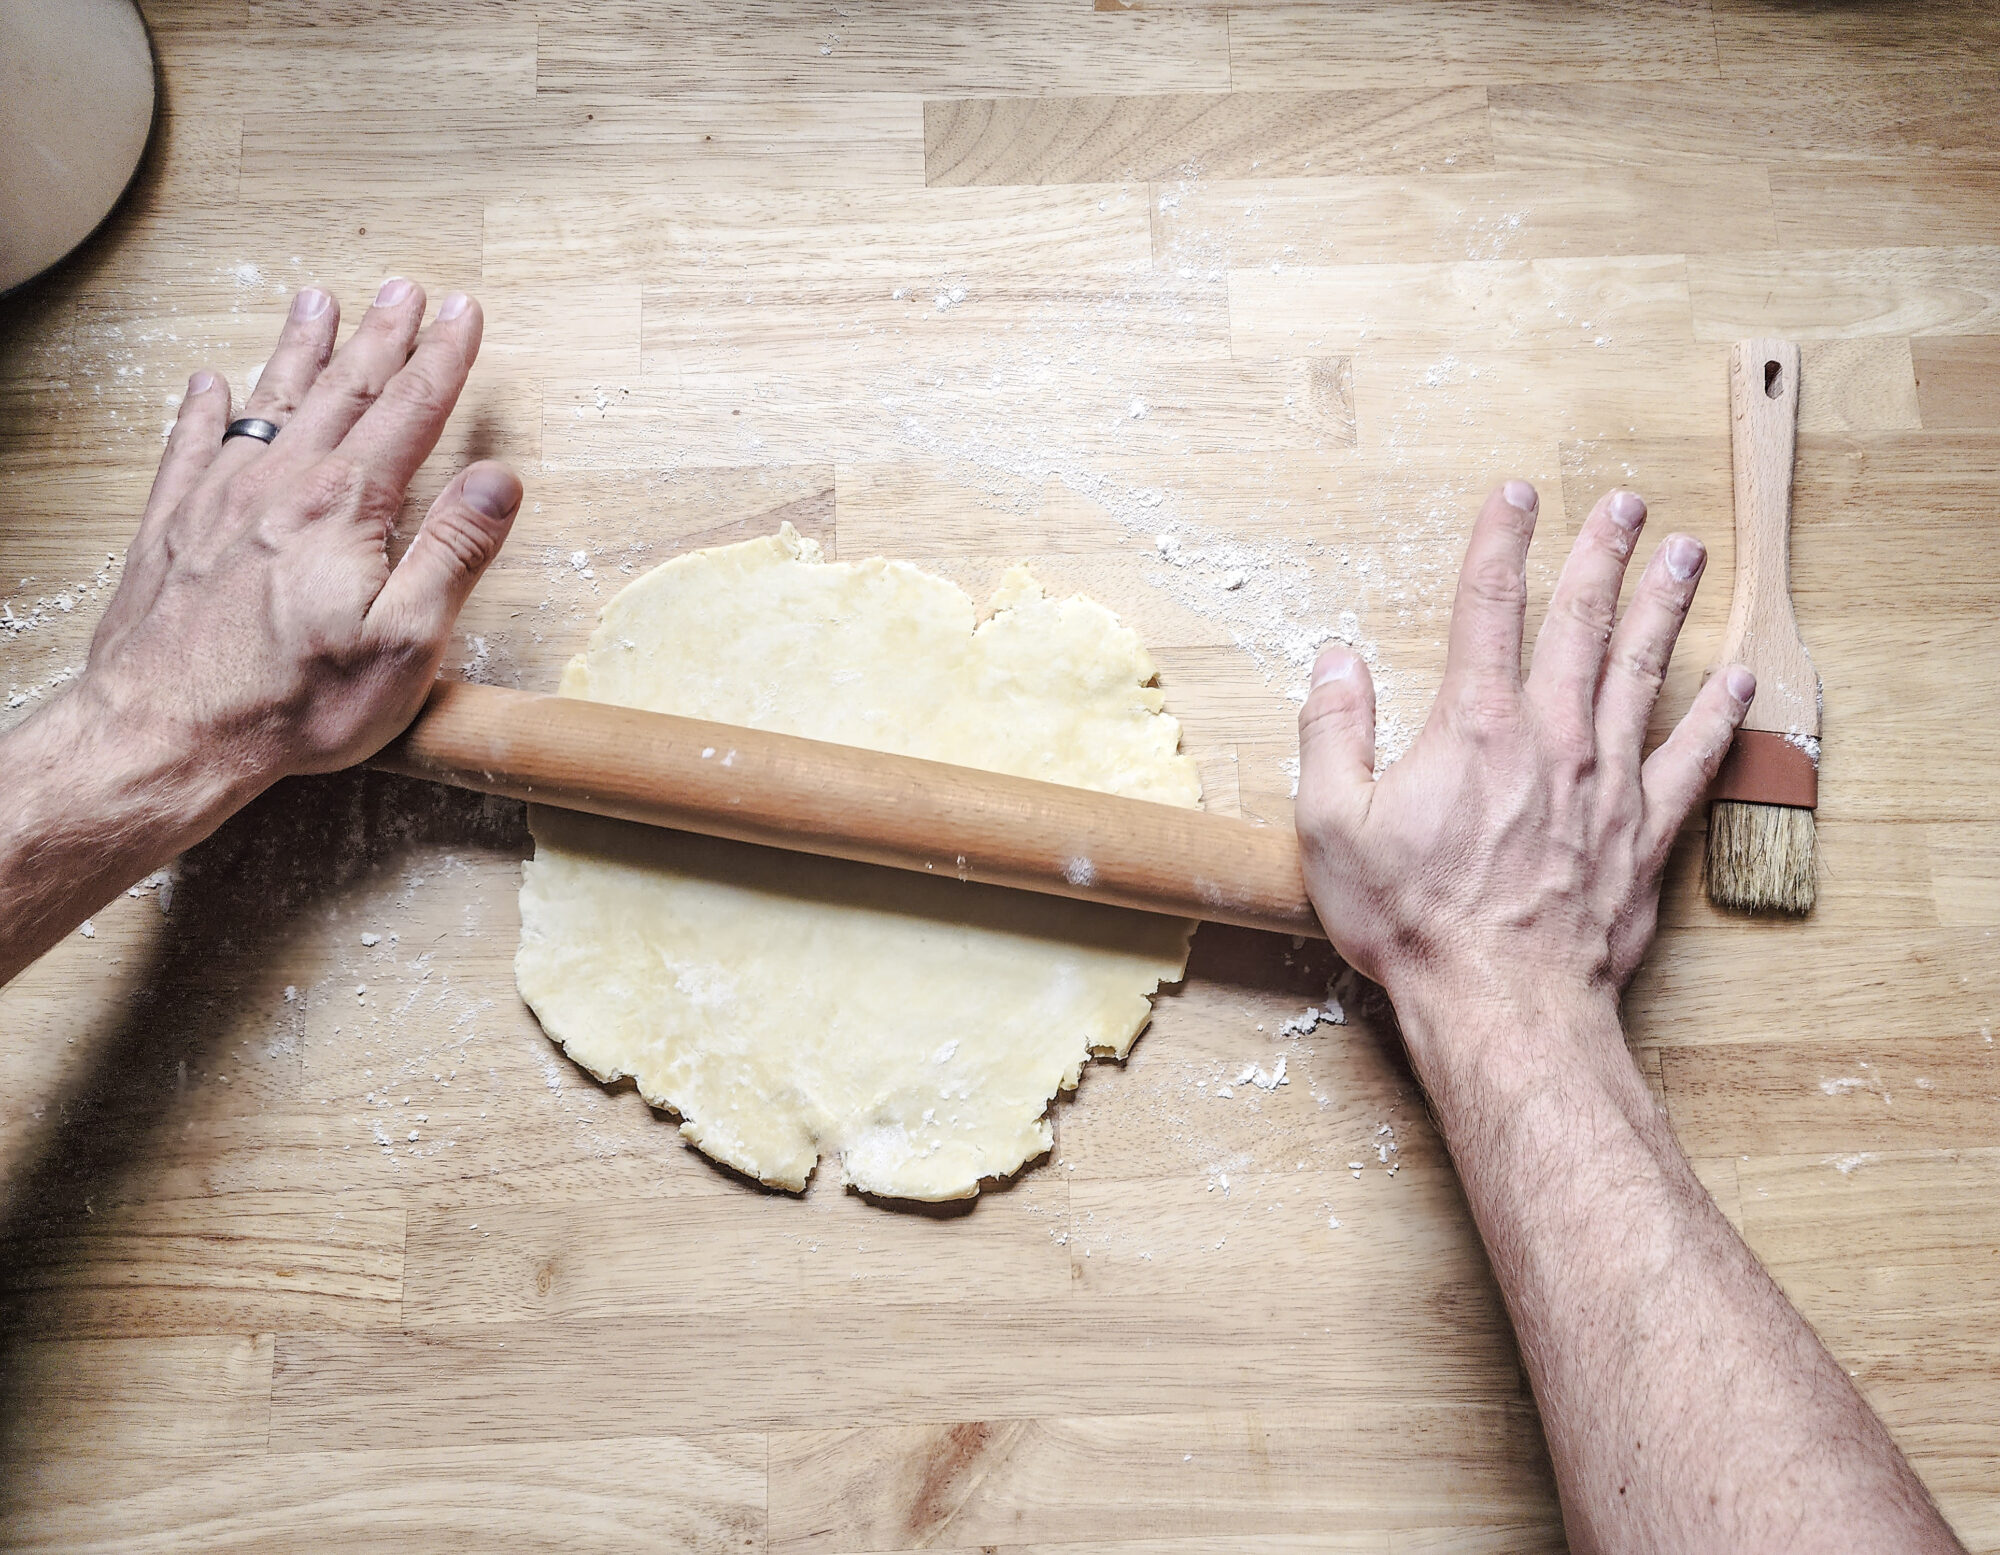
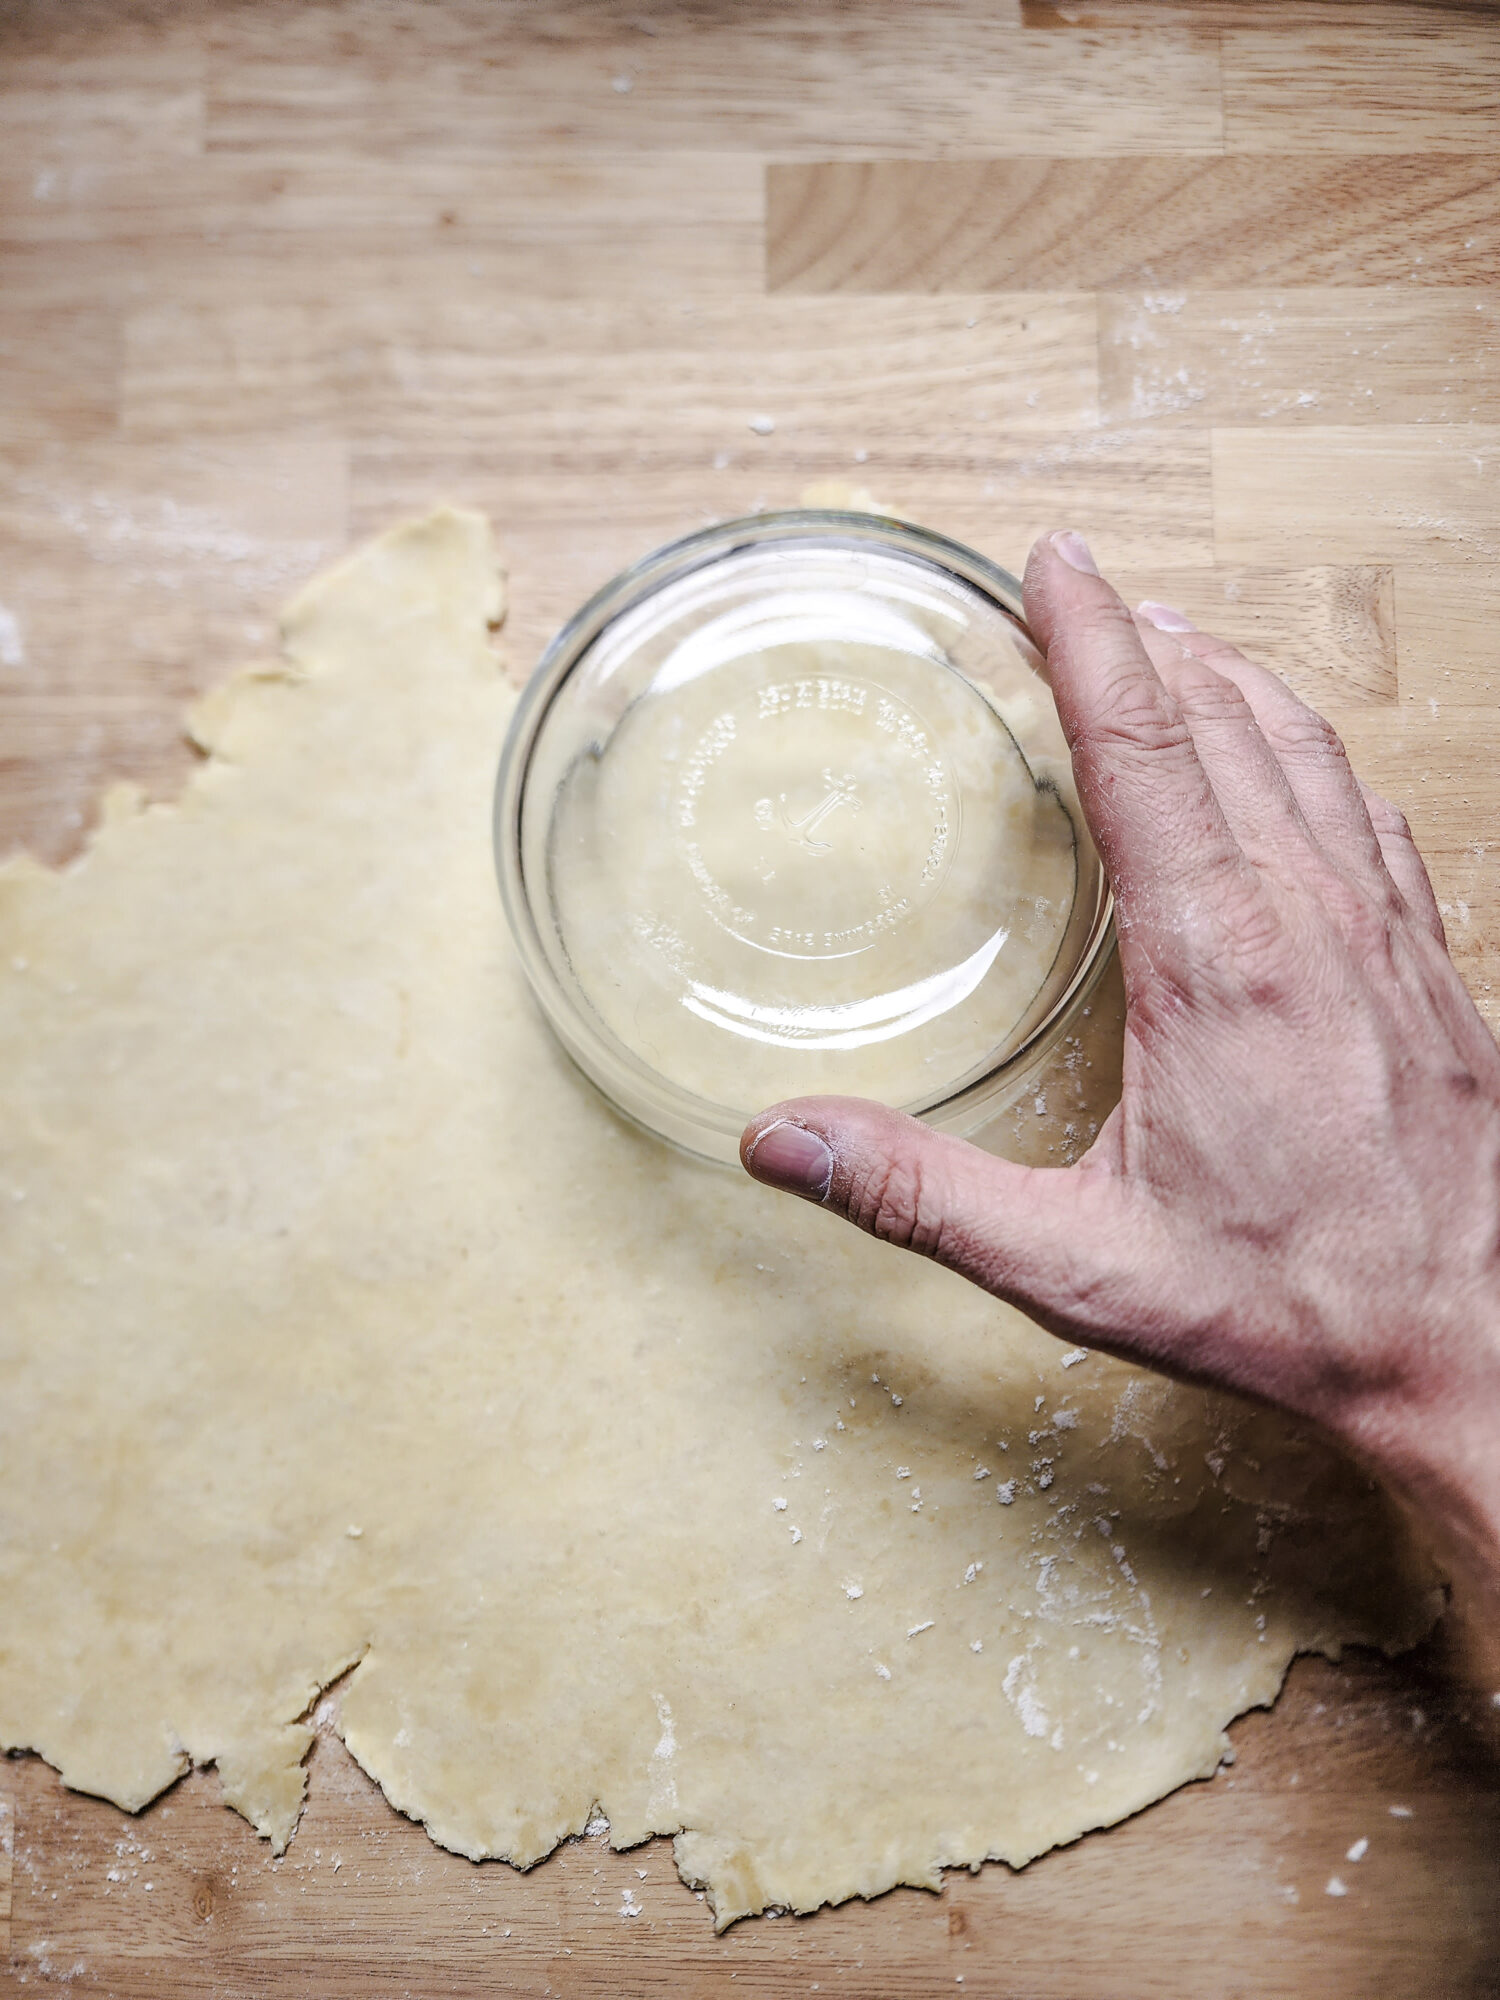
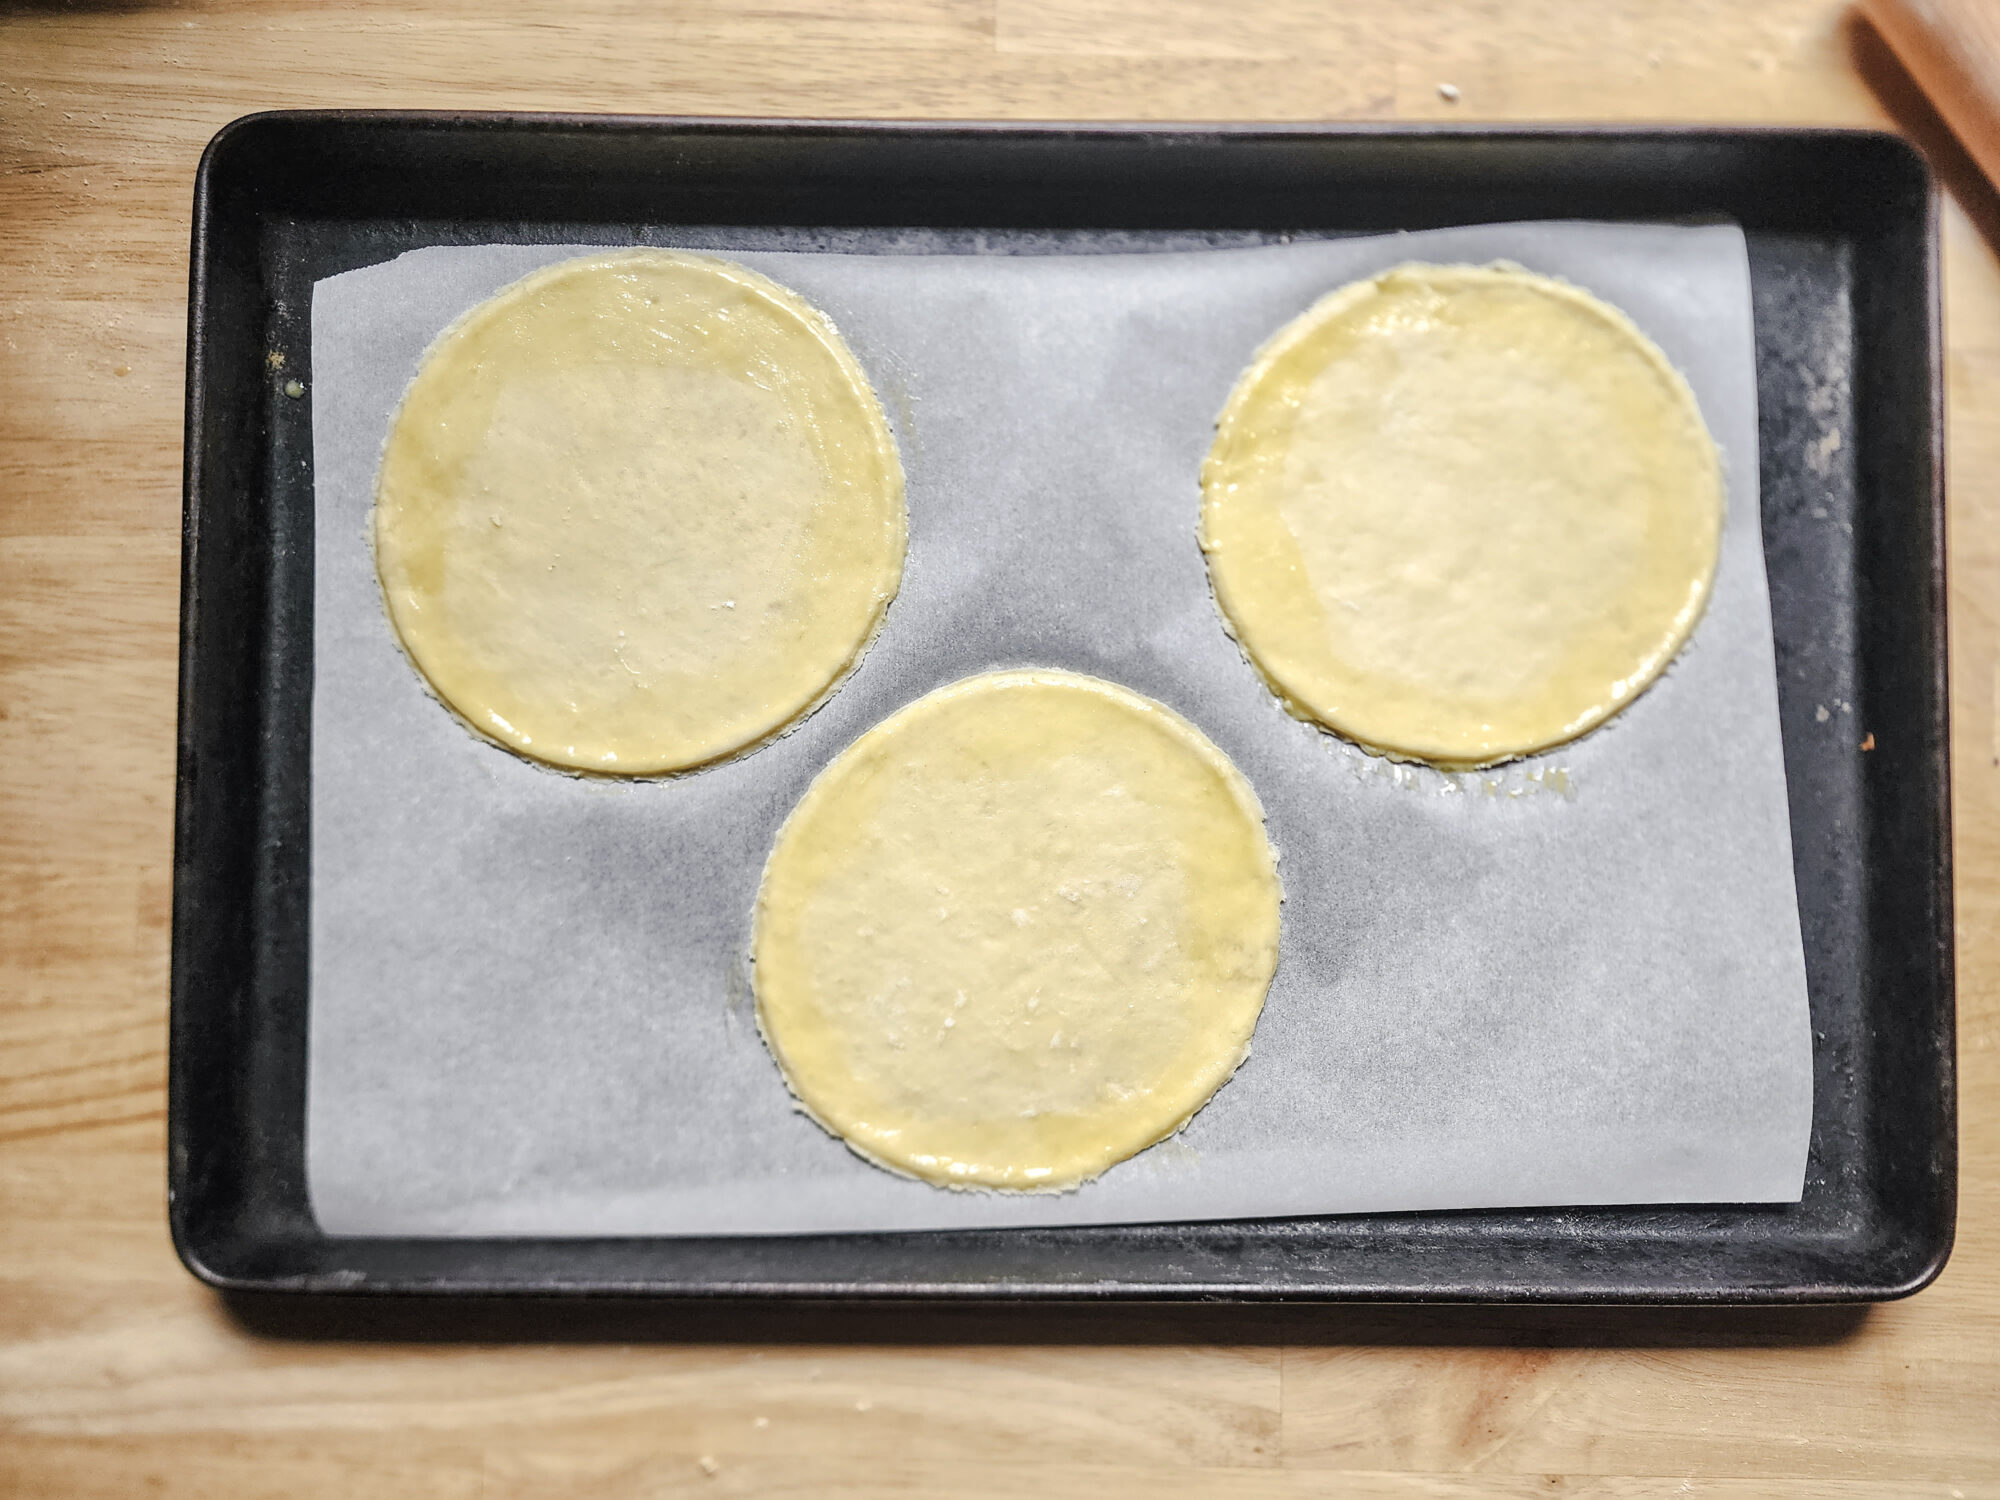
Assembling the pies is pretty straight-forward once your dough is chilled. Roll it out to ¼ of an inch on a floured work surface, then cut out ten 5-½ to 6-inch circles. You will have to combine the scraps of pie dough together to get the last couple of pies rolled out.
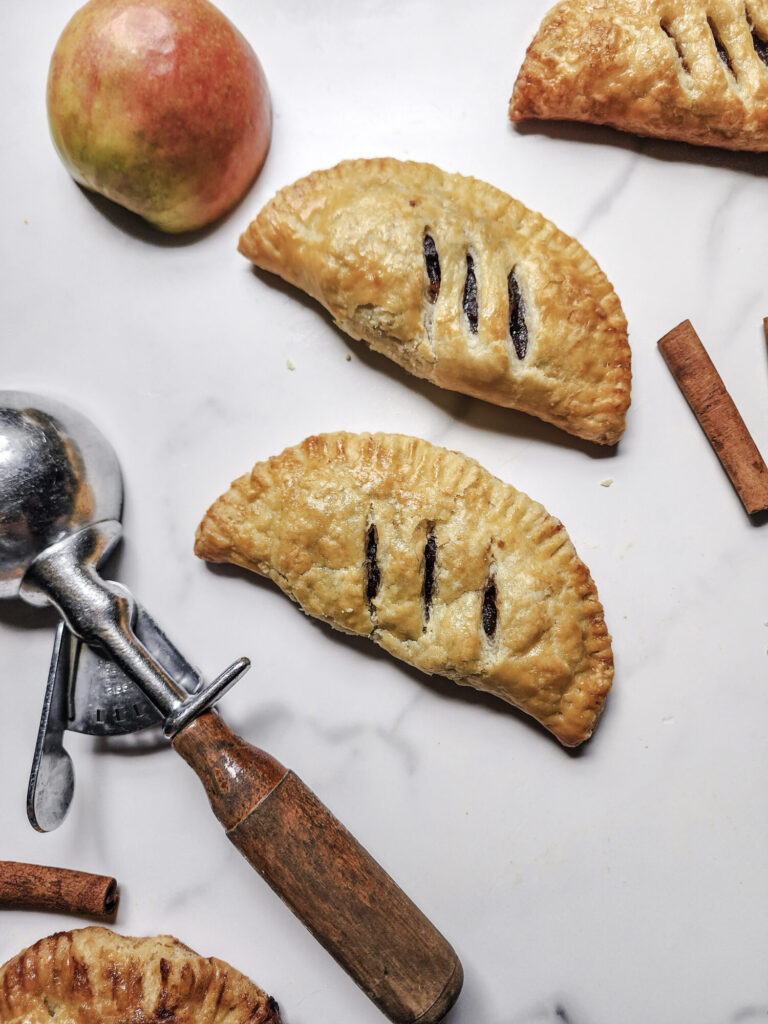
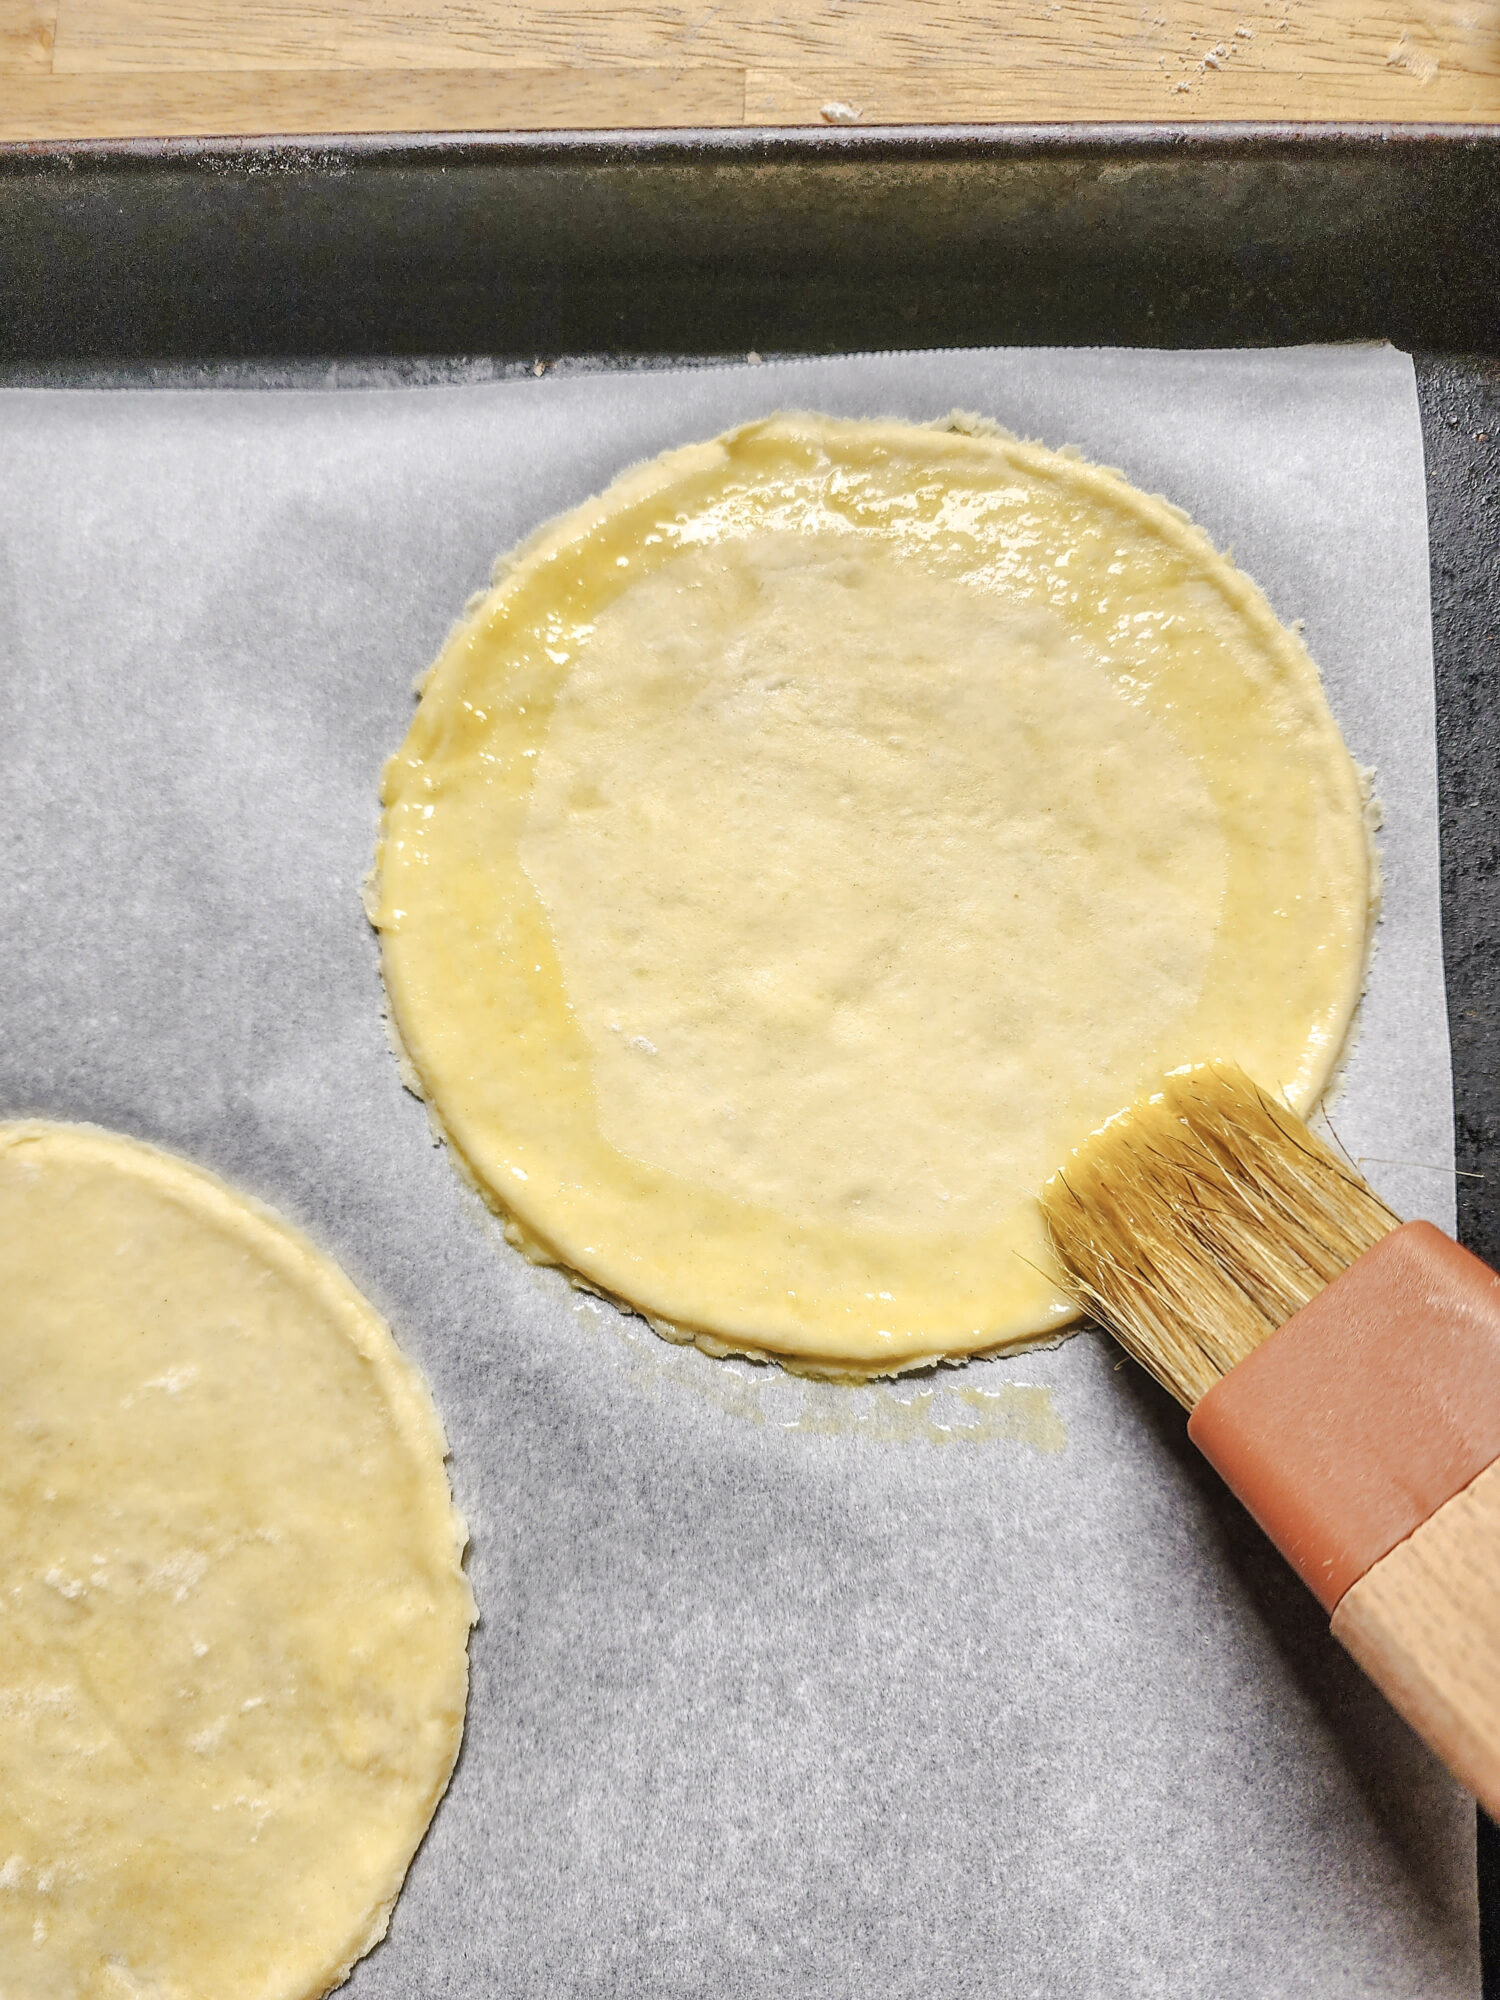
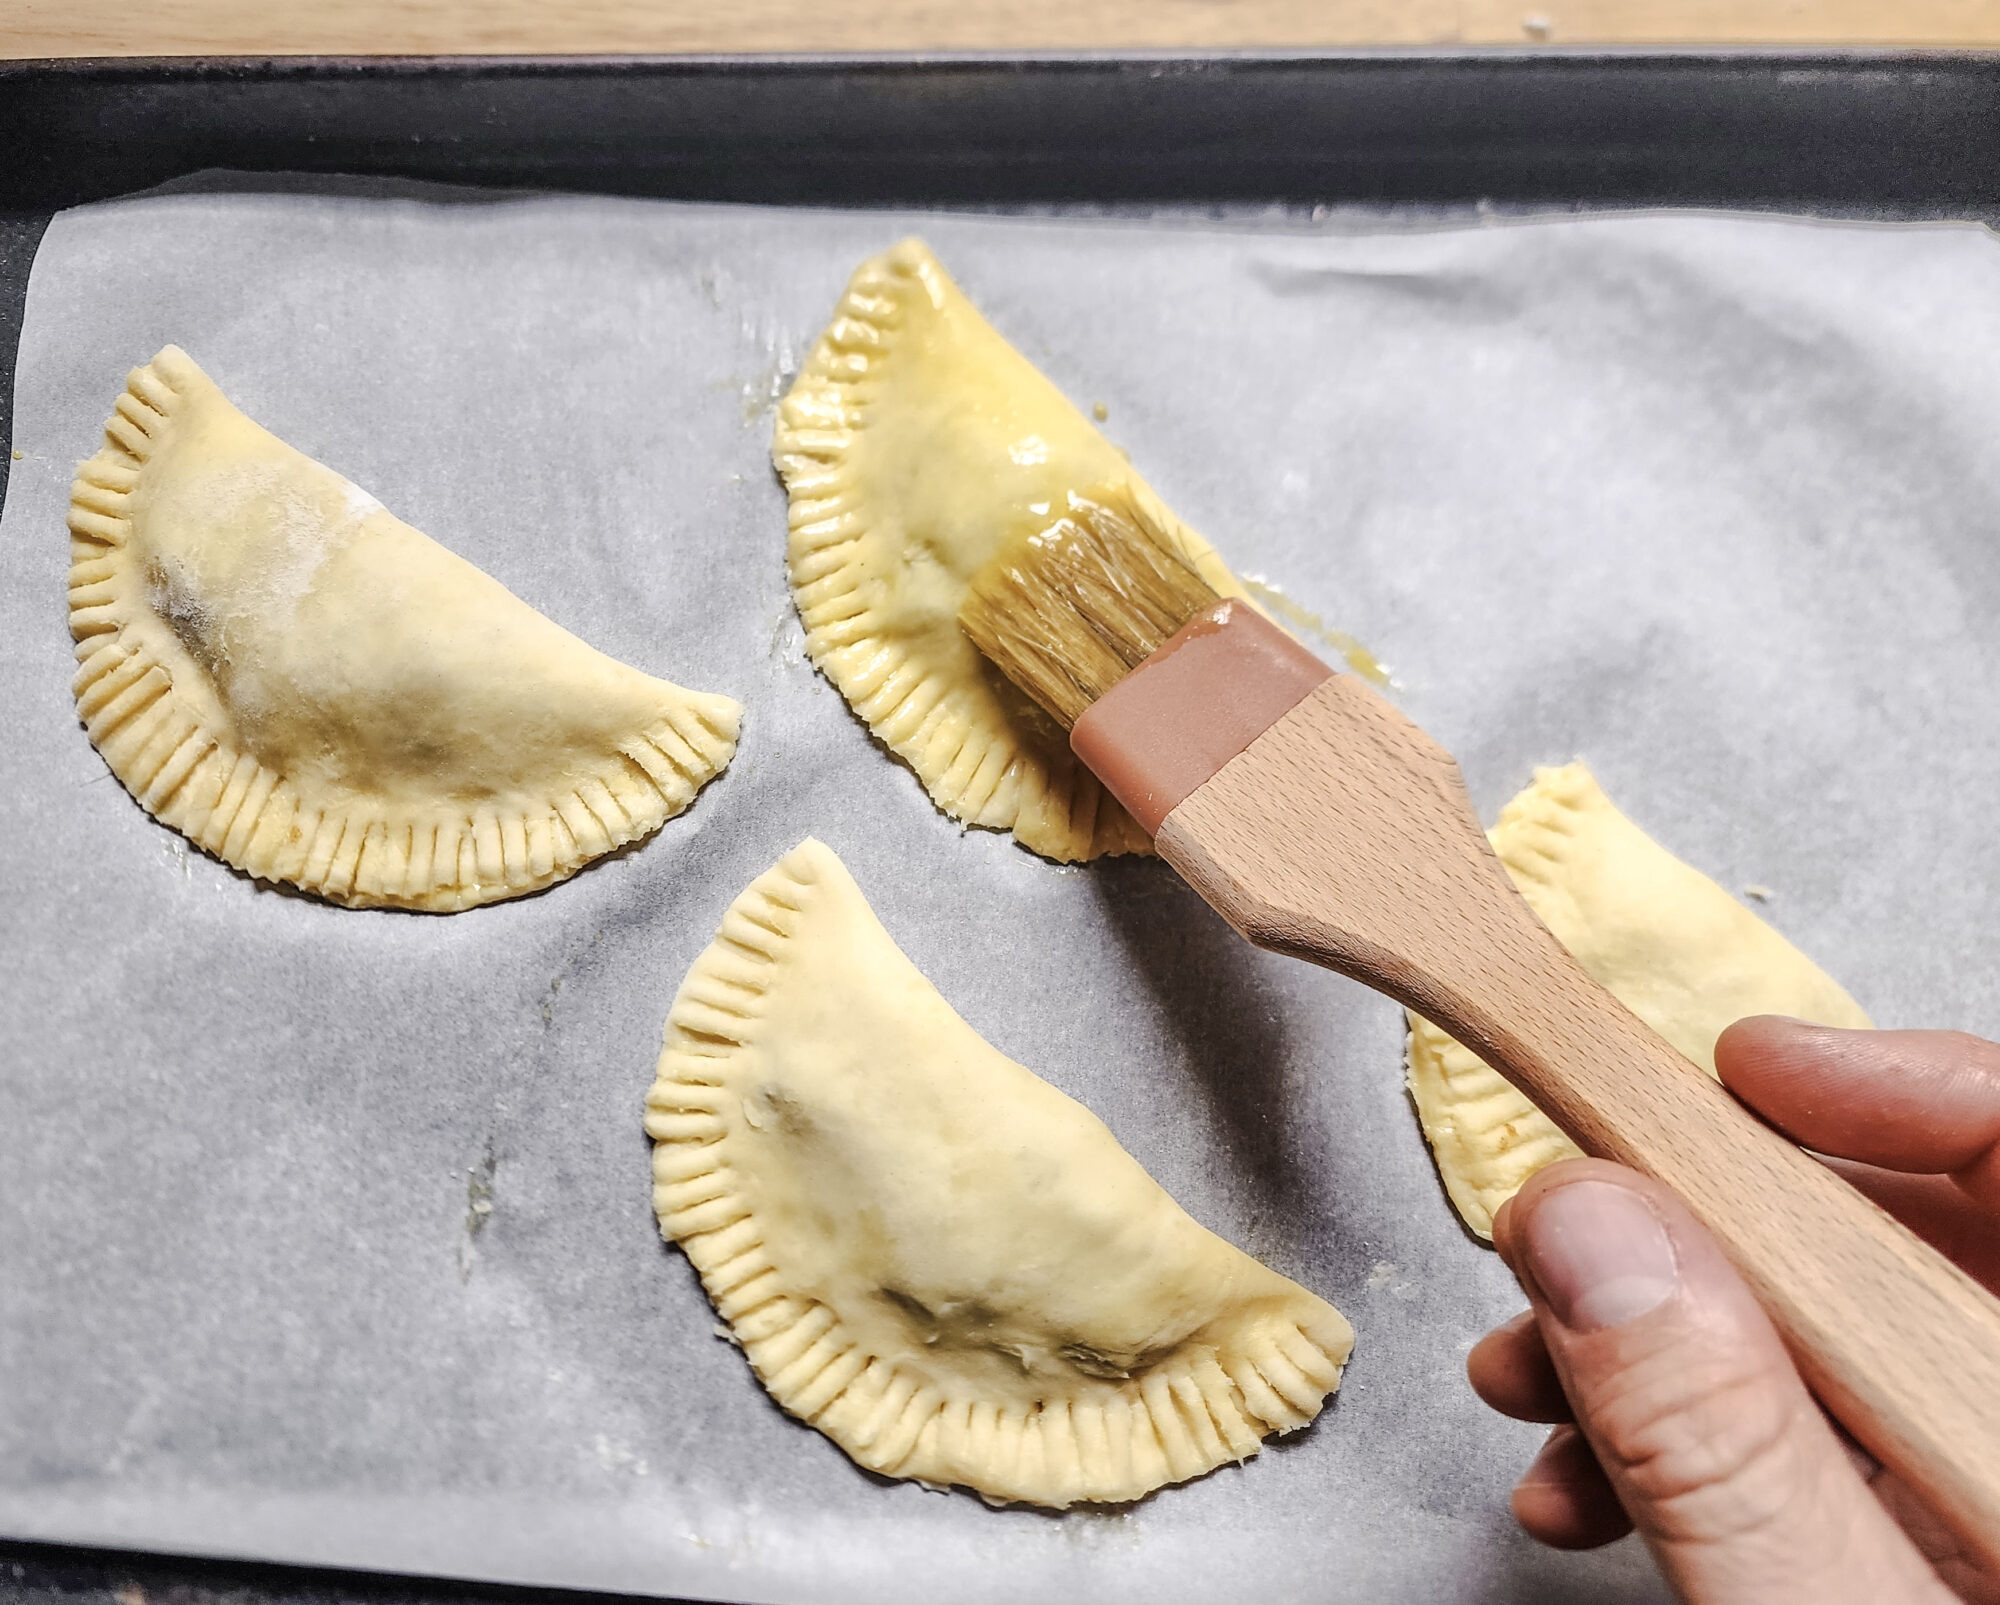
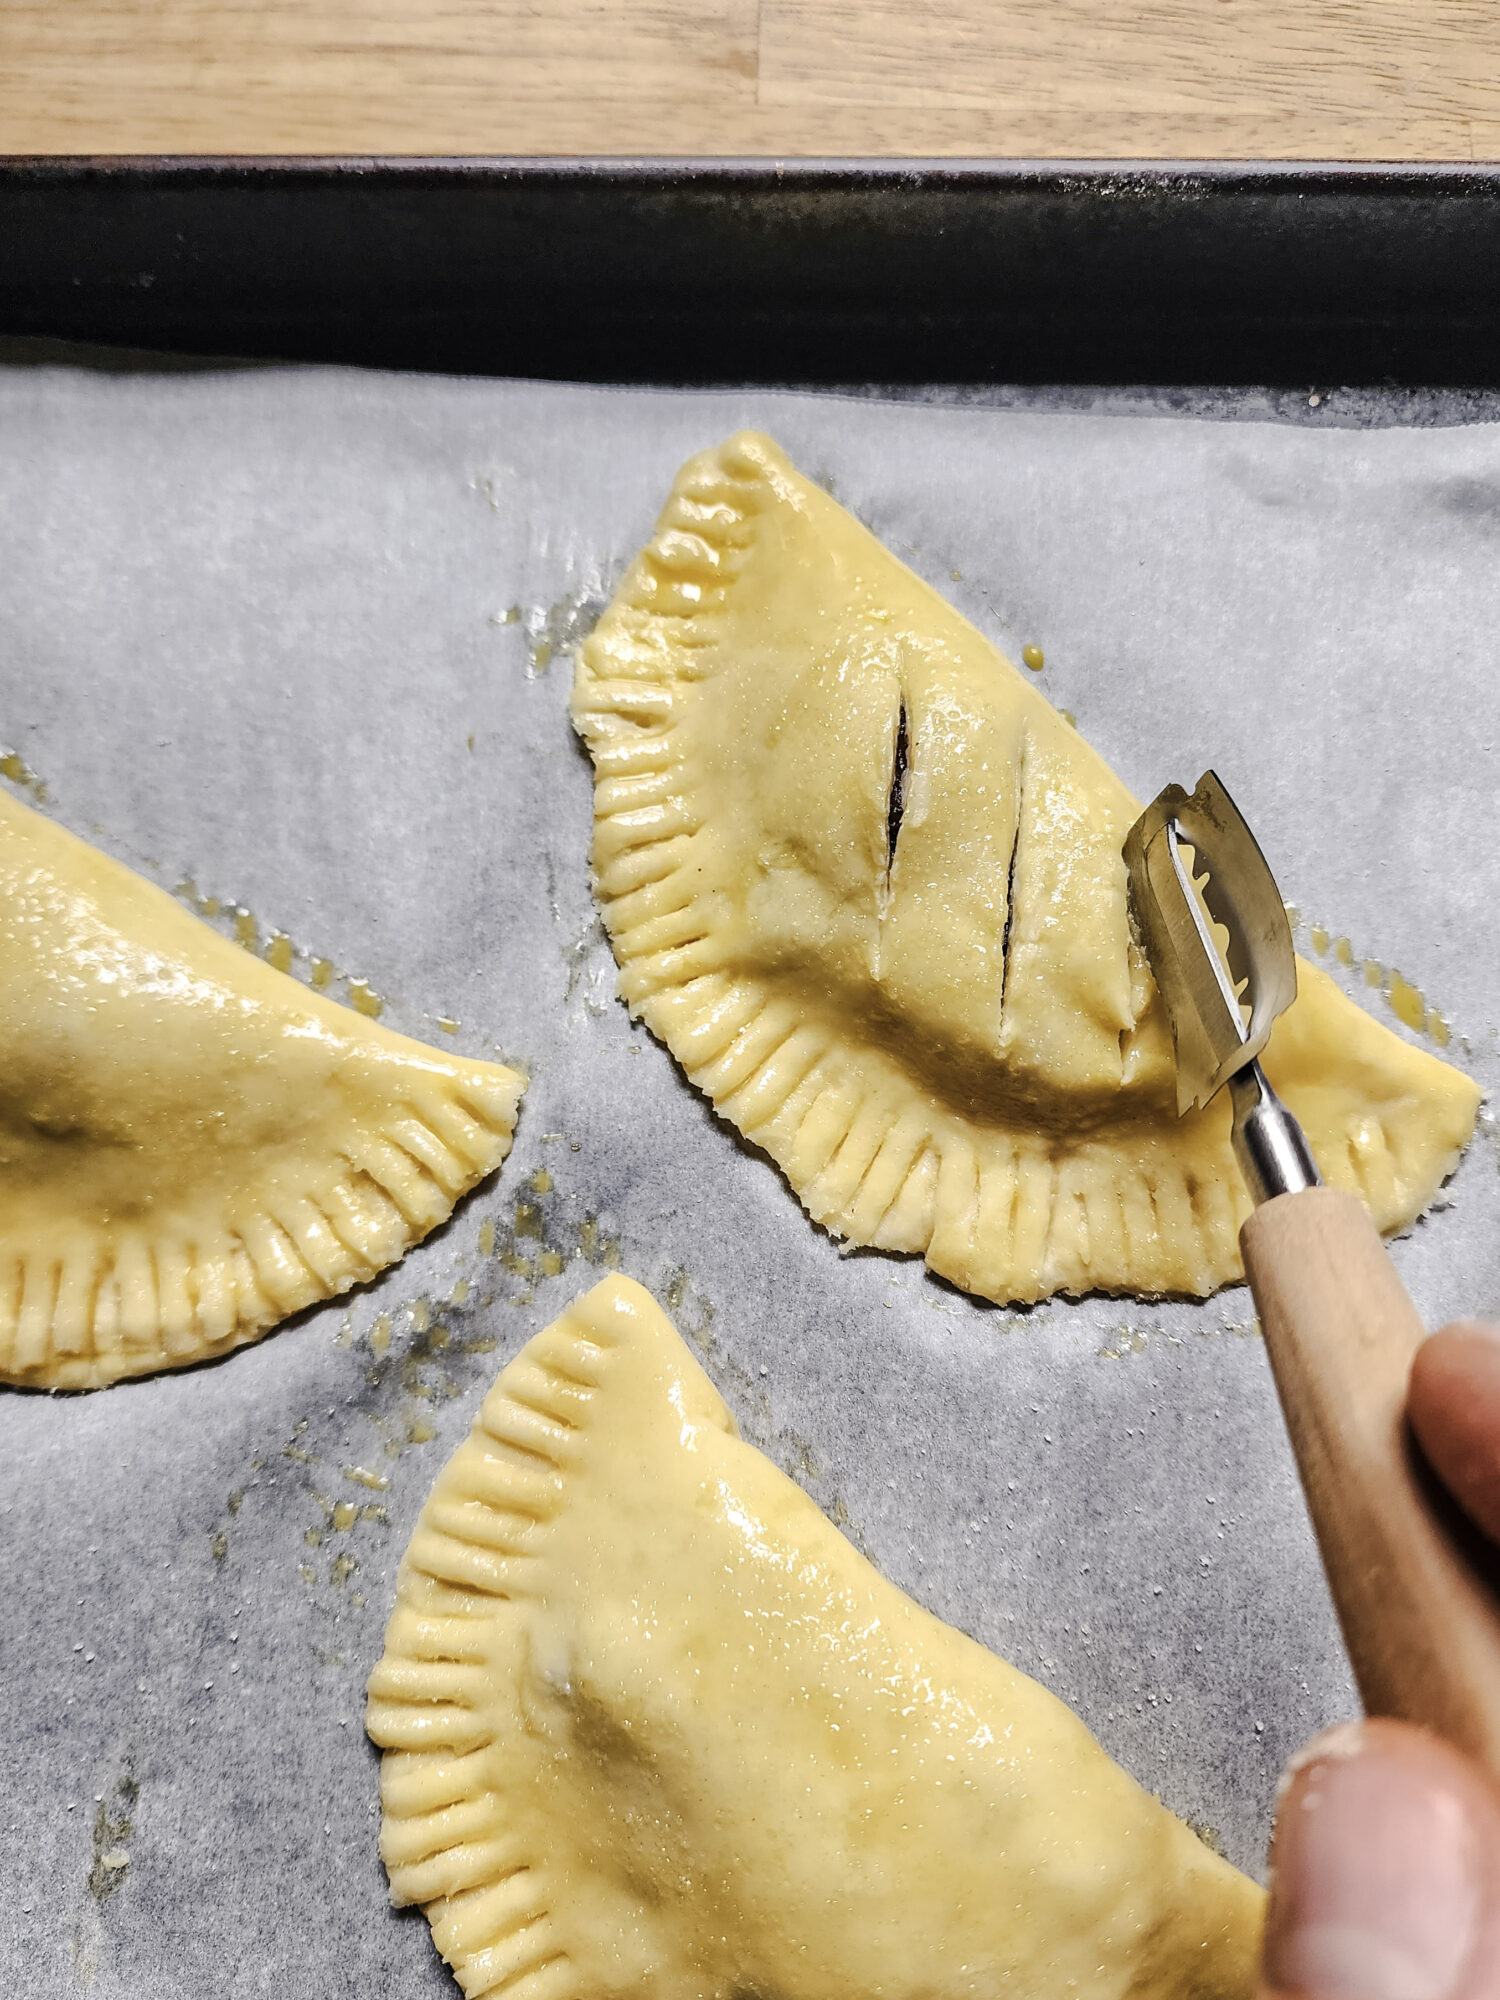
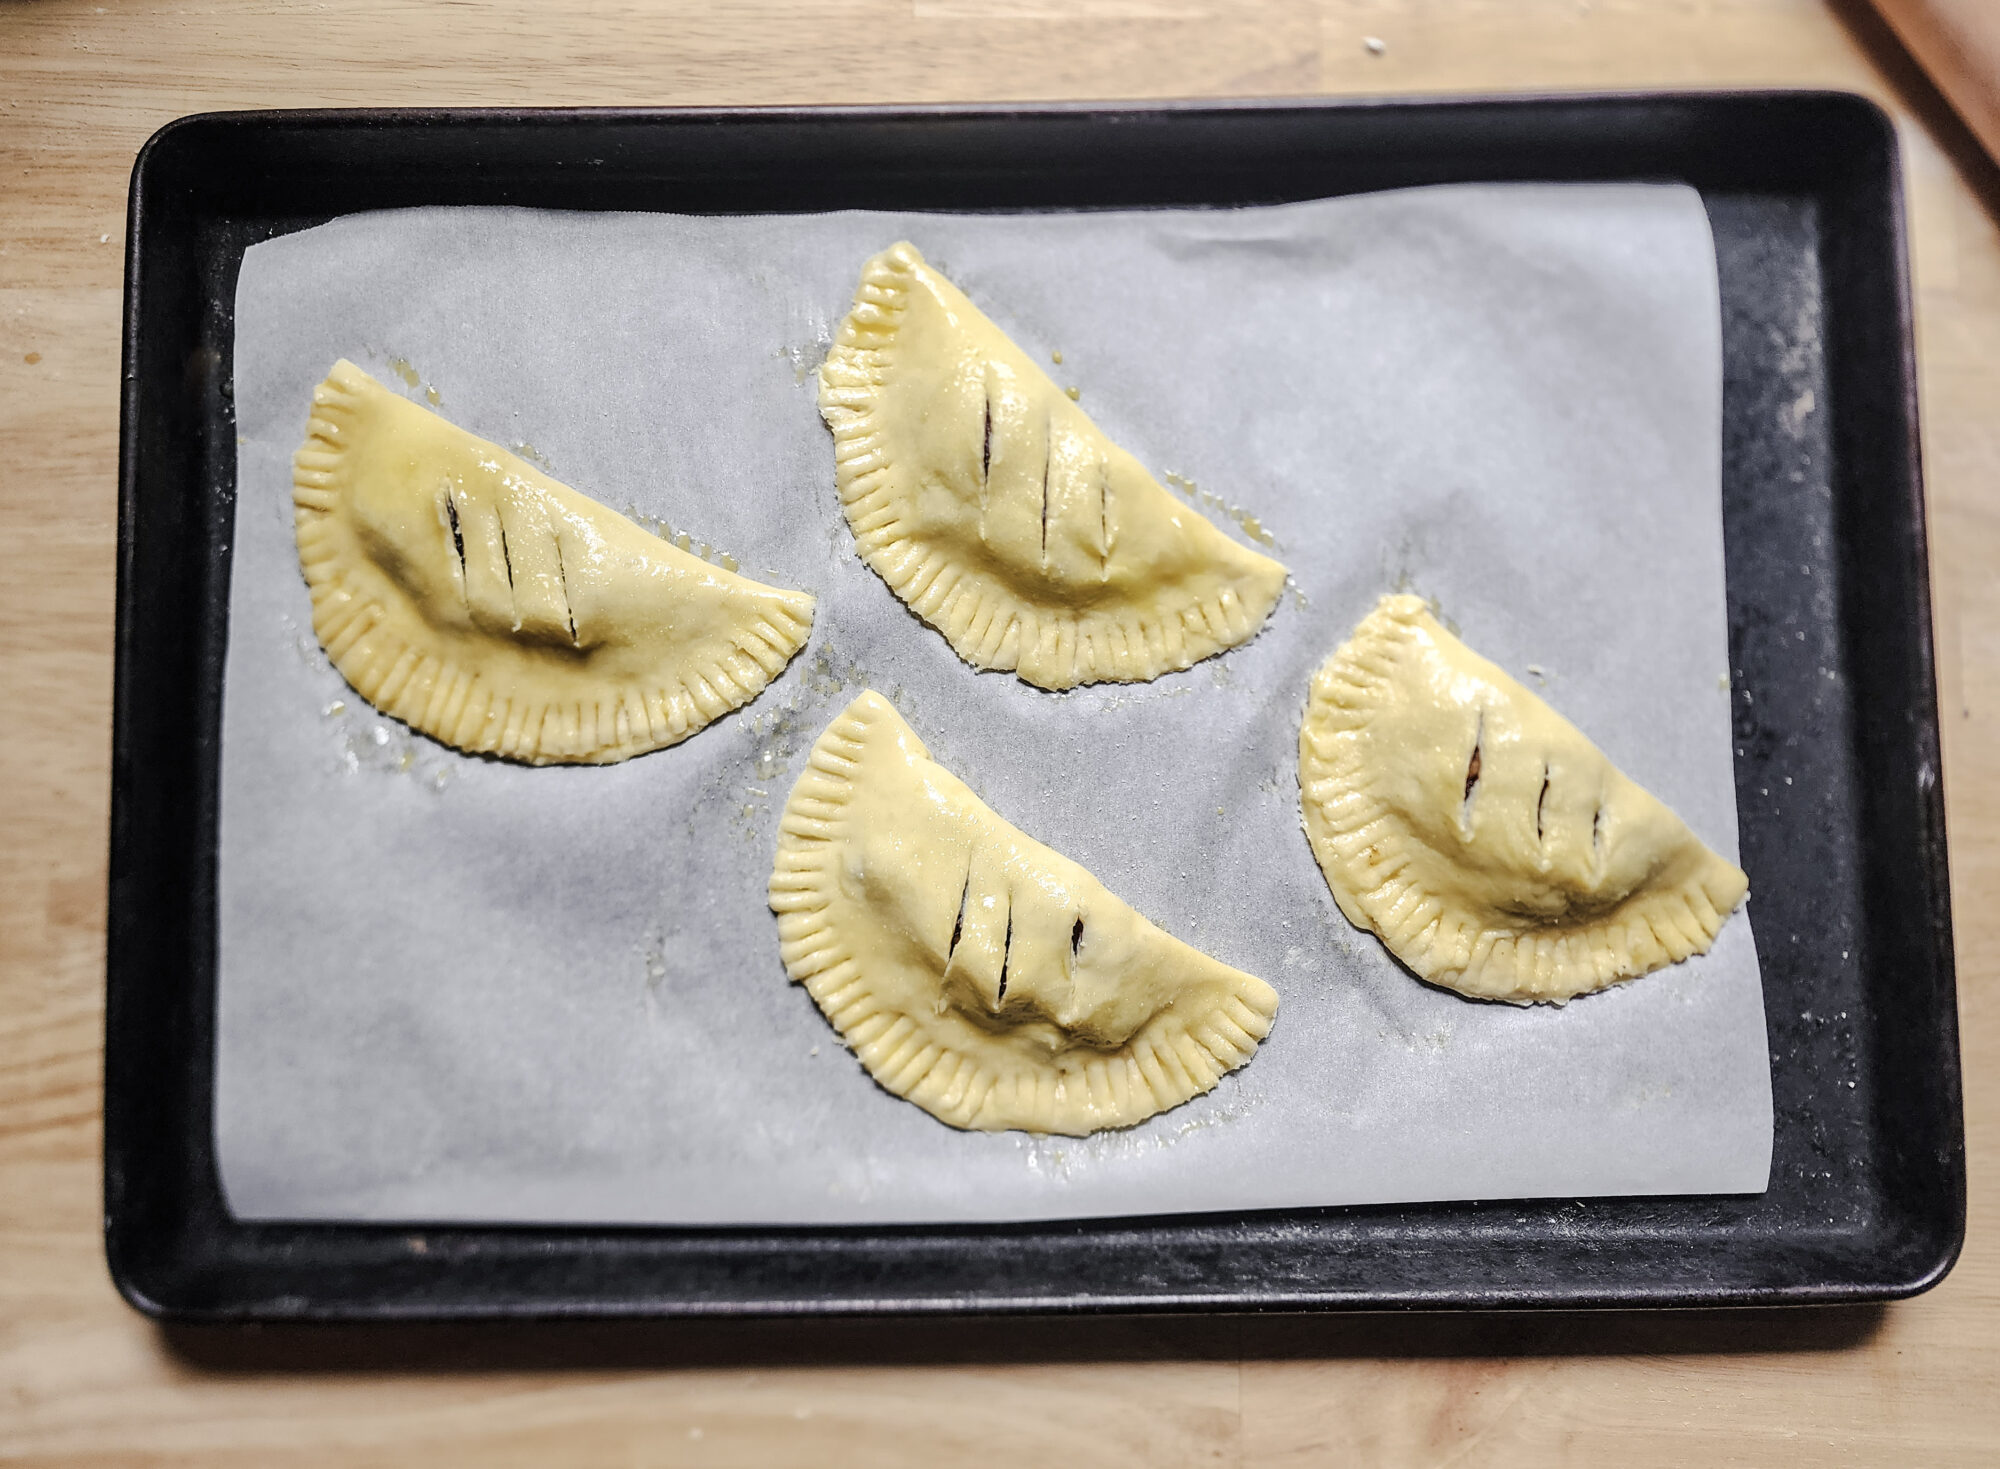
Transfer your discs to a parchment paper-lined baking sheet, brush the edges of the dough with egg wash, and place two tablespoons of the filling in the middle of each pie. Fold the tops of your pie crust over and crimp the edges shut. Brush the tops with egg wash, sprinkle with granulated sugar, and then use a sharp knife to cut several vent holes in the tops.
Transfer the shaped pies to the refrigerator and allow the pie crust to set back up for about 10 minutes, then bake until golden brown. The pictures below show the whole process of assembling these Apple Hand Pies from start to finish.

1 - Place the pie dough on a lightly floured work surface. 
2 - Roll the dough until it's at least ¼-inch thick. 
3 - Cut individual pie crusts with a 5-½ inch dish or bowl. -
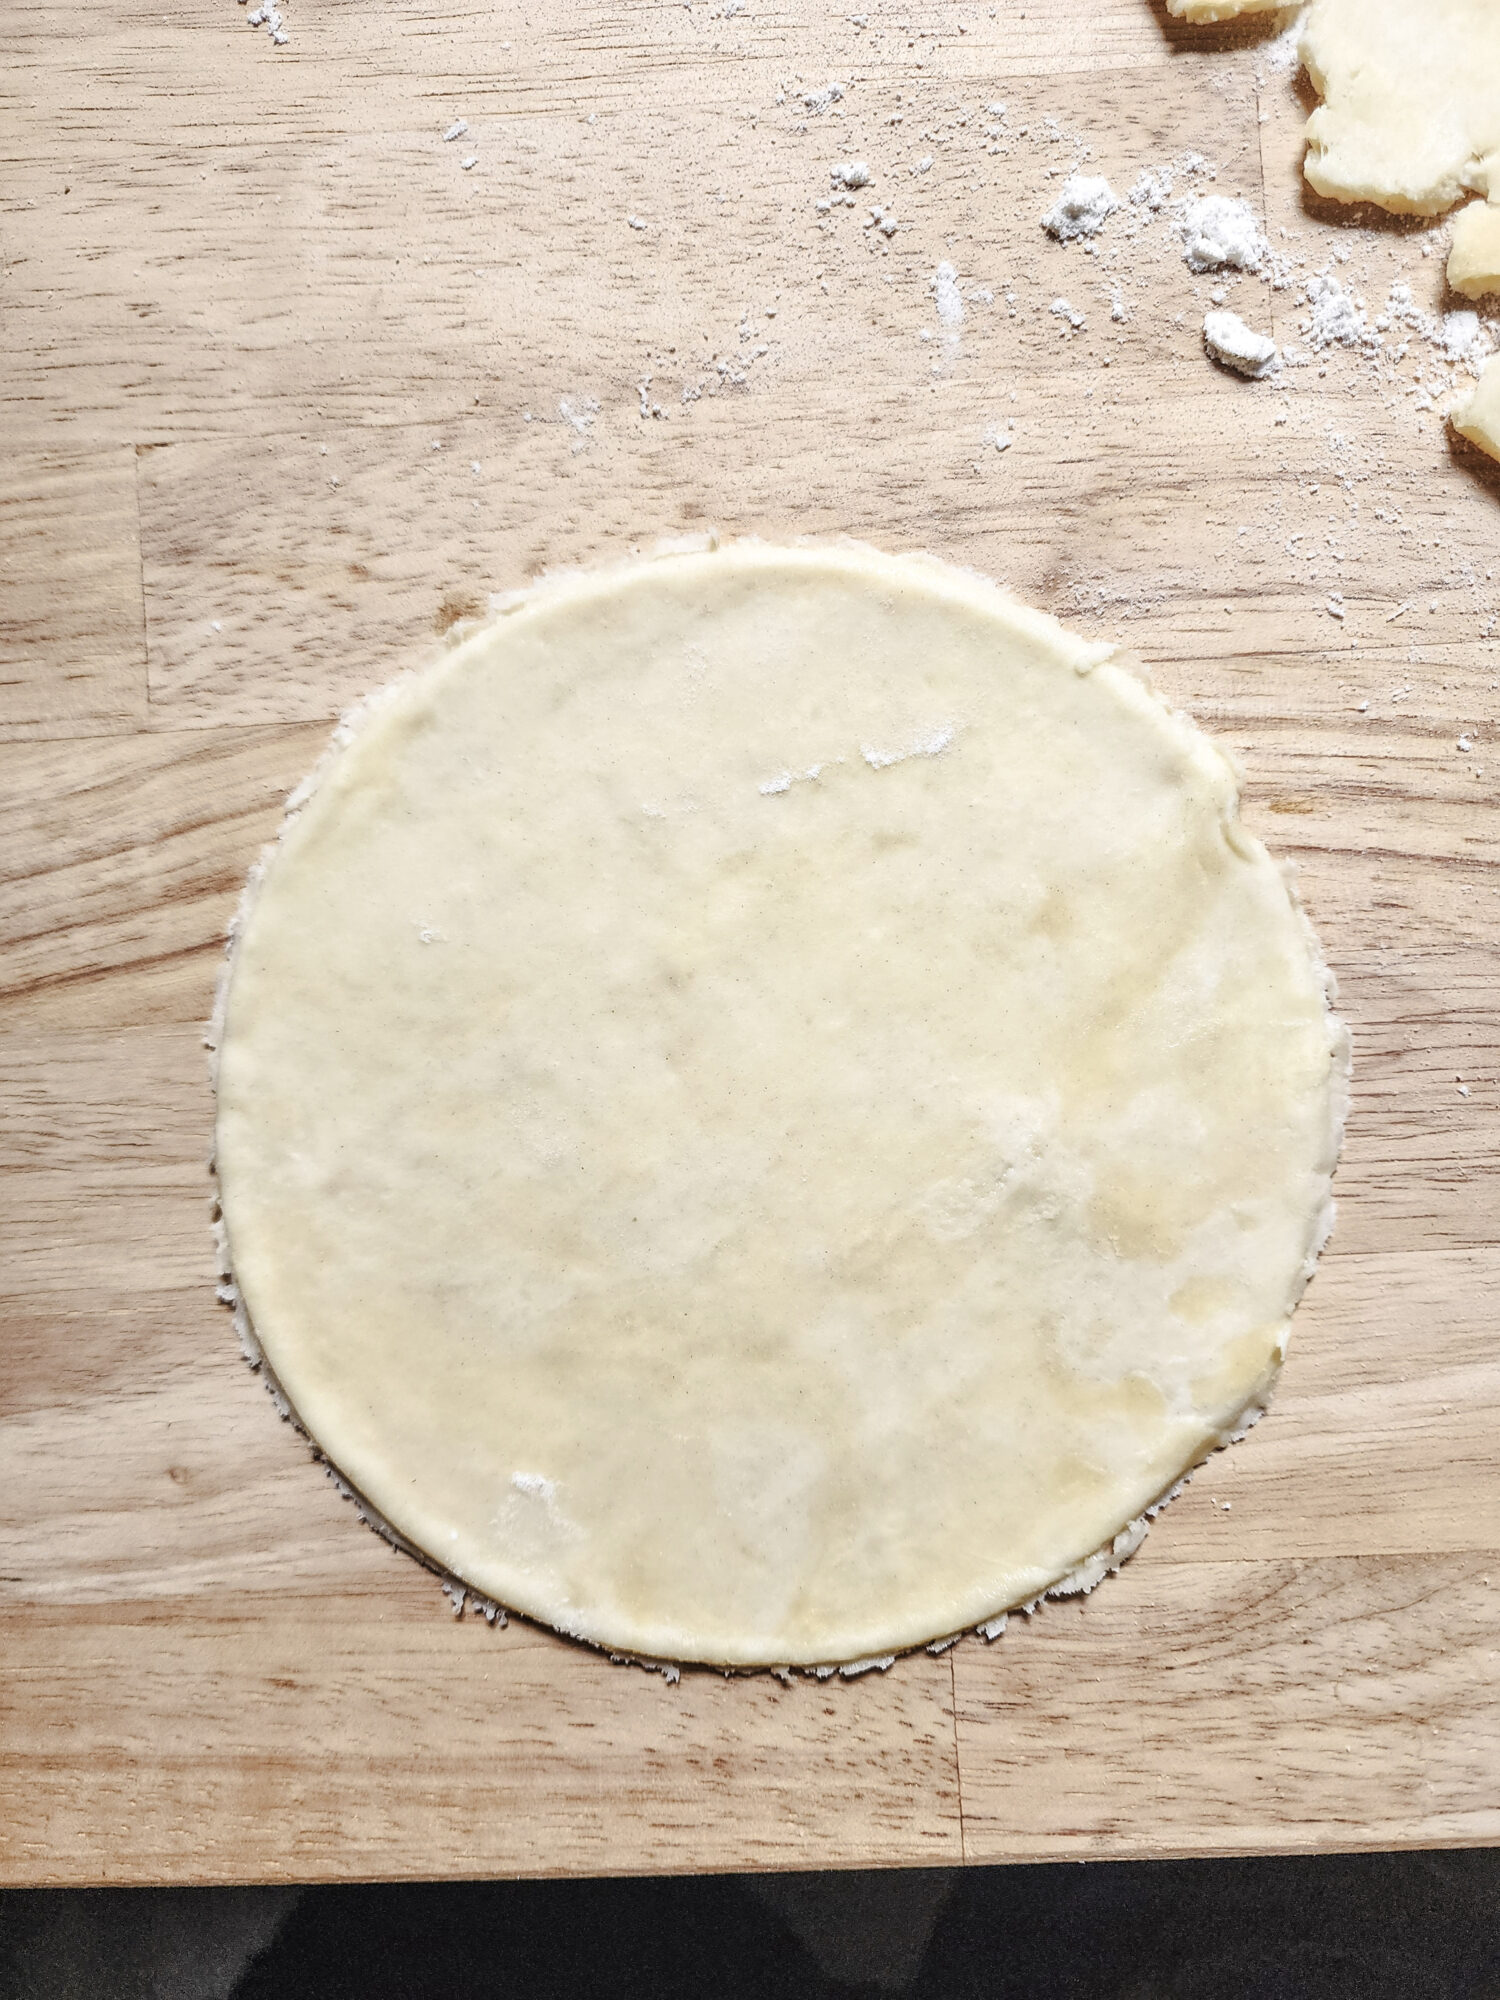
4 - Individual hand pie dough ready for egg wash. 
5 - Transfer pie discs to a parchment paper lined baking sheet. -
6 - Apply egg wash around the perimeter of each pie dough circle. -
7 - Fill each pie disk with about 2 tablespoons of filling, then fold over, and crimp shut with a fork. 
8 - Apply egg wash over the top of each pie. -
9 - Scoring apple pies 
10 - Sprinkle the tops with granulated sugar. Transfer to the fridge for 10 to 20 minutes before baking.

Harvest Apple Pie Serving Suggestions
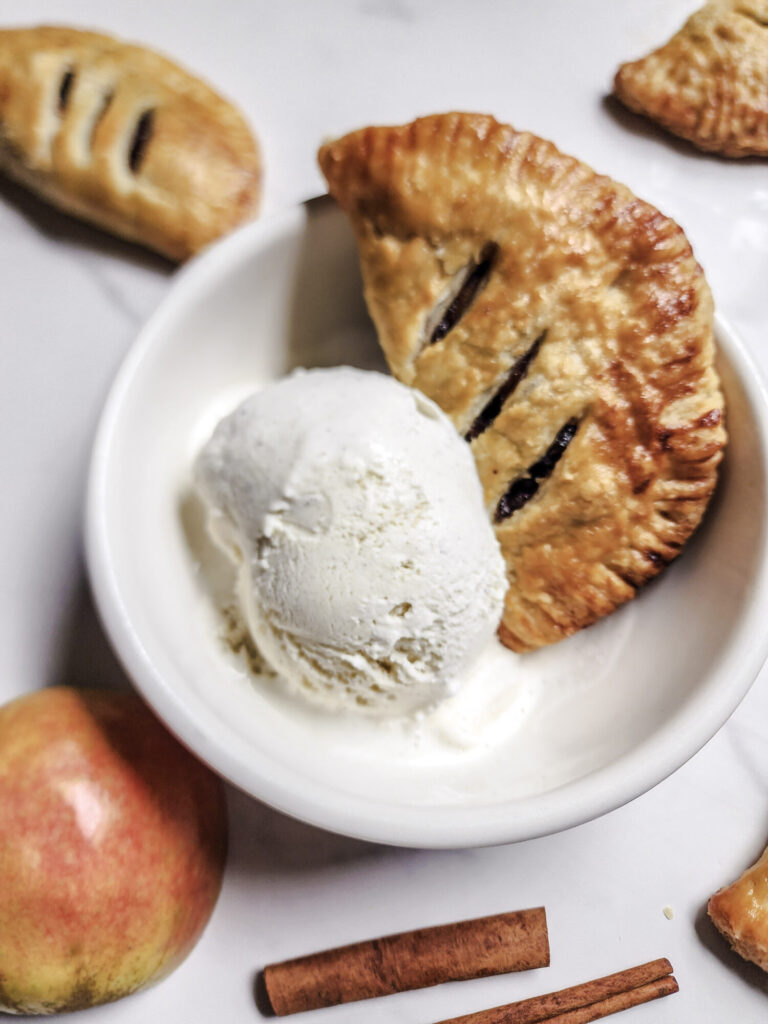
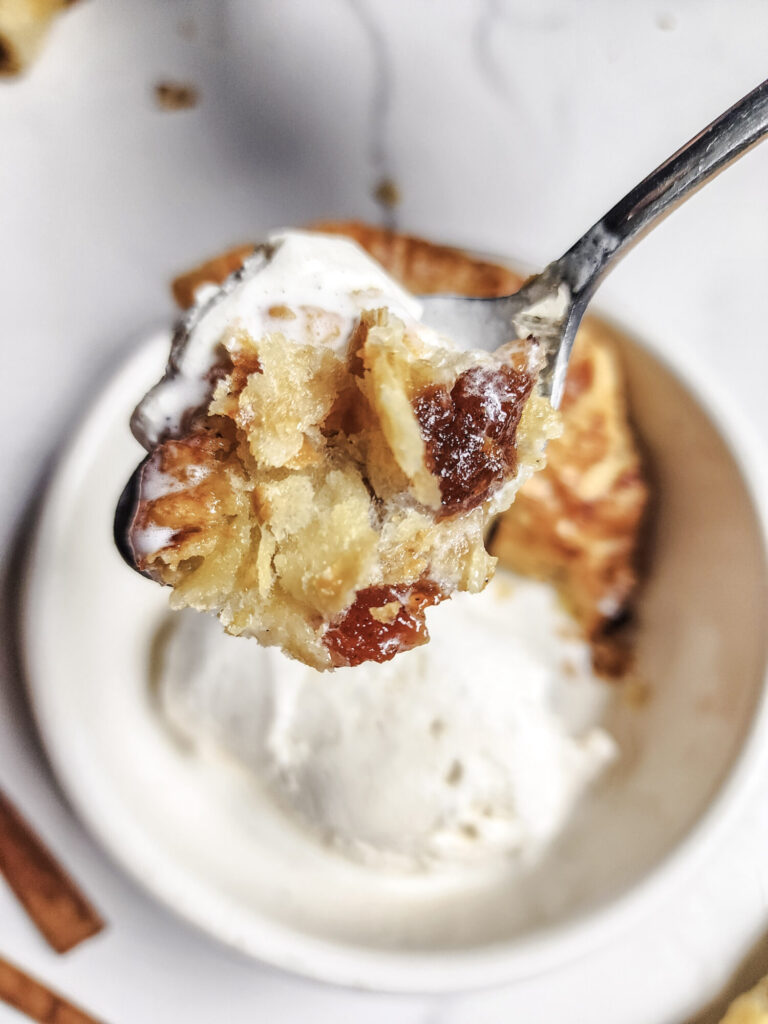
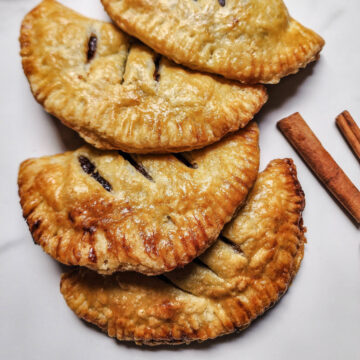
Serve these warm all by themselves or with a side of simple vanilla ice cream, and you've got the perfect fall sweet treat! These are amazingly delicious, and I can't wait to see how yours turn out.
Don't forget to check out all of my other dessert recipes here!
Did you make this this recipe for Harvest Apple Hand Pies?
Let me know in the comments below how yours turned out, and don't forget to leave a rating!
Recipe
Harvest Apple Hand Pies
Equipment
- Baking Sheet(s)
- Parchment Paper
- Spice Grinder or Pestle and Mortar
- Large Heavy Bottom, Ovenproof Saucepan
- Rolling Pin
- 5-½ to 6-inch Diameter Bowl or Dish To cut pie rounds
- Pastry/Basting Brush
- Bread Lame, Razor Blade, or Sharp Knife
- Wire Cooling Rack
Ingredients
Homemade Dried Apples
- 6 Gala, Fuji, McIntosh or other medium sized, semi-tart apple variety, Peeled, cored, and sliced approximately ⅛-inch thick.
Apple Hand Pie Filling
- 1 Cinnamon Stick Toasted
- 2 Whole Cloves Toasted
- ¼ Teaspoon About 5 Whole Black Peppercorns Toasted
- ¼ Teaspoon Ground Nutmeg Toasted
- 3 Cups Dried Apple Slices From above, or store bought
- 4 Cups Unsweetened Apple Juice
- ¼ Cup Light Brown Sugar Packed
- ½ Teaspoon Lemon Zest
- 1 ½ Tablespoon Fresh Lemon Juice
- ½ Teaspoon Kosher Salt
- 1 Vanilla Bean Substitute 2 teaspoons Vanilla Extract
Lisa Donovan's Pie Dough
- 1 ½ Cups Unsalted Butter 3 Sticks
- 2 ⅓ Cups All Purpose Flour Plus more for dusting work surface
- 2 ¼ Teaspoons Kosher Salt
- 2 Cup Measuring Cup filled to the brim with ice and topped with cold water
Assembly
- 1 Large Egg Beaten - For Egg Wash
- Granulated Sugar For Garnish
Instructions
Dried Apples
- Preheat an oven to 225°F.
- Peel, core and thinly slice the apples into approximately ⅛th of an inch slices, and arrange in a single, thin layer on as many parchment paper-lined baking sheets as necessary.
- Bake for 1-½ to 2 hours, flipping multiple times until the apple slices have lost most of their moisture. Remove any of the smaller pieces that begin to brown before the larger pieces to avoid having any burnt pieces. Remove and allow to cool.
Apple Pie Filling
- In a large, heavy bottom, ovenproof saucepan over medium-high heat, toast the cinnamon stick, black peppercorns, and cloves for a minute or two until fragrant. Add nutmeg for the last 5 - 10 seconds. Remove the pan from the heat and transfer the black peppercorns, cloves, and nutmeg to a spice grinder, or pestle and mortar. Grind into a powder and return to the pan.
- Add apple juice and dried apple slices to saucepan. Cover and let stand 1 hour.
- Preheat oven to 400°F. Uncover saucepan, and bring apple mixture to a boil over medium-high heat. Boil, then reduce heat to medium-low and simmer, uncovered, stirring occasionally, until liquid is mostly absorbed, about 30 to 40 minutes.
- Remove from heat and add brown sugar, lemon zest, lemon juice, and kosher salt.
- Split the vanilla bean lengthwise and scrape into the pan. Optionally, add vanilla extract if not using whole vanilla bean. (Don't forget to include the vanilla bean pod for added flavor!)
- Transfer the saucepan to preheated oven and bake, uncovered, for 15 to 20-minutes until the remaining liquid is mostly evaporated. Remove from oven and let the mixture cool for at least 30 minutes. Cover tightly with plastic wrap and chill for 2 hours, minimum. Remove cinnamon stick and vanilla bean pod and reserve the filling for later steps.
Lisa Donovan's Pie Crust
- While the pie filling is hydrating or cooling, fill a 2-cup measuring cup with ice. Top measuring cup off with water (at least ½ cup). Set aside.
- Cube butter into ½-inch to 1-inch pieces with varying rough chops. Toss together flour and salt in a large bowl.
- Toss butter cubes into flour mixture, and separate cubes with your fingers before beginning to work together. Work in butter using your hands, making smears and buttery flakes. Do not use a machine or a pastry cutter; using your hands will help you discern the temperature and feel of the flour. You are looking to incorporate all the butter into the flour without overworking. Every piece of butter should be smeared with some flour before you begin to add the ice water; there should be no untouched pieces of butter. Doing this deftly is key; if the butter starts to feel too warm, use your refrigerator as a tool-place bowl in freezer or refrigerator at any time to cool off. Preferably, though, you will be able to work the butter in quickly without too much fuss.
- To incorporate the ice water, start by drizzling about 3 tablespoons water (do not add ice) into flour mixture. Using your hands slightly cupped as paddles (do not use your fingers or do any kneading), toss the water into the flour until it is fully absorbed. Add additional water, 1 tablespoon at a time, paddling with hands between each addition, until mixture begins to form a shaggy dough. You will likely use about ¼ cup to ⅓ cup water total, depending on the humidity. The dough should feel moist but not wet or sticky. Turn dough out onto a clean work surface. Give dough a few strong kneads to work it all together (about 4 turns). Your dough should feel tacky and supple but not sticky.
- Divide dough evenly into 2 pieces (about 12 ounces each). Form each piece into a flat disk and wrap individually in plastic wrap. Chill in refrigerator at least 1-hour or up to 3-days.
Assembly
- Preheat oven to 375°F.
- Unwrap pie dough disks, and transfer to a lightly floured work surface. Roll each dough disk to about ¼-inch thick with a rolling pin. Cut 10 (5-½ to 6-inch) dough rounds, rerolling scraps as needed for the last few pies. Arrange dough rounds evenly on two parchment paper-lined baking sheets.
- Working one dough round at a time, brush dough edges with the beaten egg mixture. Spoon about 2 tablespoons of the chilled apple filling onto center of the dough. Fold dough up and over filling, crimping the edges with a fork to seal completely.
- Brush tops of pies lightly with remaining beaten egg and sprinkle evenly with granulated sugar.
- Using a sharp knife, razor blade, or bread lame, cut 2 or 3 vents in the top of each pie.
- Transfer the prepared pies to the refrigerator and rest for 20-minutes, up to 2 hours, uncovered, until dough is hardened.
- Bake pies in preheated oven until golden brown, 25 to 30-minutes. Remove from oven and transfer to a wire cooling rack and let cool completely, about 1 hour.


Bekah says
These are delicious!! What’s not to love about a pie that you can have all to yourself?!